Results in Manual Testing
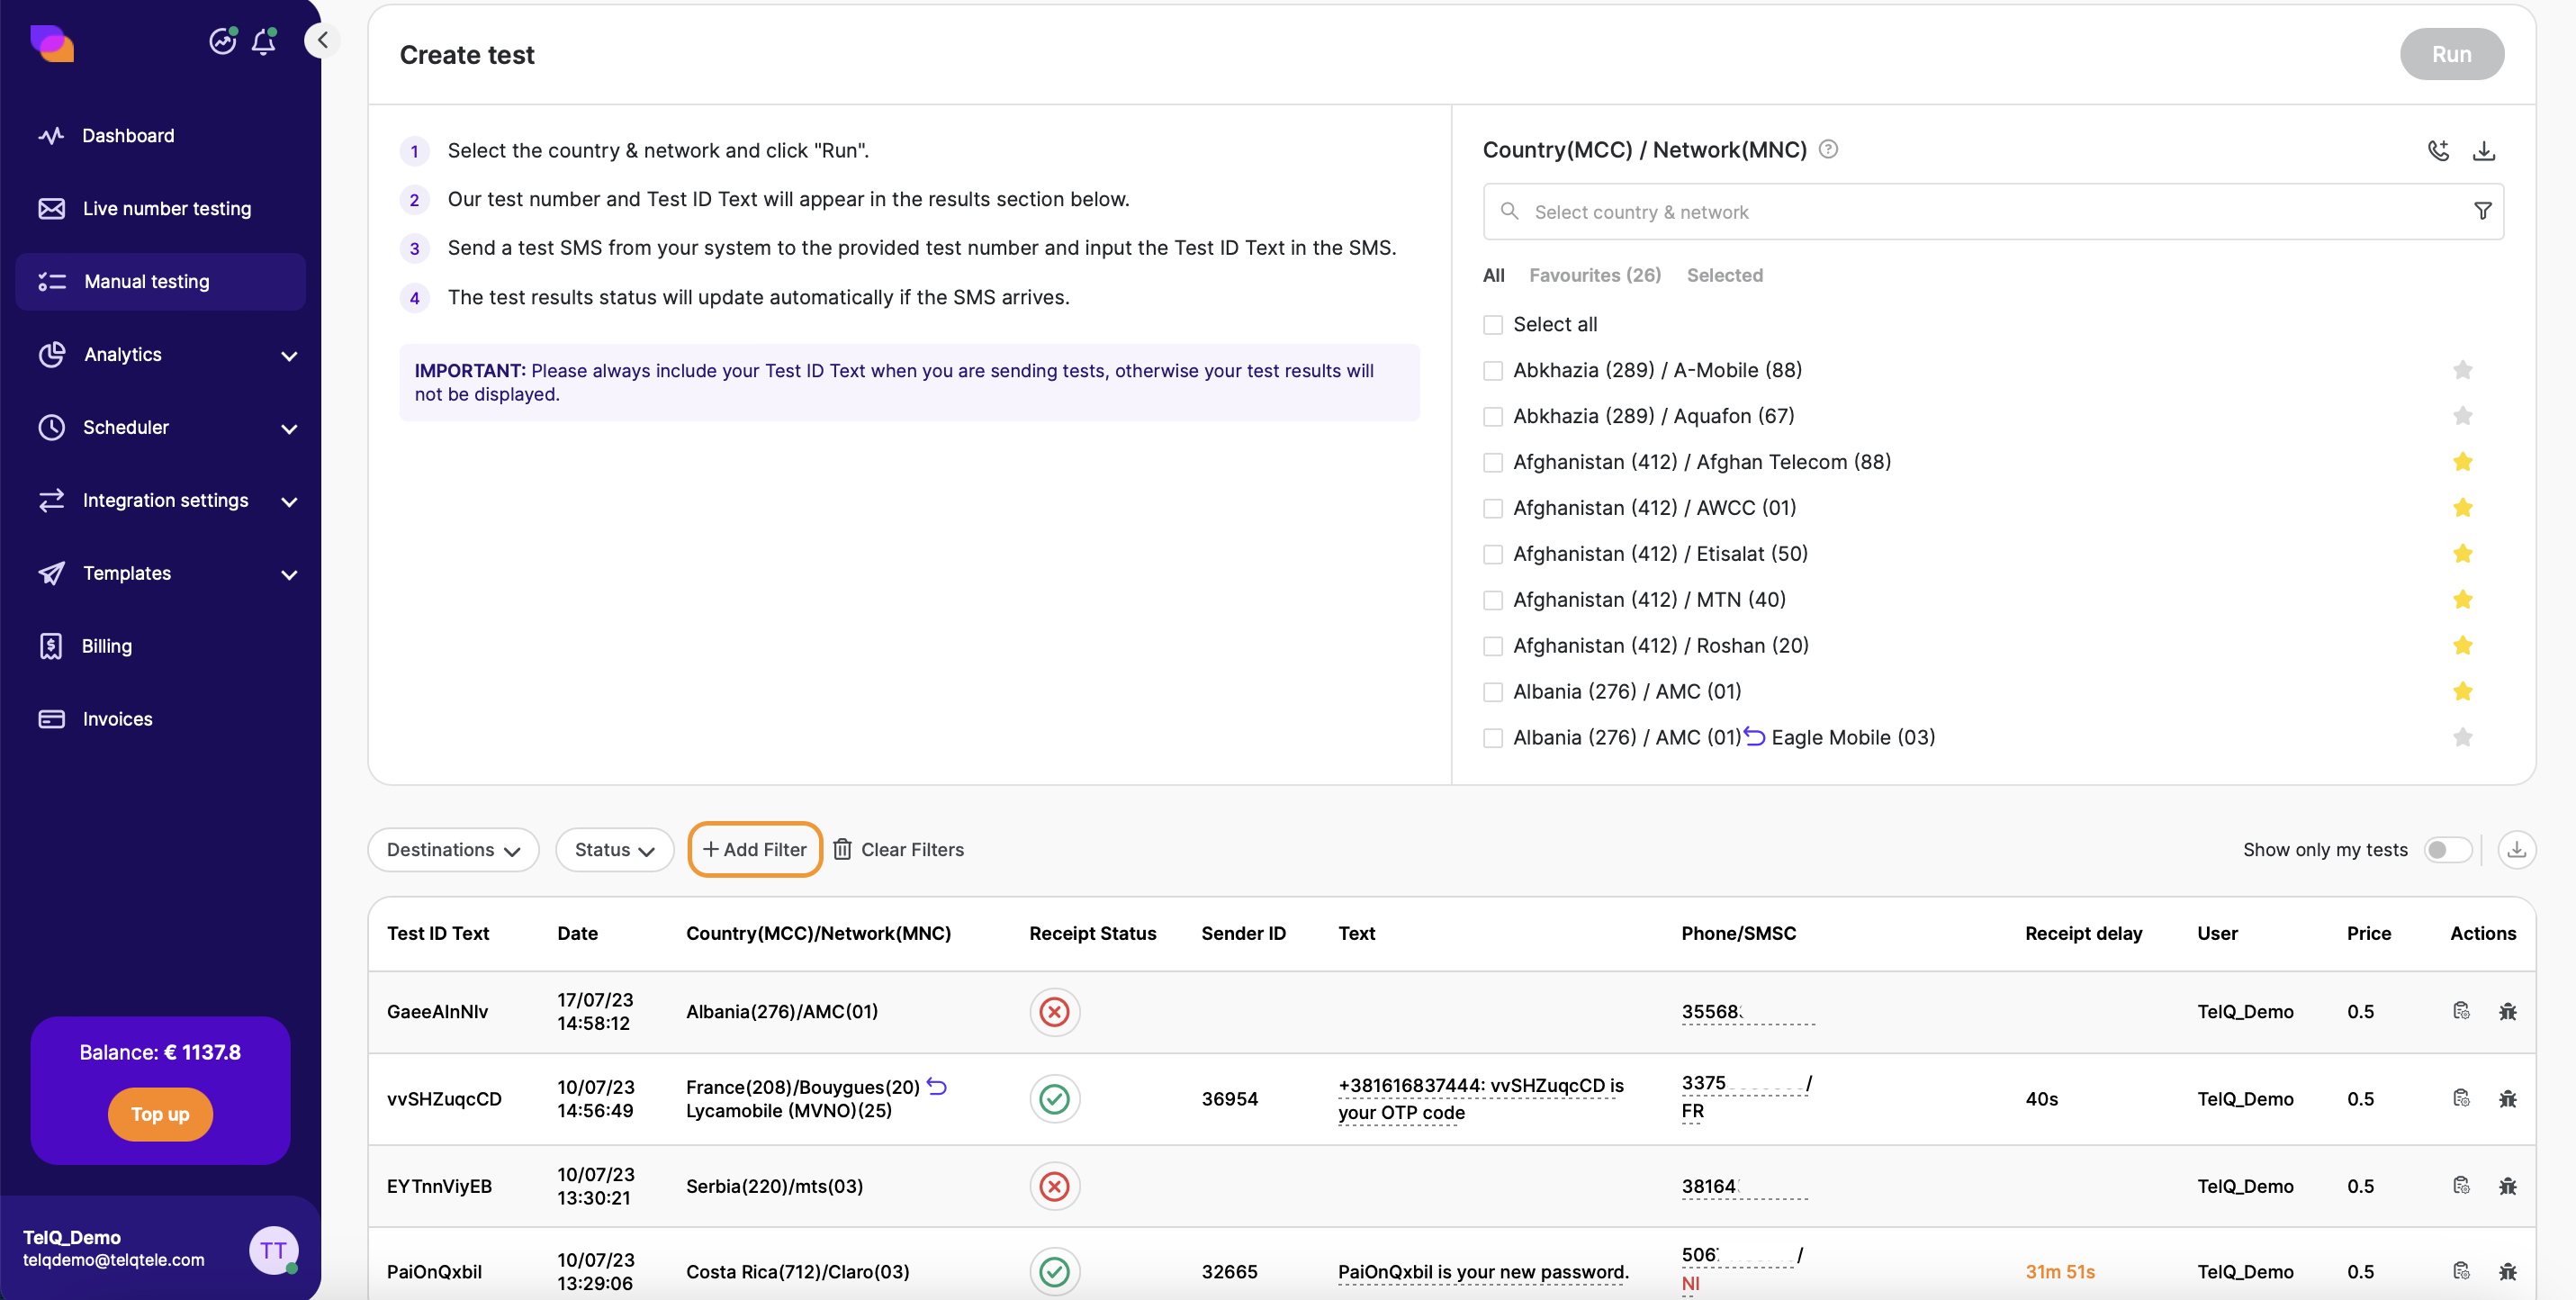
All the tests that you issue will be visible in the Results section, at the bottom of Manual Testing.
Between the Test Creation and Test Results sections you will find the Filters section which you can use to search or filter for specific tests. You can add the filters you need by clicking on the + Add Filter button:
You may choose the following as parameters for searching among the Results:
-
Date
-
Test ID Text
-
Users
-
Status
-
Destination(s)
-
Phone
You can clear the your search criteria by clicking on the “Clear Filter“ button, which will reset the filters and show all results again. To remove any filter from the bar, drag and drop it on the “Clear Filter button“.

If you don’t like the order in which the filters appear, you can rearrange them by dragging and dropping.
-
To see only your own test results, you can toggle the “Show only my tests“ option, which will overwrite the Users filter. If you need a quick filter on your own test results, you may use this option. This value will be cleared after refresh of the page or selection of another menu page.
-
To keep your search criteria, toggle “Save search“. This filter will be set for the test results until you unselect it or log out.
-
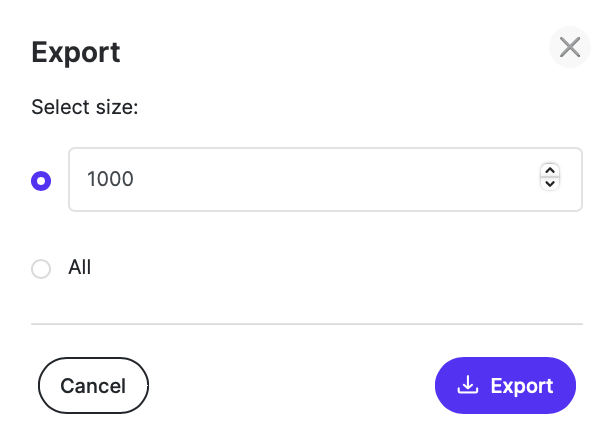
To download your test results in Excel (all or only the selected ones), click on the download icon.

The extracted excel file will contain all the information related to your tests.
Please keep in mind that the format of the exported Excel files is the same for both Live number testing and Manual Testing. However, as explained above, due to the fact that for Manual Testing the tests are not issued from TelQ platform, but directly from your platform, we do not have access to the submitted Sender ID and Text or the DLRs, so these fields will remain blank in the excel file extracted from Manual Testing.
Interpretation of Results
Columns and explanations:
Test ID Text: A random and unique string of 11-13 characters which should be included in the message body in order to retrieve the Receipt confirmation from the handset (the matching of the test request with the test result is done based on the Test ID Text). Please keep in mind that this value is valid for the duration of the TTL that you set (the default is 60 minutes). Note that for Manual testing, the TTL can only be manually set up in an API request (and not from within the UI).
Date: Date and time of the test request being issued (more accurately, date and time when the Test ID Text was issued for your test request). Please note that the timestamp in html is always in the browser’s timezone.
Country(MCC)/Network(MNC): The destination you selected for testing
Status: This column reflects the Receipt Status.
Receipt status is the answer given by our test number to your test request. More details about the Receipt Status can be found in Help (clicking the question mark in the bottom right corner), as well as by hovering with the mouse over the top of the icon in Results:
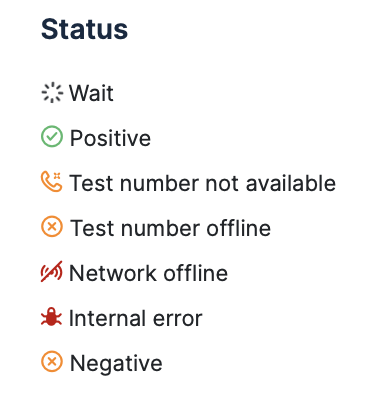
Please note that ‘Test number not available’ is a temporary status. We update our test numbers’ availability constantly and in rare cases it’s possible that the test number selected for your test will no longer be available, in which case we will make sure it is disabled if it does not communicate with our system for 4 minutes. Therefore, you will receive ‘Test number not available’ as Receipt status. It is a temporary status, which means that our system will wait for the test number to come back online during the TTL value (the validity time of the Test ID Text).
If our test number does not come back online during this time, the Receipt status will change to ‘Test number offline’ and we will return to your balance the credit consumed for this test.
Please note that escalation of our test numbers to your vendors in case of Fake DLR is strictly forbidden. By escalating our test number to your suppliers, you will only announce the quality testing to your vendors and they will whitelist the test number. This will make it useless for your own purpose of performing quality testing on their routes and useless for us as we will have to replace our test numbers more frequently, and therefore drive a price increase of our services.
Sender ID: This value is the Sender ID received by our test number - we can populate this section only if the test was successfully received by our test number. Please note that for Manual Testing, the tests are issued directly from your platform, so we do not have access to the Sender ID that you initially set up, therefore we cannot compare it with the one that was received by our test number and we cannot highlight any modifications.
Text: This value is the Text received by our test number - we can populate this section only if the test was successfully received by our test number. Please note that for Manual Testing, the tests are issued directly from your platform, so we do not have access to the Sender ID that you initially set up, therefore we cannot compare it with the one that was received by our test number and we cannot highlight any modifications.
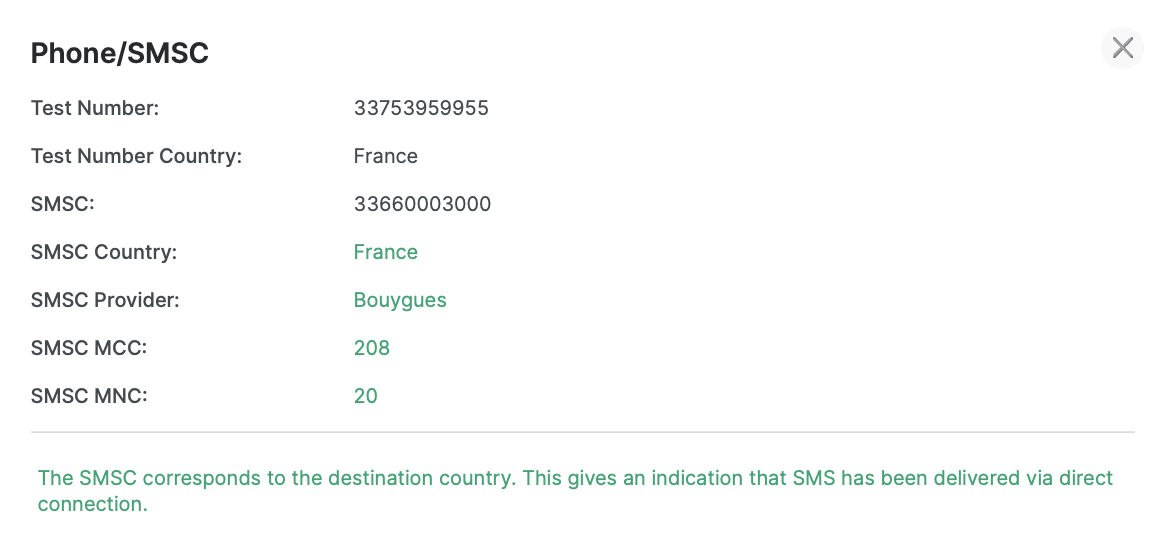
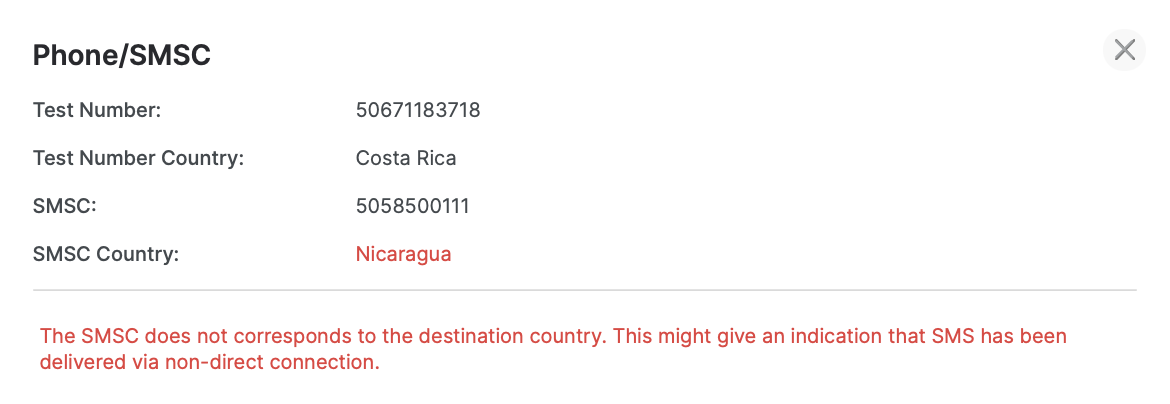
Phone/SMSC: In this column, you can see the test number allocated to your test request and, in case the test was received by our test number, the SMSC that delivered the message. Please note that the SMSC information is provided by the operator and in case the MNO did not provide this information when delivering the message, we cannot retrieve the SMSC info and therefore it will not be displayed. The SMSC value will be in green if the SMSC country code matches the country code of the tested tested, and it will be in red if it does not match. If you click on the value in Phone/SMSC column you will be able to see more information:
Receipt delay: This column indicates the value of the delay in delivery for the Receipt status. The Receipt delay is the delay between when the test was created and when our system received the information from the test number that the message was delivered.
User: In this column you will see the user that created the test.
Actions column has 2 buttons which are detailed below:
The “test case details” will open a pop-up which displays all the details of your test. An example of it can be found in the screenshot below:
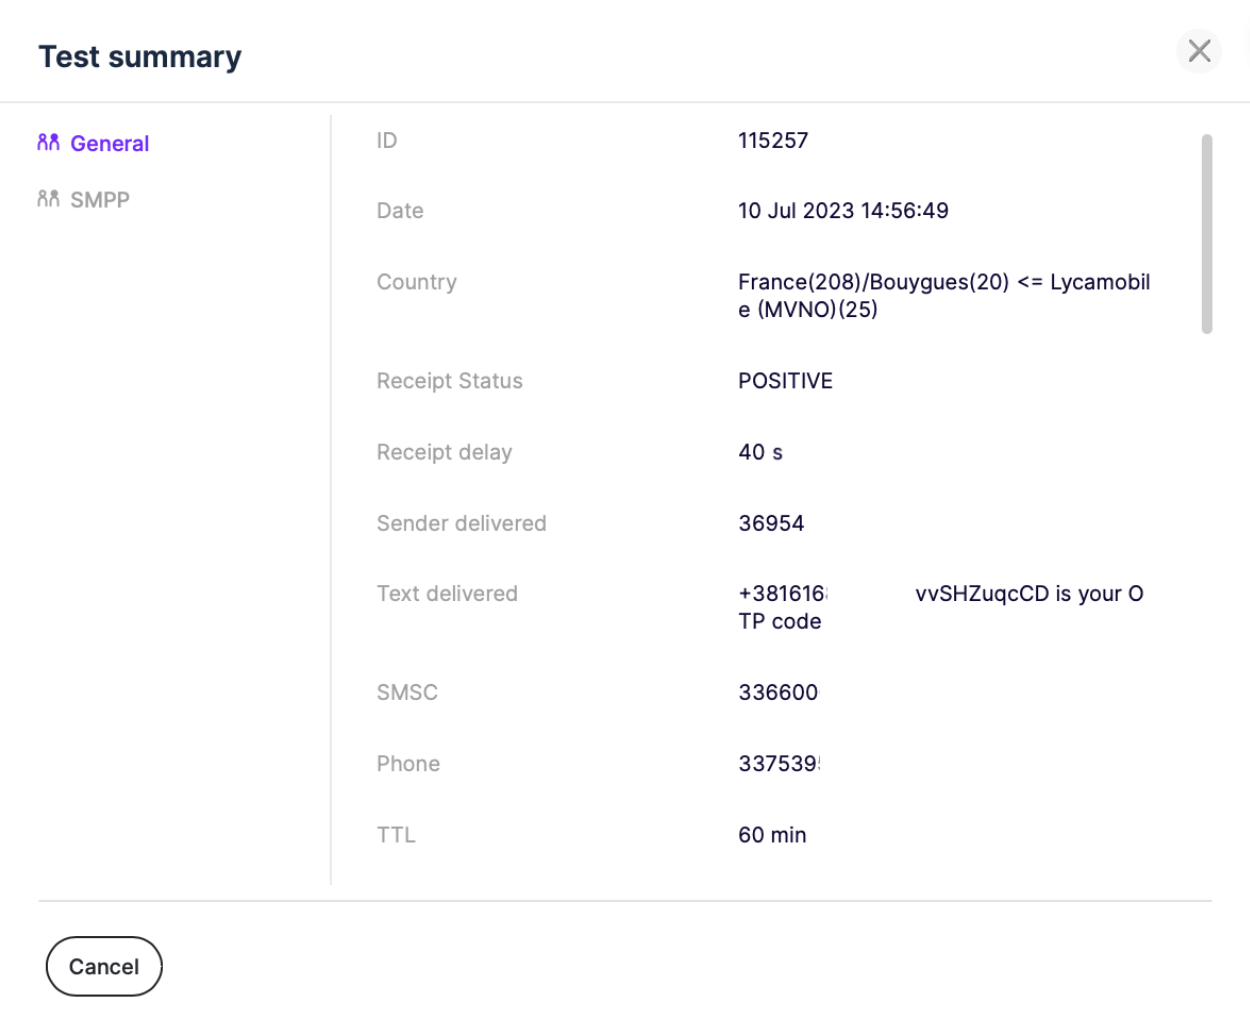
Results table information (detailed explanations below):
ID: The test ID allocated to your test.
Date: The value that is present in the 2nd column of Results table.
Country: The value that is present in the 3rd column of Results table.
Receipt Status: The interpretation of the graphical representation of Rec. Status in the 4th column of Results table.
Receipt delay: The value that is present in the 9th column of Results table for Rec. Status.
Sender delivered: The Sender ID received by our test number for the test.
Text delivered: The text received by our test number for the test.
SMSC: The value that is present in the 7th column of Results table as SMSC.
Phone: The test number allocated to your test request.
TTL: set value for the account’s TTL.
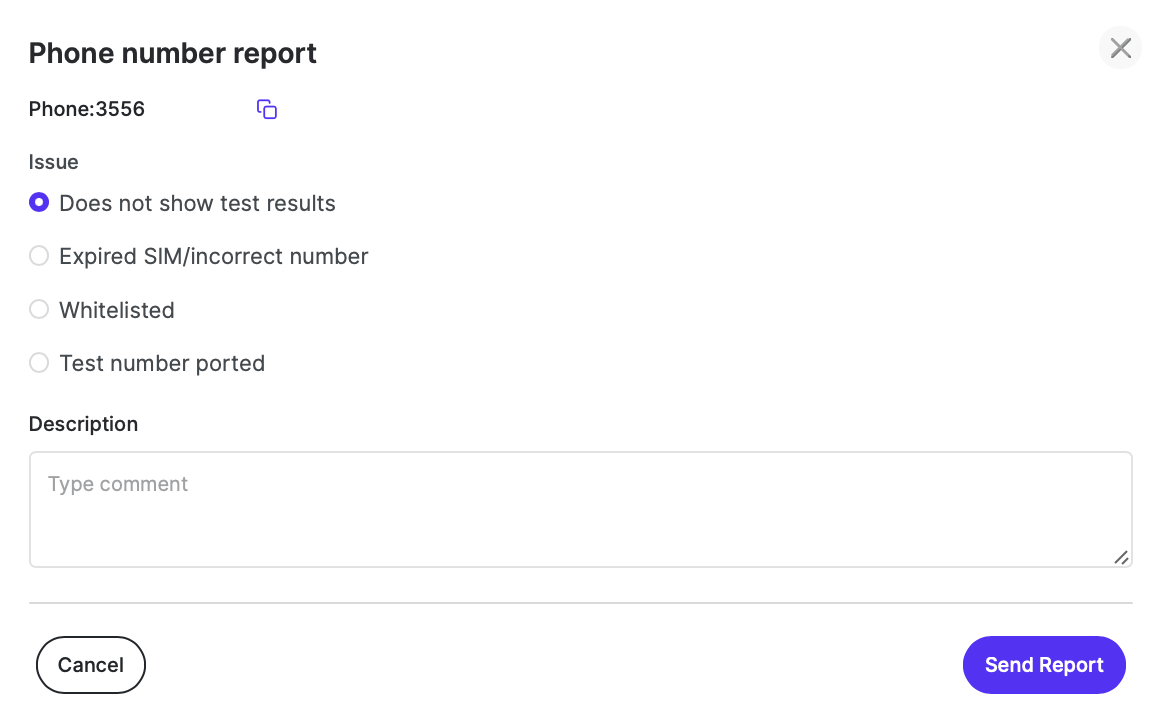
Clicking on the bug button, you will be able to report a malfunction of the test number. When you click on it, a pop-up window will appear and you may select the suitable issue you suspect to be the problem for that particular test number. Here is a screenshot of the pop-up window: