
SMPP Connections
SMPP Connections
You can also find the detailed information about setting up SMPP connections on our platform under the Help section of the SMPP Connections page.
In order to create an SMPP bind between our platform and your platform the following steps need to be followed. Also, you may watch our video tutorial on how to set up SMPP connections: https://www.youtube.com/watch?v=M7cf8woTG7I
Step 1: Whitelist our IP (52.29.63.229).
Step 2: Create a new SMPP client account on your platform and set up routing for it (as if we would be buying SMS routes from you). As mentioned, it’s important not to connect directly to your suppliers - that option would increase the chances of your suppliers spotting the quality checks you are doing and whitelisting the test numbers. We advise you to connect from our platform to your own platform and then route the tests from there to your suppliers (TelQ platform -> your SMS platform -> Supplier).
Go to Integration Settings – SMPP Connections and click on Create SMPP Connection as highlighted in the screenshot below:

Step 3: In the pop-up, the 1st step will be selecting a supplier from your supplier list.
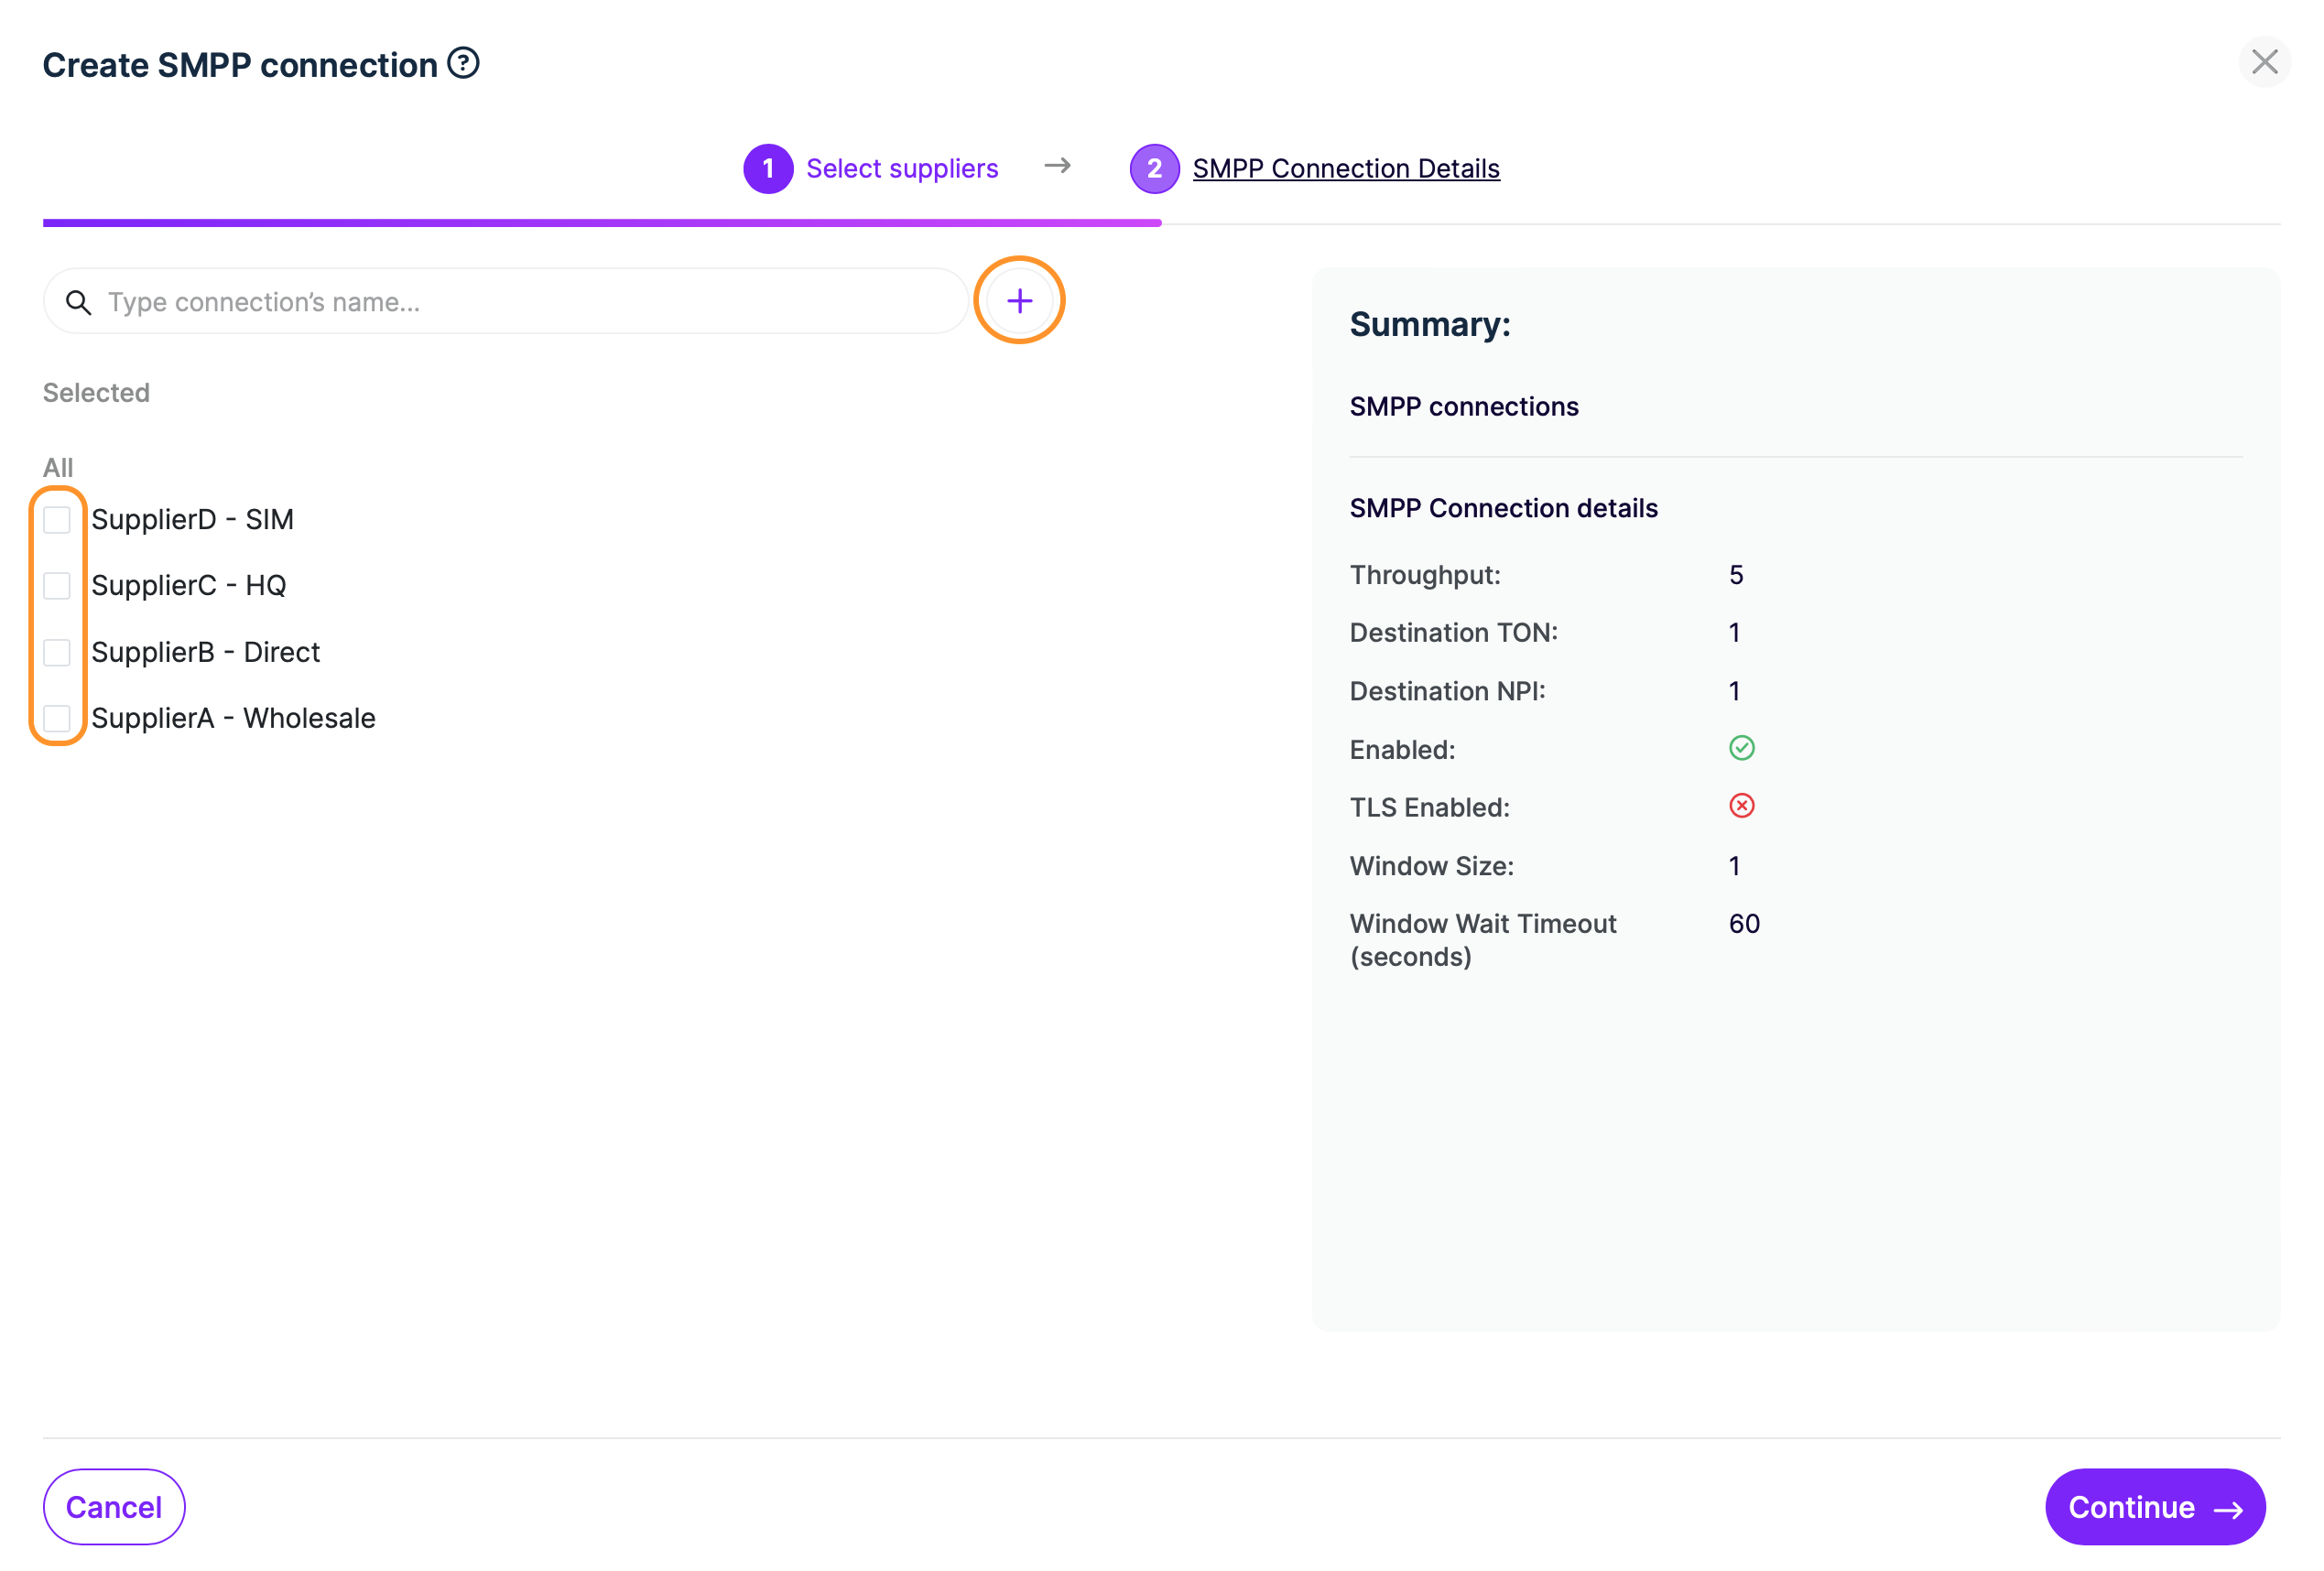
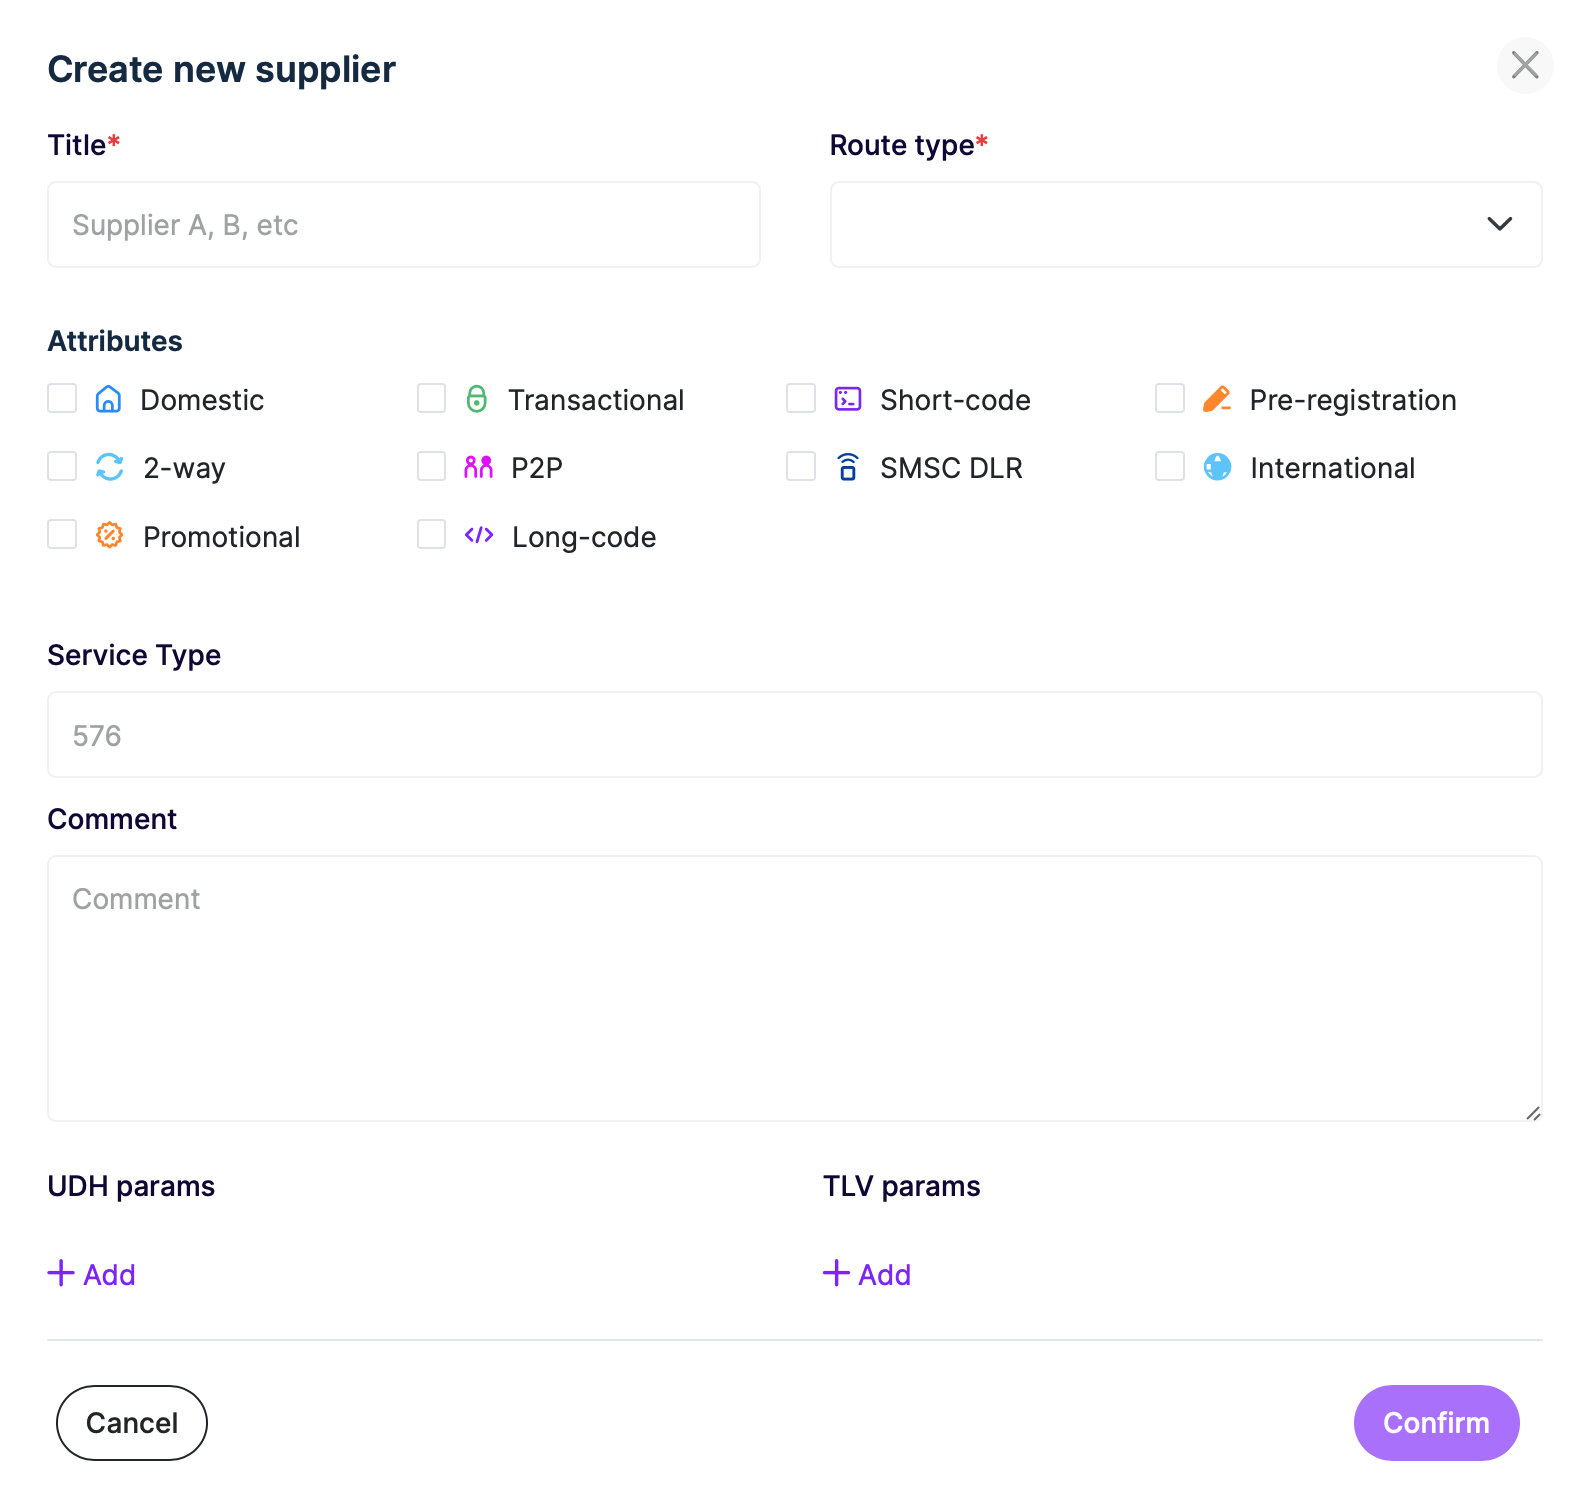
If you do not have any suppliers already created, click on the + button to create one.
Click “Continue” to move on to step 4.
Step 4: In Login and Password enter the credentials of the SMPP account you created in your system (as per Step 2).
In Host and Port please enter the IP/host and port of your server.
Step 5: Additional parameters: Throughput, Destination TON and NPI, etc.
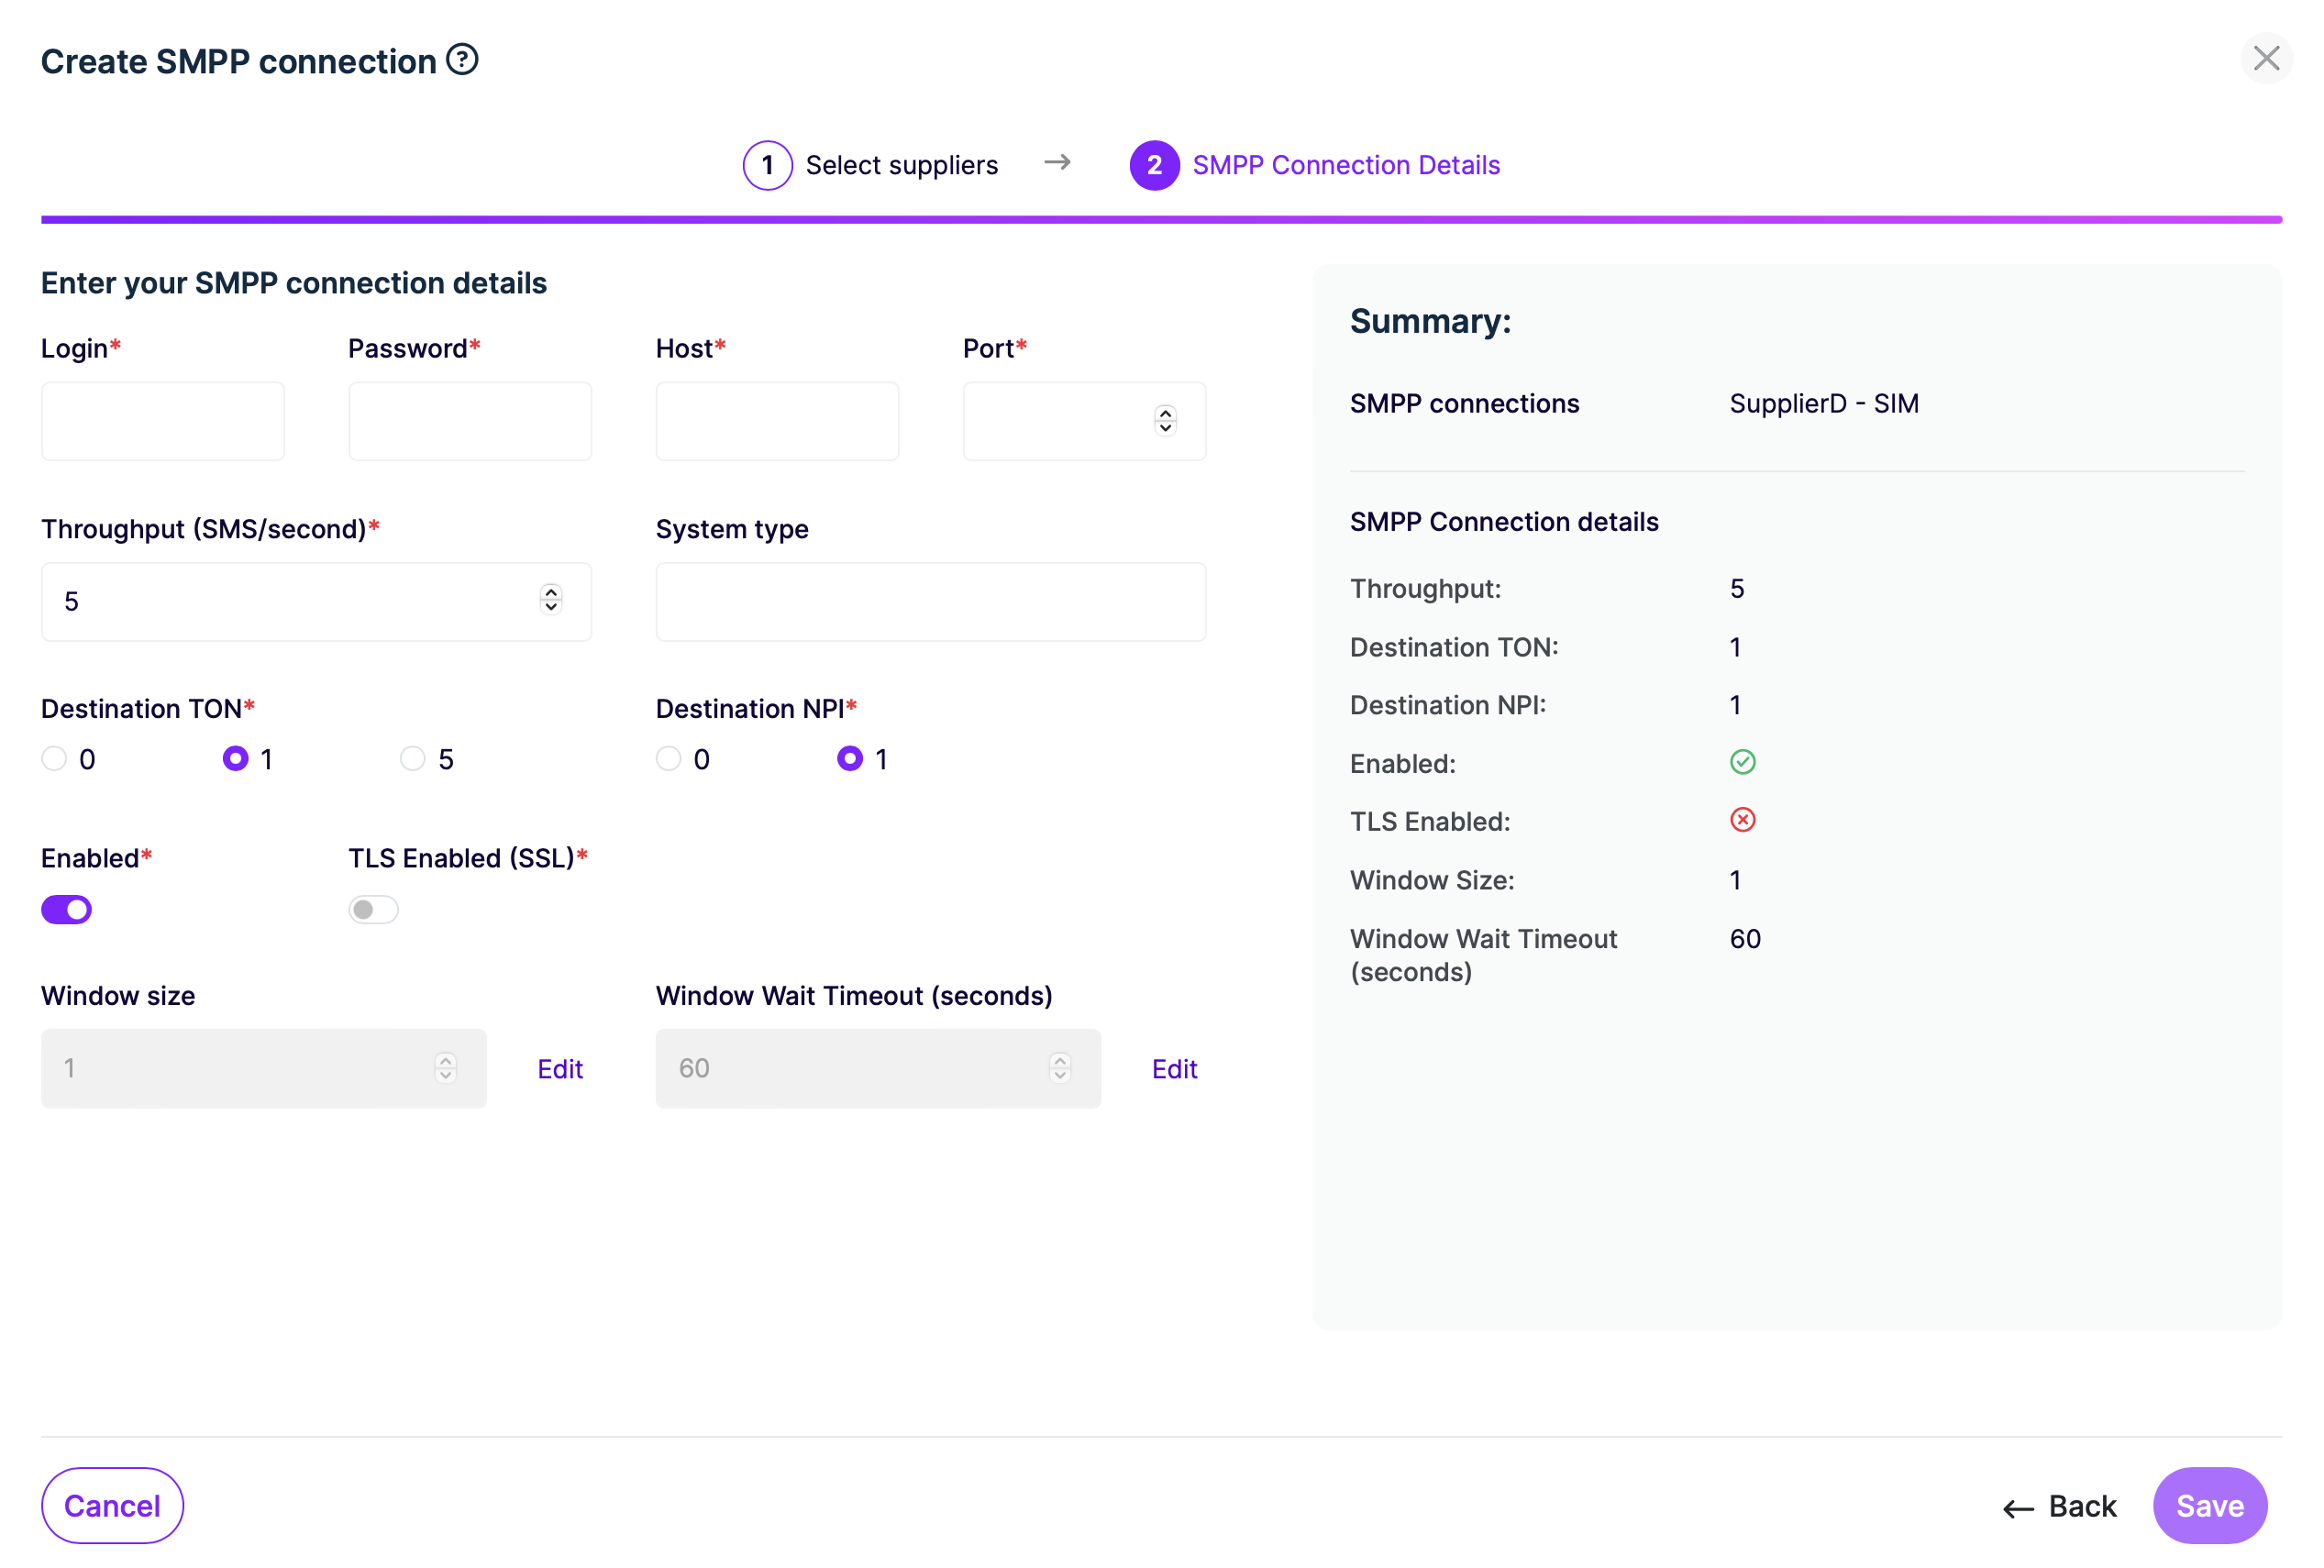
Step 6: Click “Save“
Step 7: Restart the connections
Restart the connection(s) by following the steps below :
Click on the checkbox next to your connection, or select all by clicking the checkbox next to ID as marked in the screenshot if you have multiple connections. Then, click on 'Disable' from the options that will pop up below as in the screenshot:
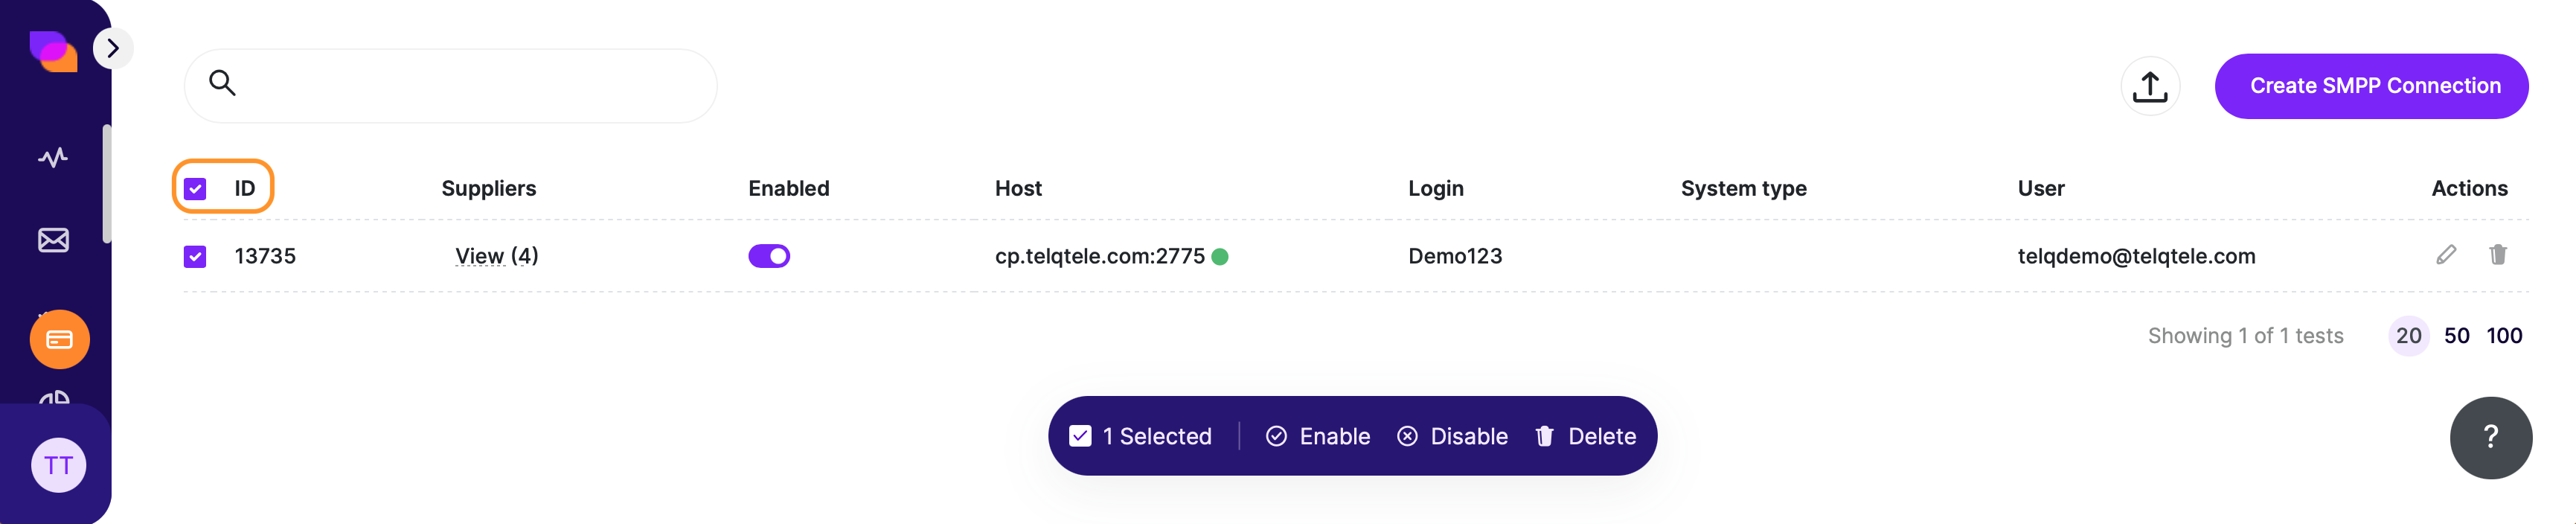
Wait a few moments, until the dot(s) in the Host column are red:

Wait for 1 minute, click again on the checkbox as mentioned in Step 1 and click on 'Enabled':

Your connection(s) should become green after this step.
