
In Schedules you can view all the tasks (scheduled test campaigns) created for your account, except those that have been already hidden.
When accessing the Schedules menu, you will see the list of all present (active and inactive) tasks. Please find below the explanations and details for each column:
ID: A unique ID given to each Scheduled task
Name: The task name of the test batch (defined by you)
Start date: The start date and time you set up
Finish date: The end date and time you set up
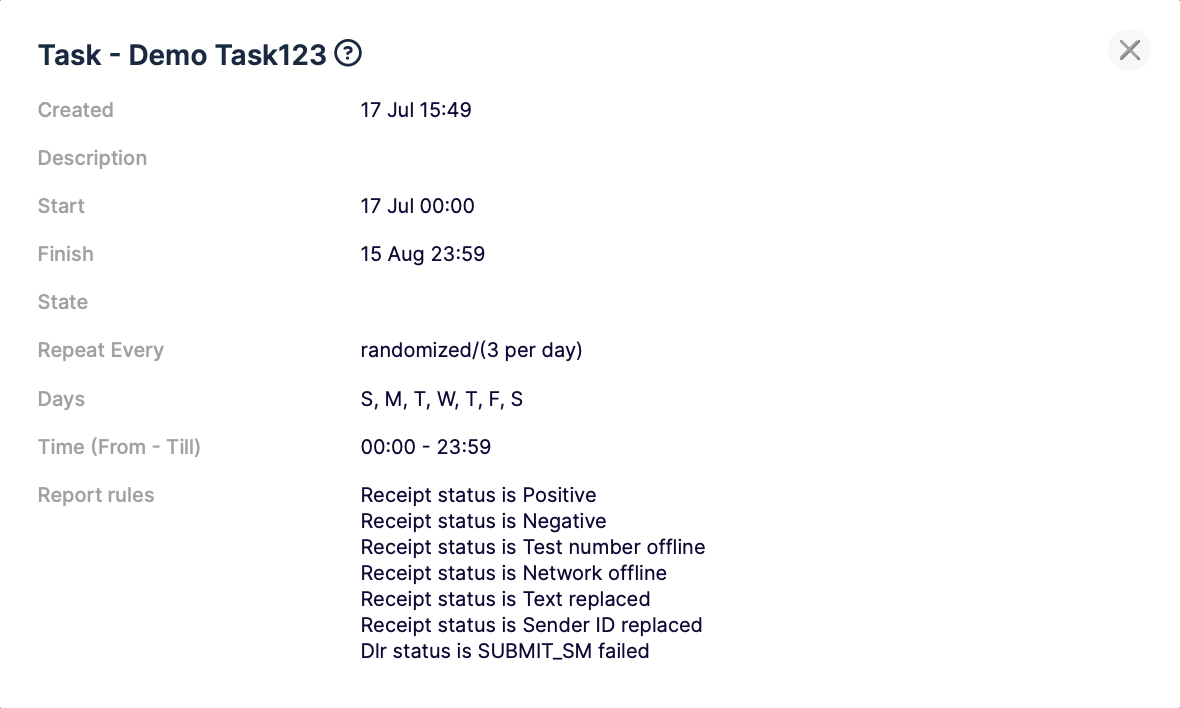
Test settings: Clicking on View shows the summary of the task
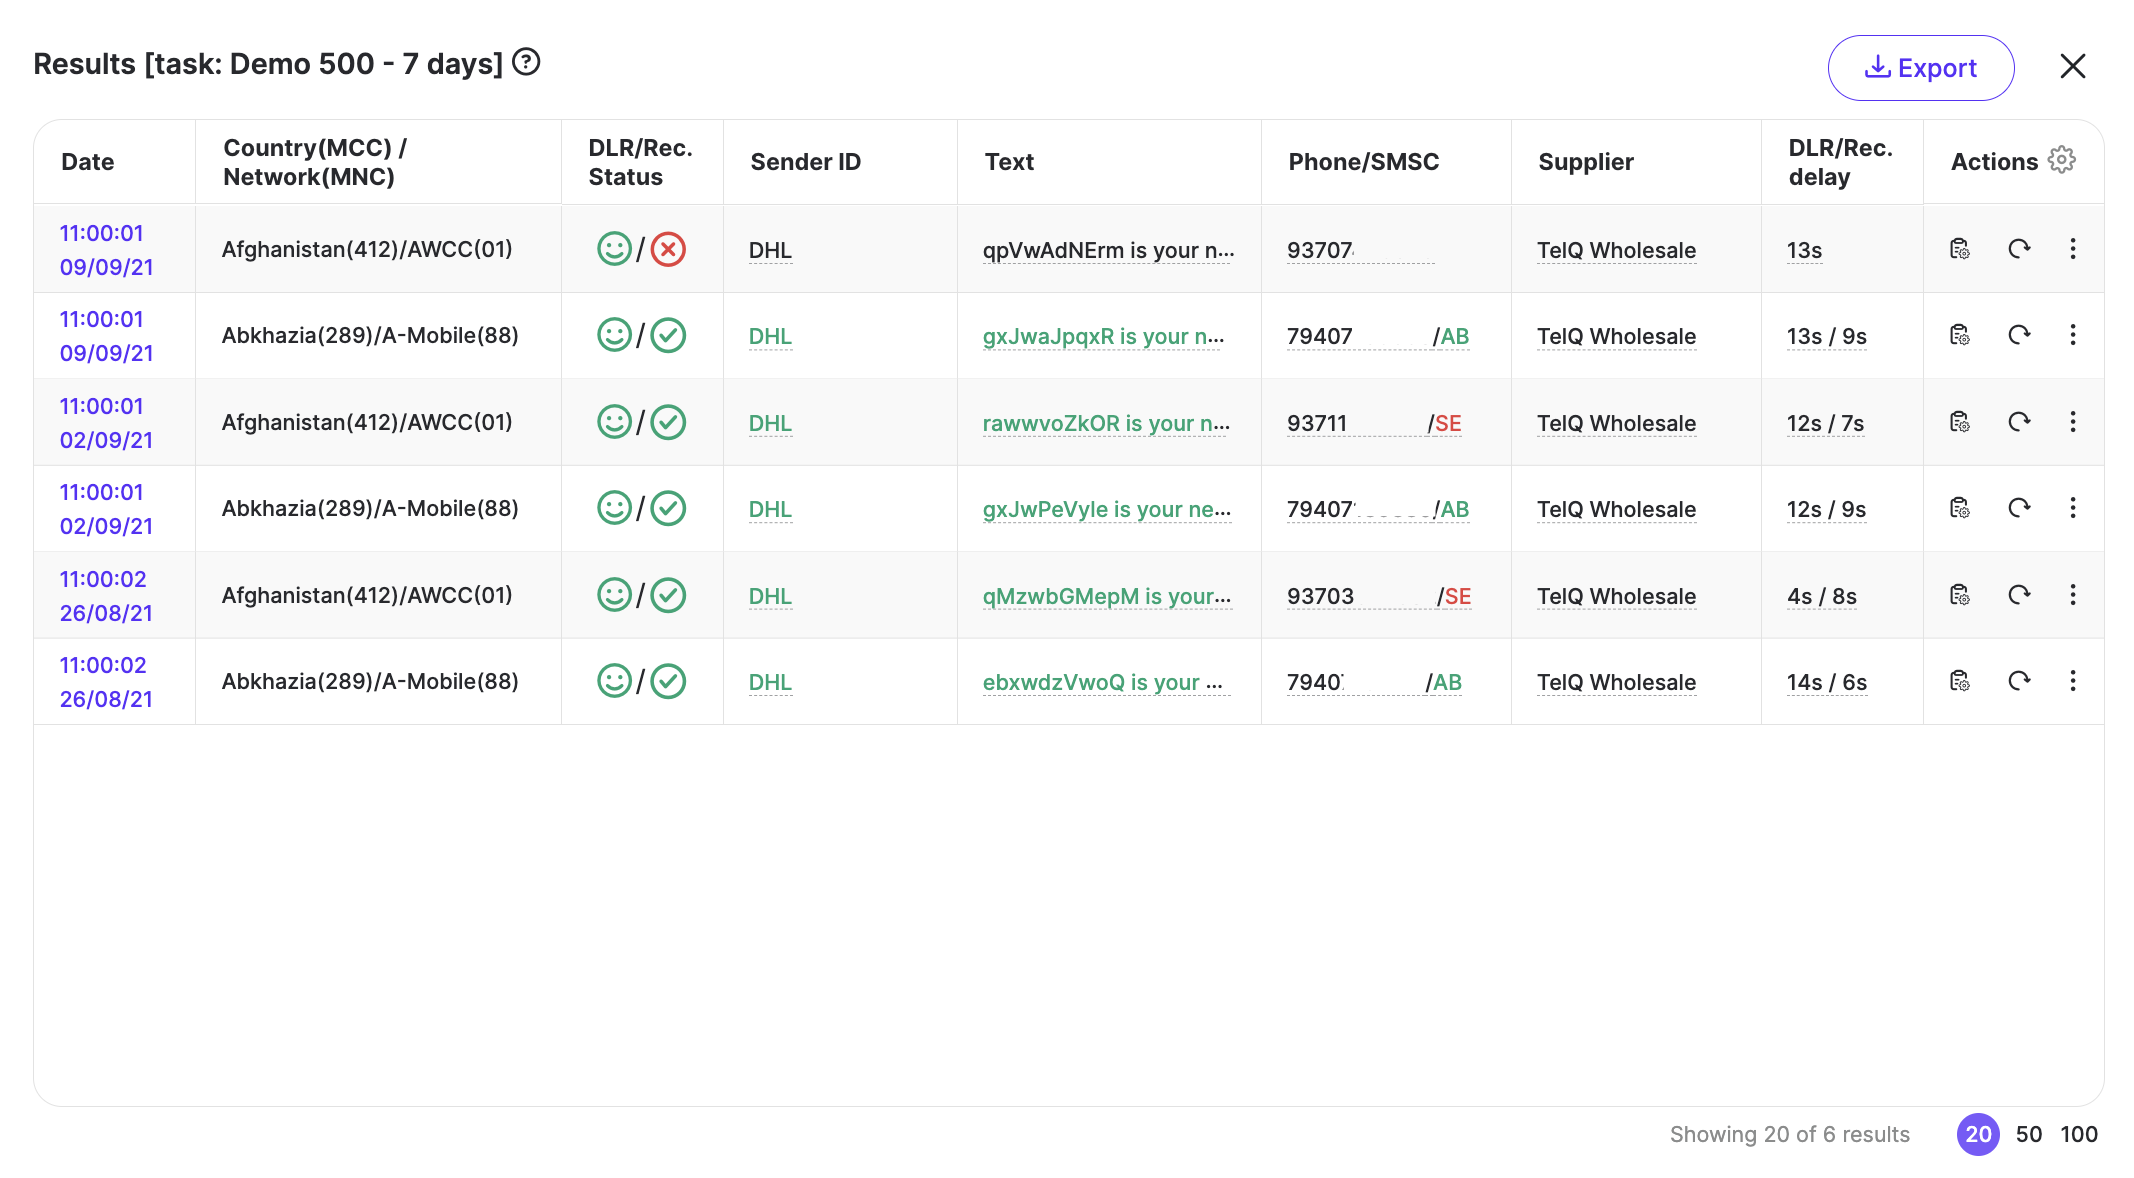
Tests results: Clicking on View shows the test results for the task and the option to download the excel file with the results of the task
Send tests every: The frequency selected for issuing the test batches
Next schedule: Next iteration’s date and time
Status: Scheduled (active), Finished (completed) or Stopped (interrupted/paused)
User: The account that created the scheduled batch
Actions: Hidden (to hide a task), Clone (to modify a task) or Stop (to interrupt/pause a task)
You may select one task at a time and then use the Hide button
to hide a task.
If you wish to list the hidden tasks, please enable the ‘Show hidden’ button
Creating a task
In order to create a new task, please press on +Create:

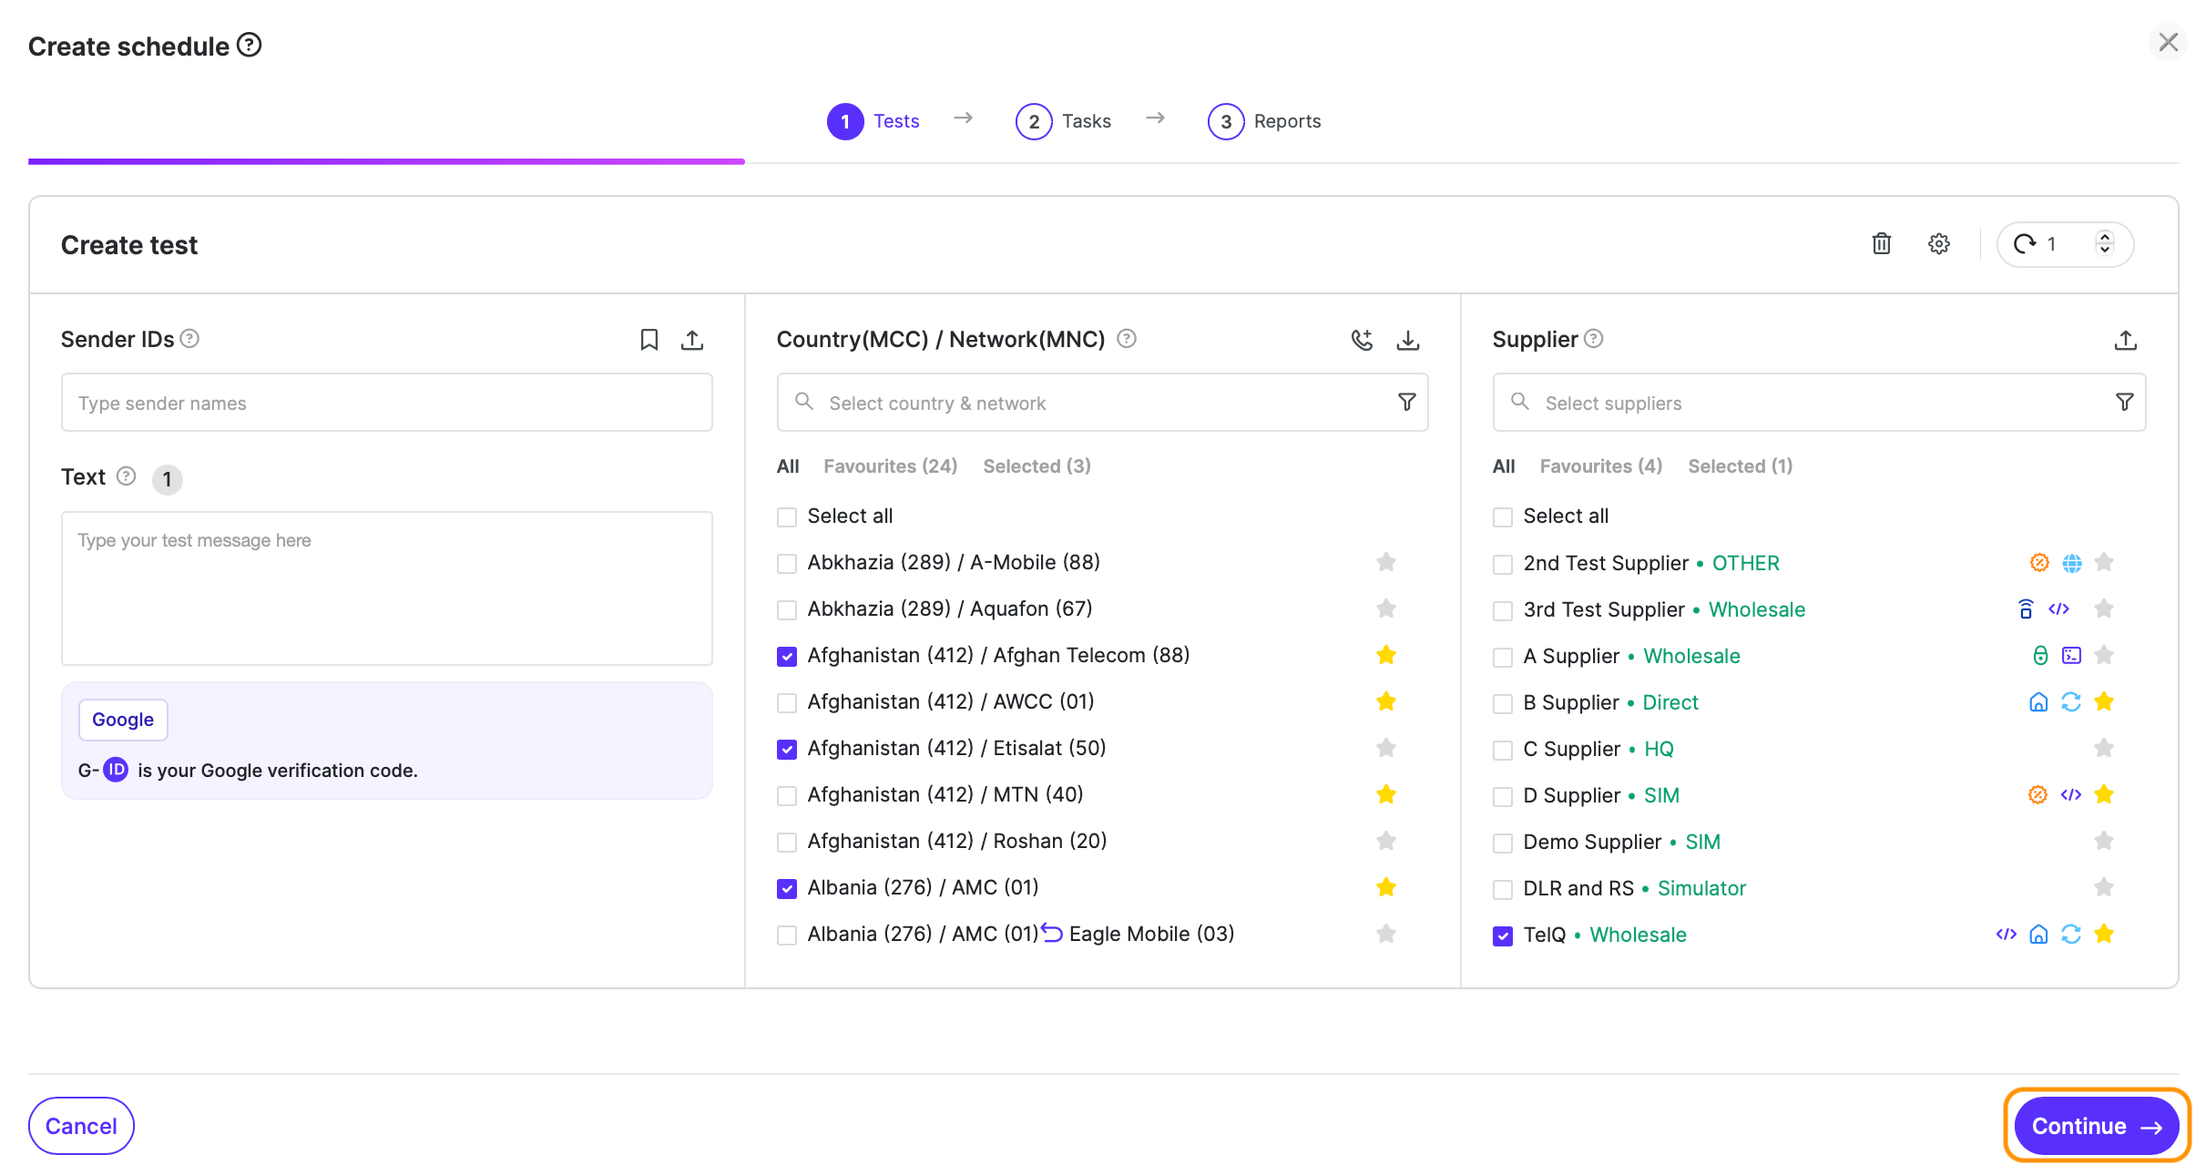
By pressing on Create, in the pop-up, the step 1 (out of 3) will be displayed. In this step, you have to select the input of the campaign: Sender ID(s), Text(s), Destination(s), Supplier(s) and (optional) Settings.
For more information, please read Live Number Testing chapter as it provides more details on how to create tests for SMPP integration.
When at least one of each is selected, press the ‘Continue’ button in order to proceed to step 2.
Example:
After pressing Continue, the following page will appear:
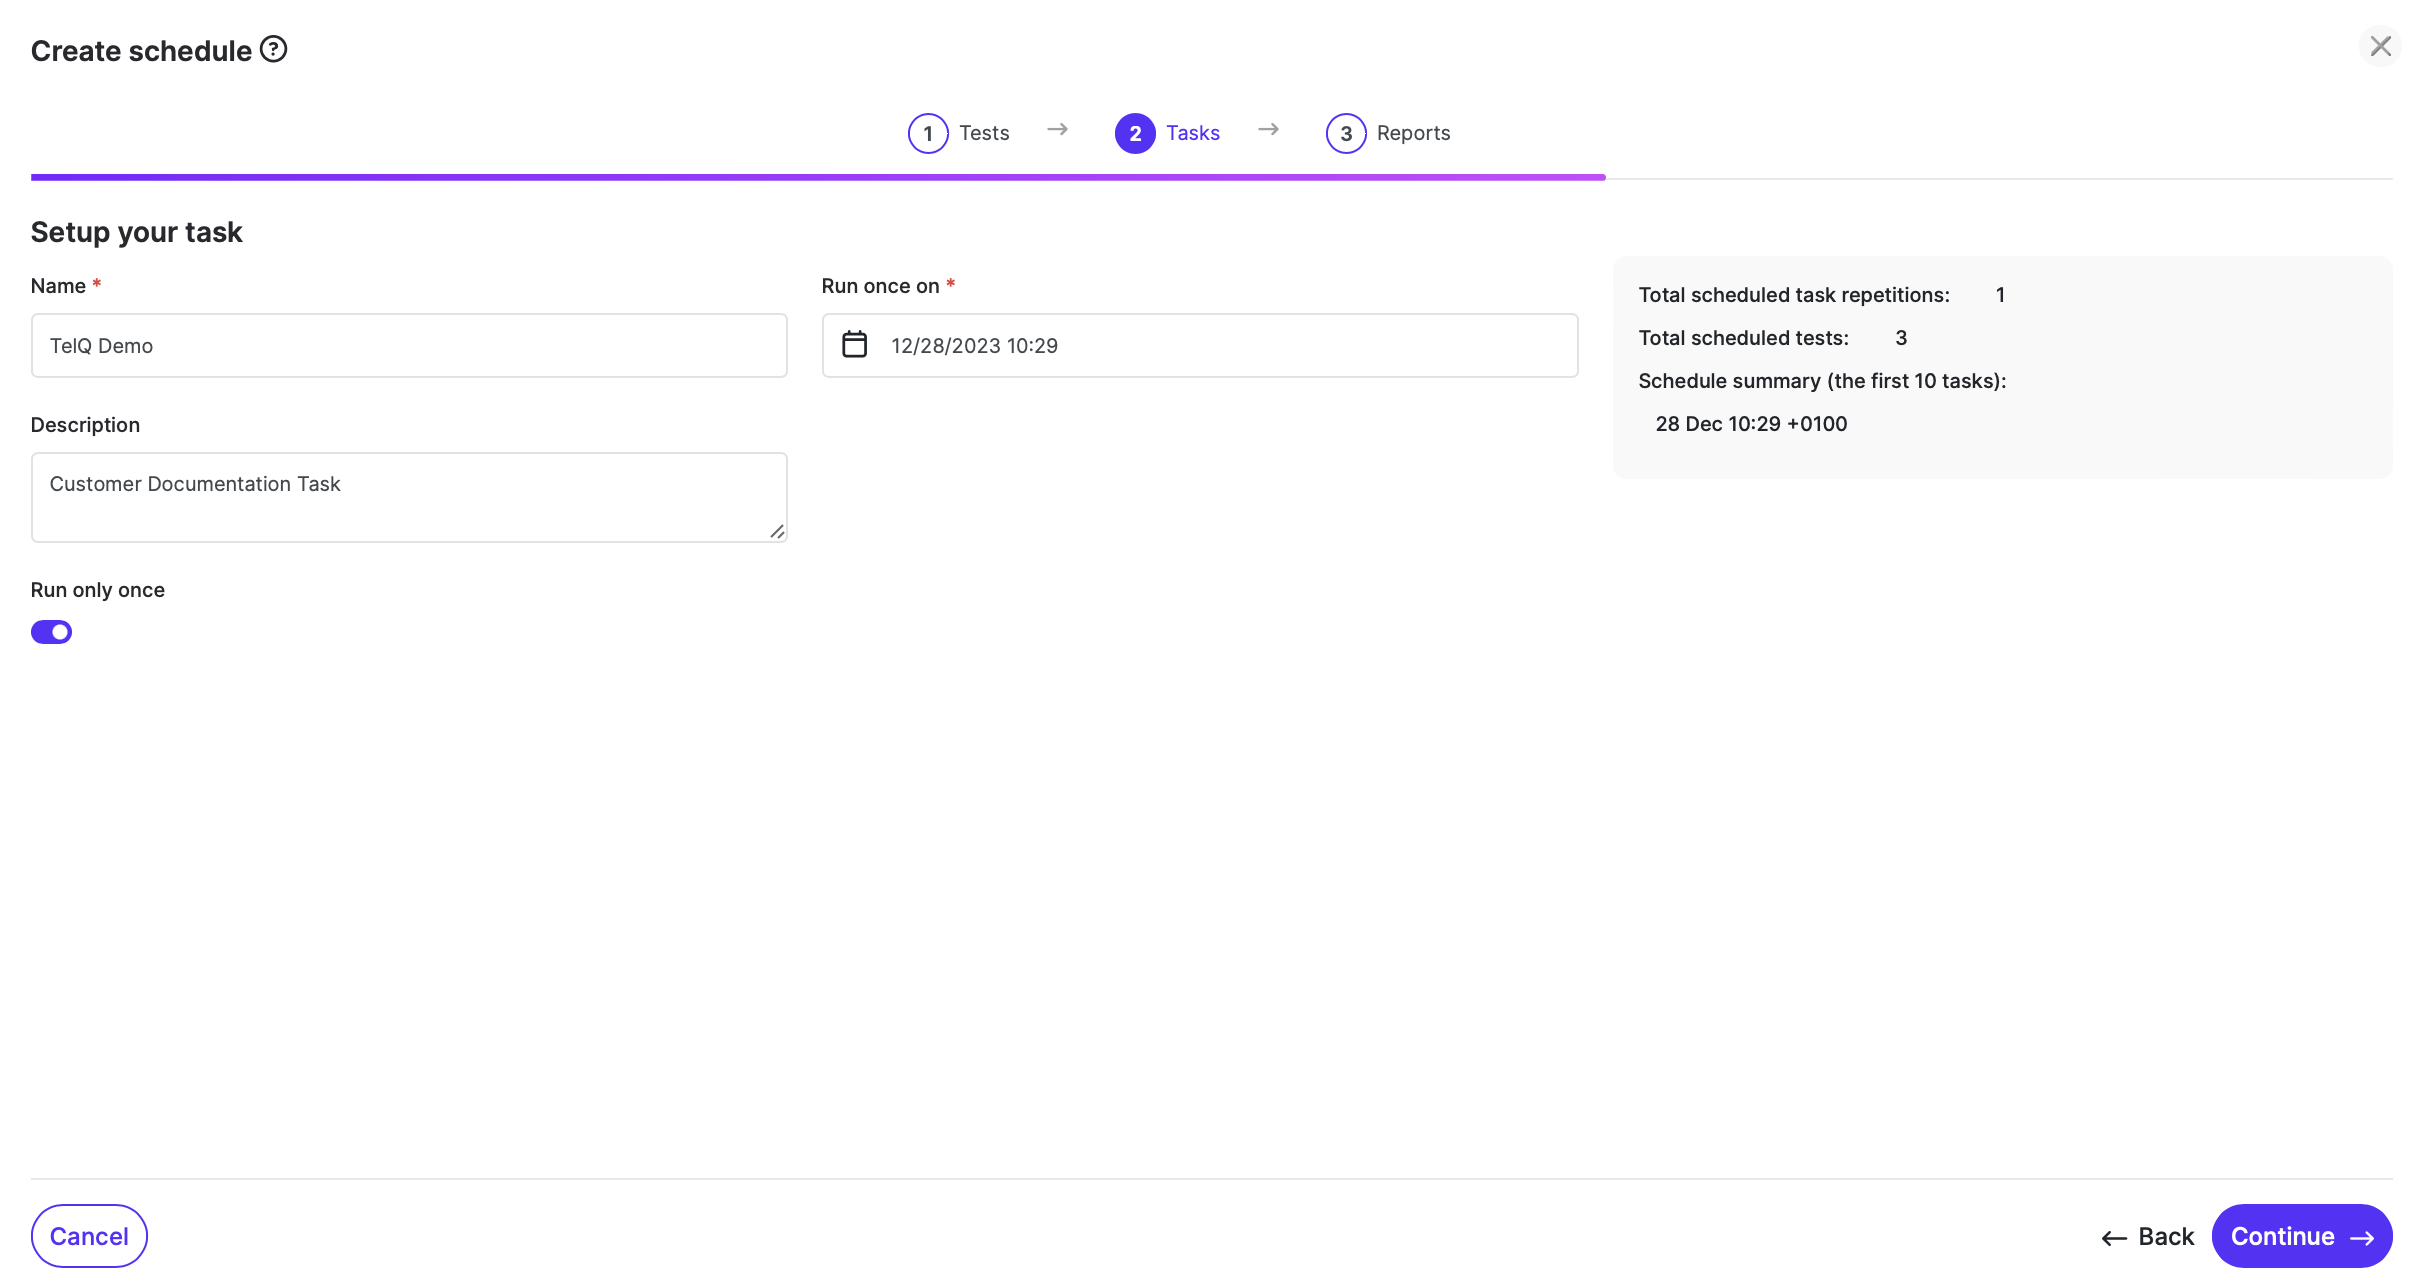
Please populate the fields on the page:
Name: The name that you want to give to this current task you are creating.
Description: A short description for the task so you can easily identify it.
Date period: From what date and hour until what date and hour you need this task to be performed (start time and end time). Please note that when selecting the start date, the time that you select as start time will be the first test batch and the frequency will be calculated based on that value as time start. This section is also relevant for the ‘Send only once’ value.
Send only once: Leave it enabled if you only want to issue one test batch. Disable it in case you want to create a recurrent test batch, sent regularly at an interval.
If you disable ‘Send only once’, the following sections will be displayed:
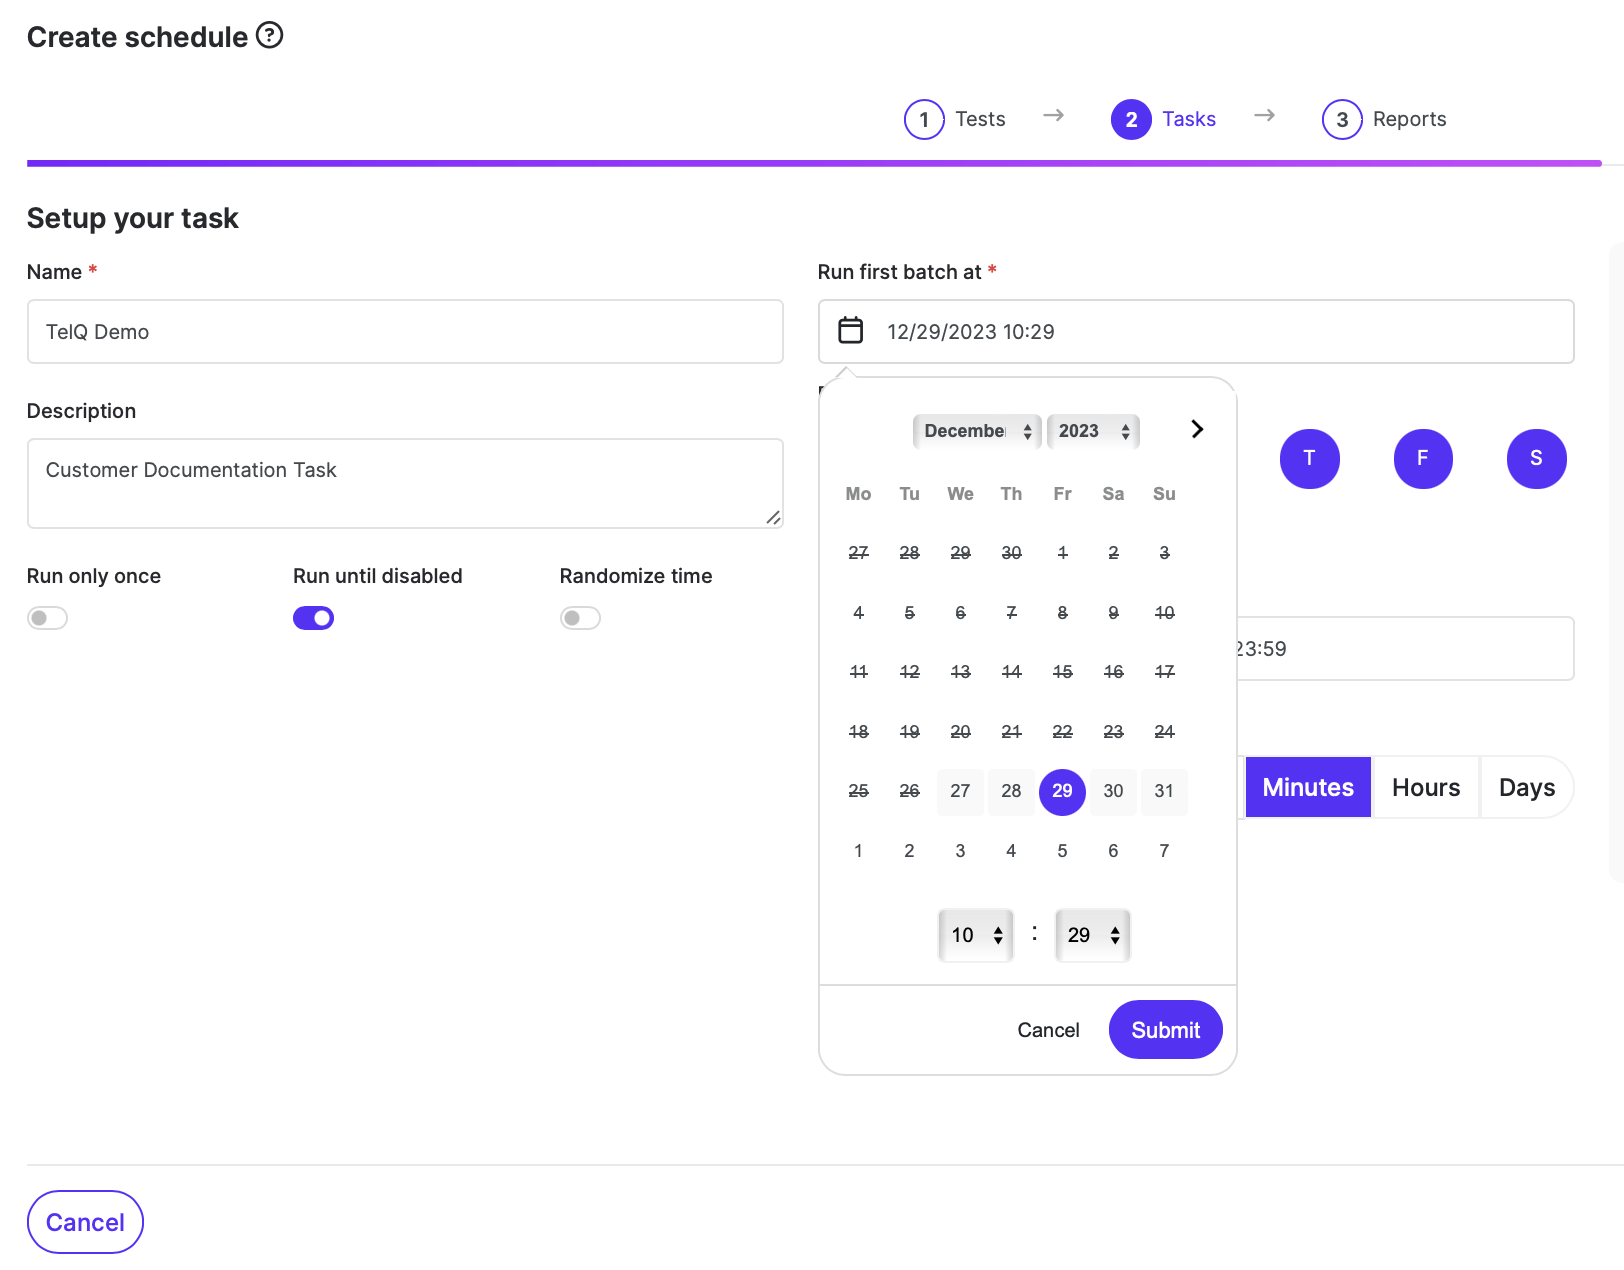
Run until disabled: If you wish your scheduled batch to run indefinitely until manually disabled, you can select this option and indicate the start date only.
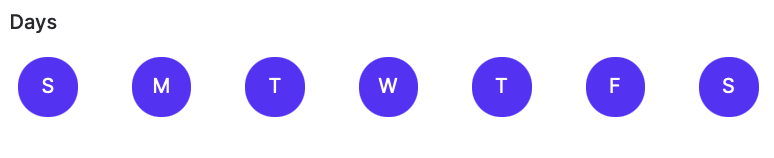
Days: You can select the week days when you’d like your test batches to be sent. The active days will be in purple. All days are selected by default. To unselect a day, please click on it.
Example of test batch for business days only (Mon to Fri):
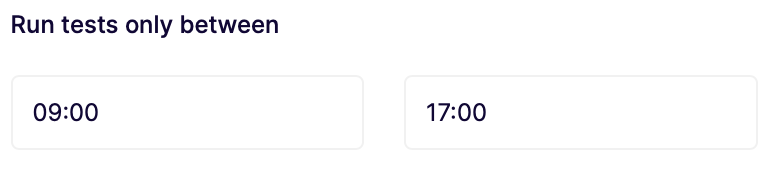
Run tests only between: Here you may select in between what time you would like the tests batches to be issued. Please note that your browser’s timezone is considered. After the creation, all local time values are converted to UTC and will not respect summer/winter time changes.
Example of test batch for business hours only (9am to 5pm):
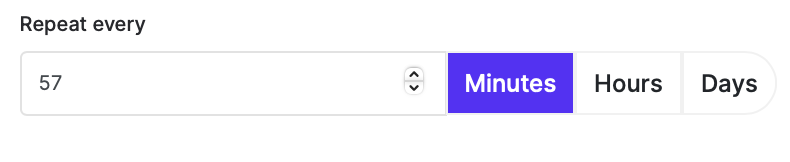
Repeat every: Set up the frequency for your tests – enter the value and then select the measure of time (Minutes/Hours/Days).
Example of test batch to be sent every hour:
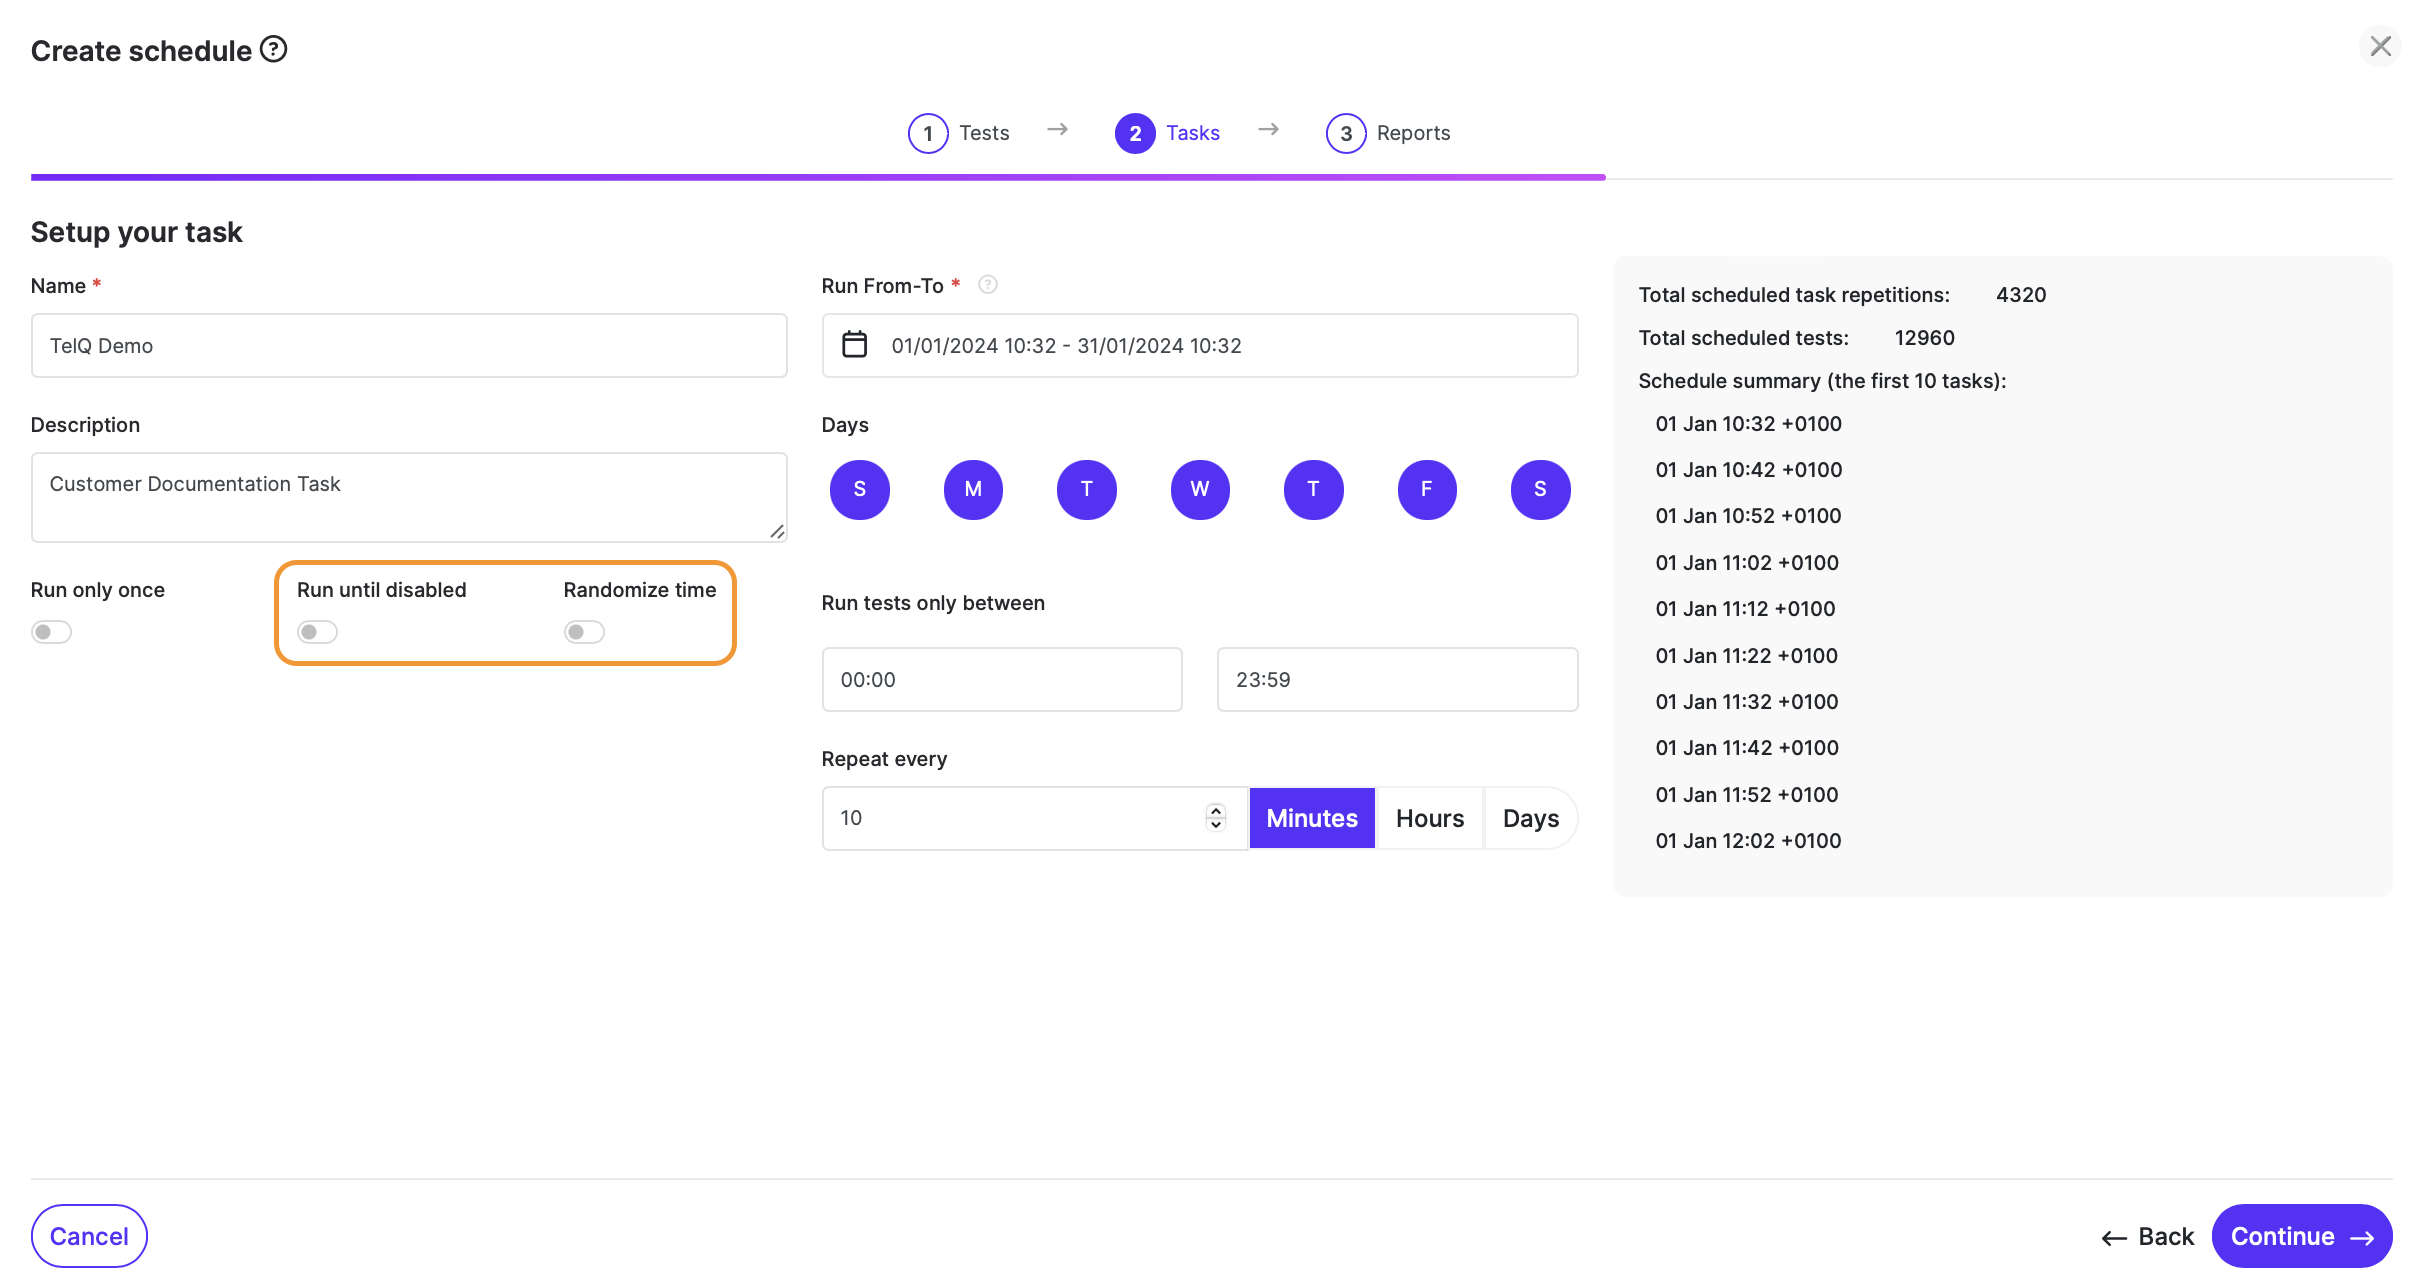
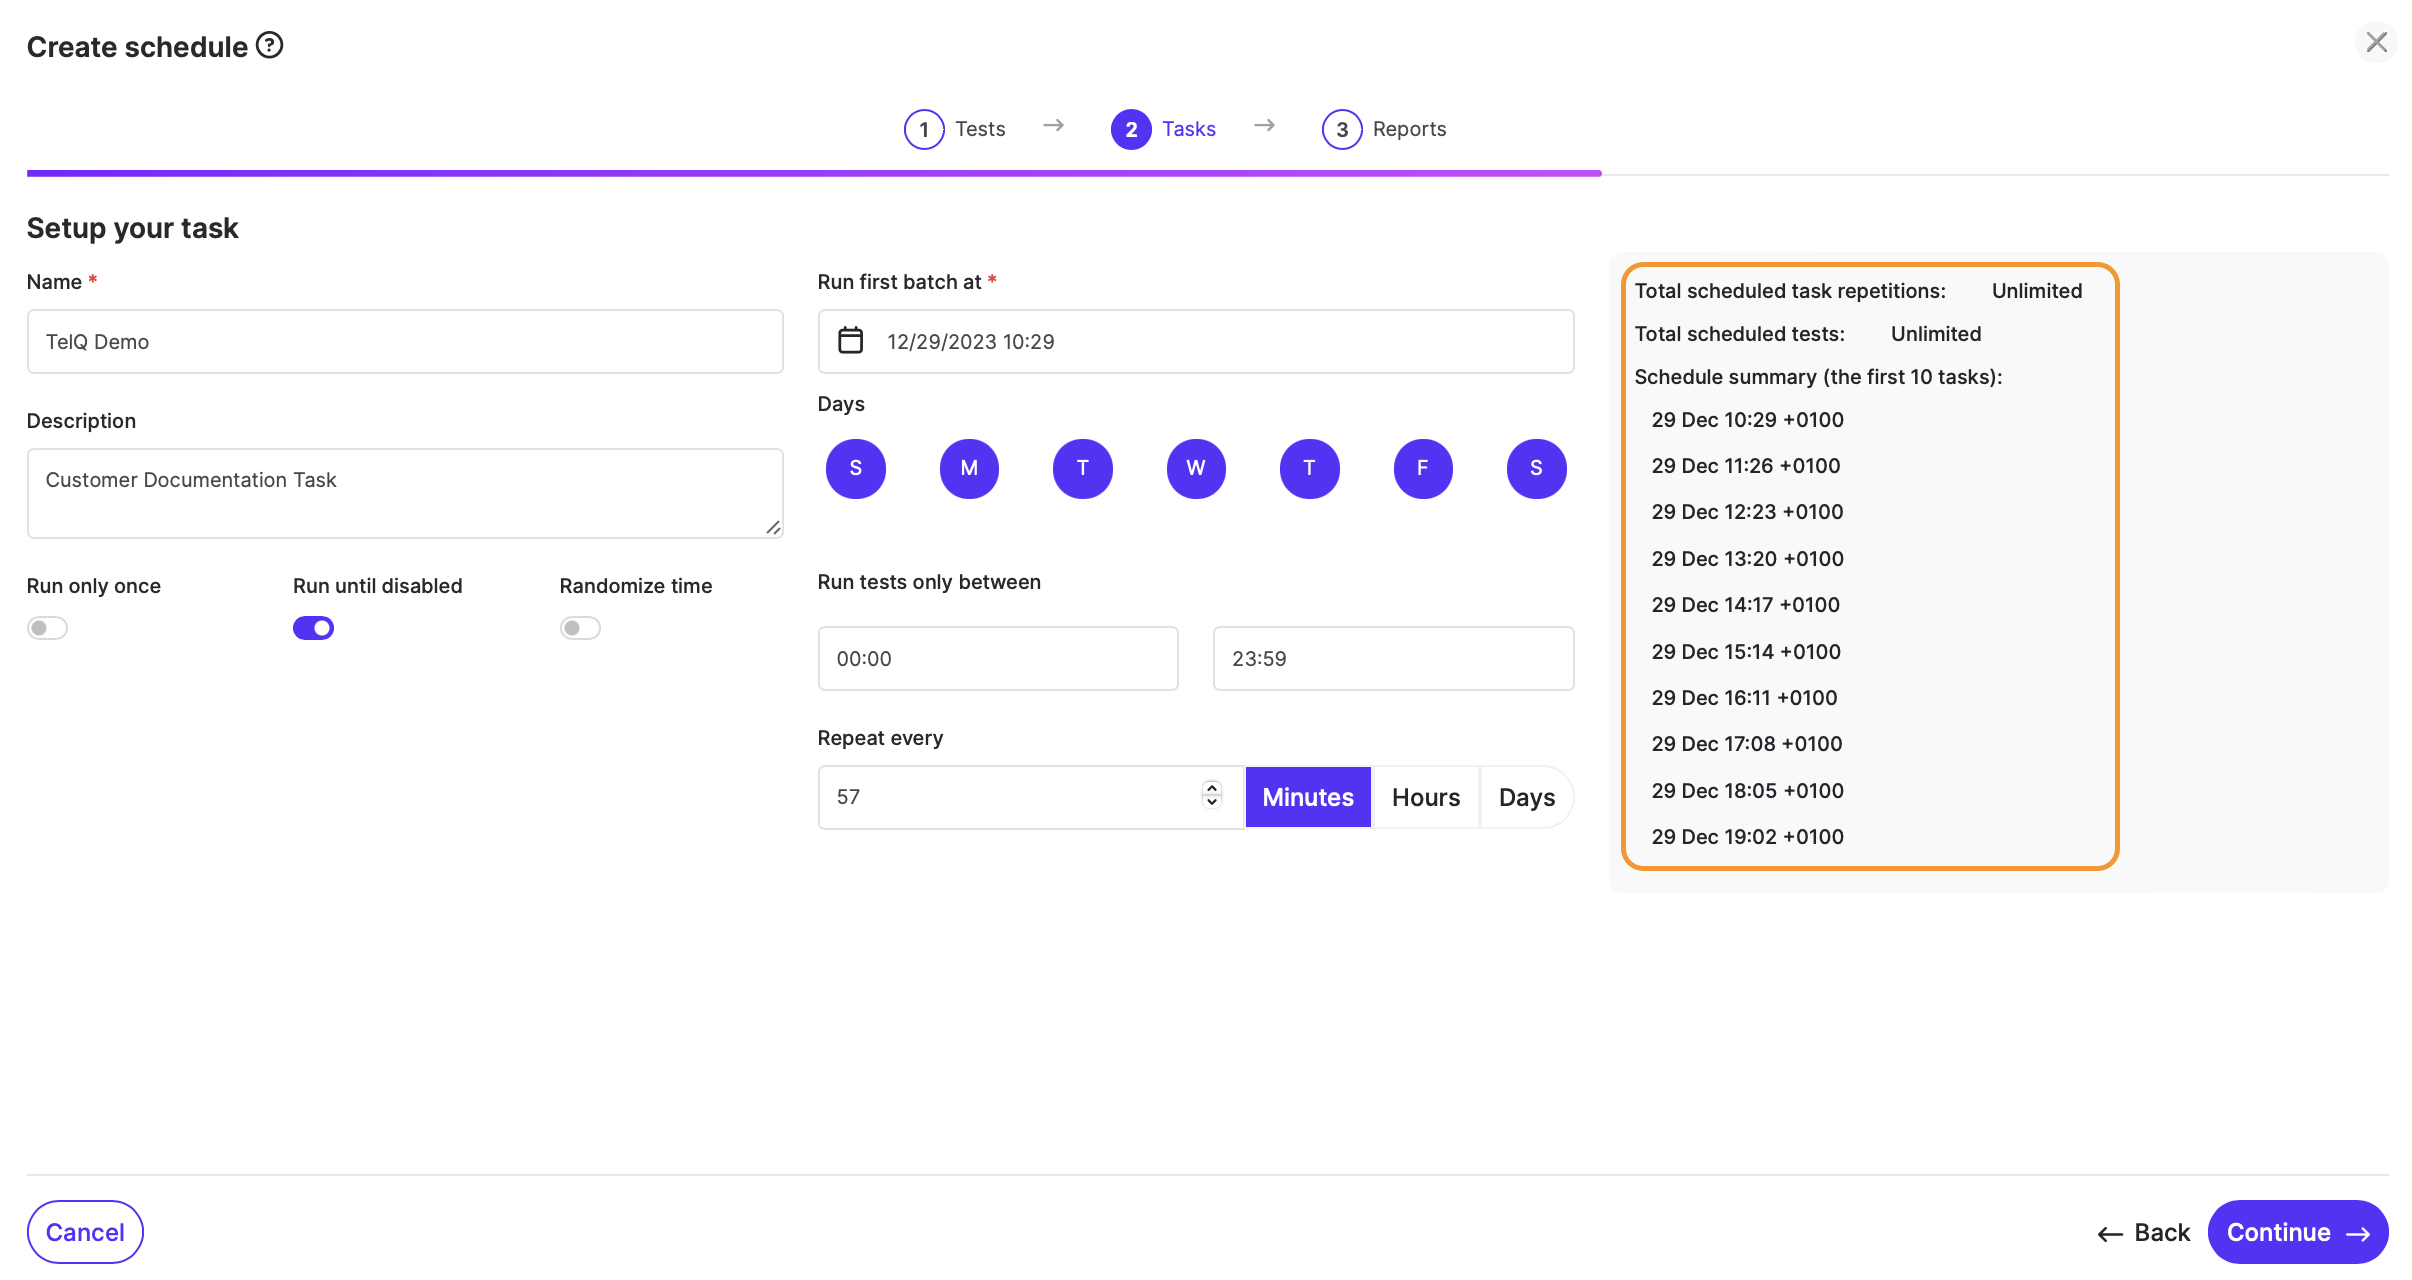
After you input the values on the left side of the menu, you will see on the right side of the page the first 10 iterations (test batches) and their scheduled times. You will also see the total amount of tests that will be issued by this scheduled task.
Example:
You can also randomize the time of your scheduled batches to conceal your scheduled tests from your vendors. If you enable this option, you will be able to select the number of repeats per selected day:
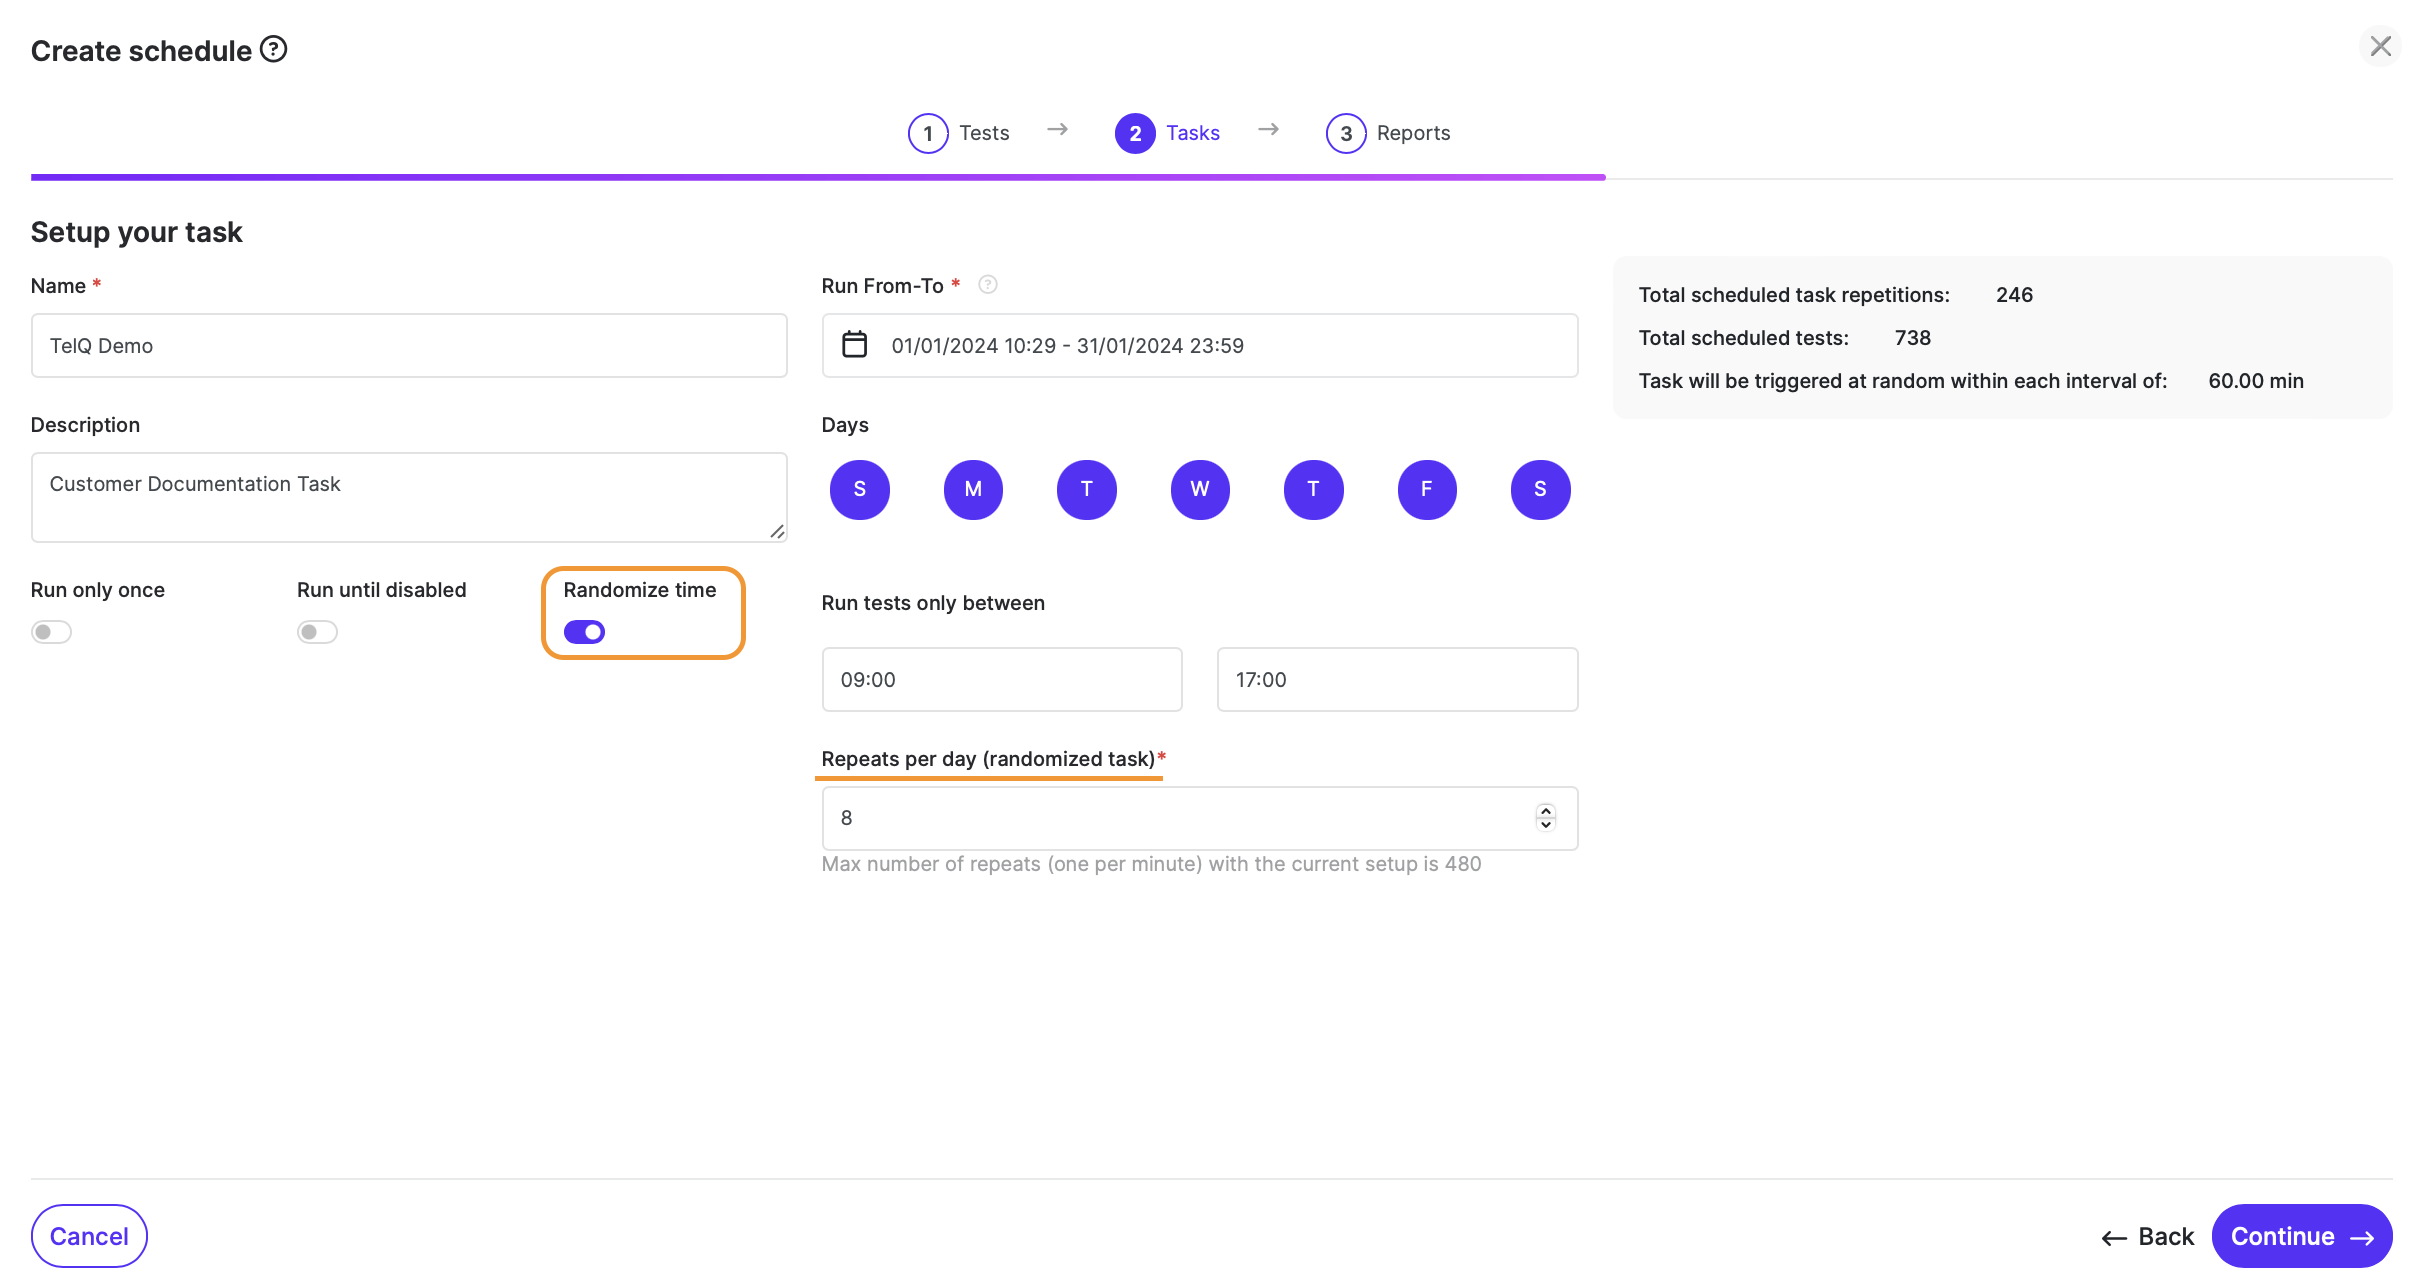
Depending on the number of selected repeats and the “run only between“ settings, the Scheduler will calculate on the right hand side of the screen the length of the time interval during which your batch will be triggered at a random time:
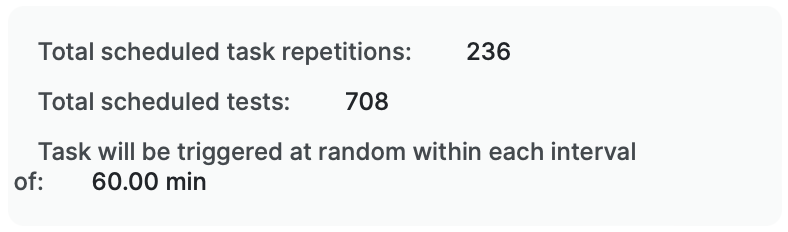
In the example above, we selected 8 repeats during an 8h period. Scheduler will divide this time to 1h increments as you can see on the right hand side.
Example: Between 9AM and 10AM, one batch will be randomly triggered. The next one will be triggered at another random time between 10AM and 11AM, and so on.
After pressing Continue, the Reports page will appear:
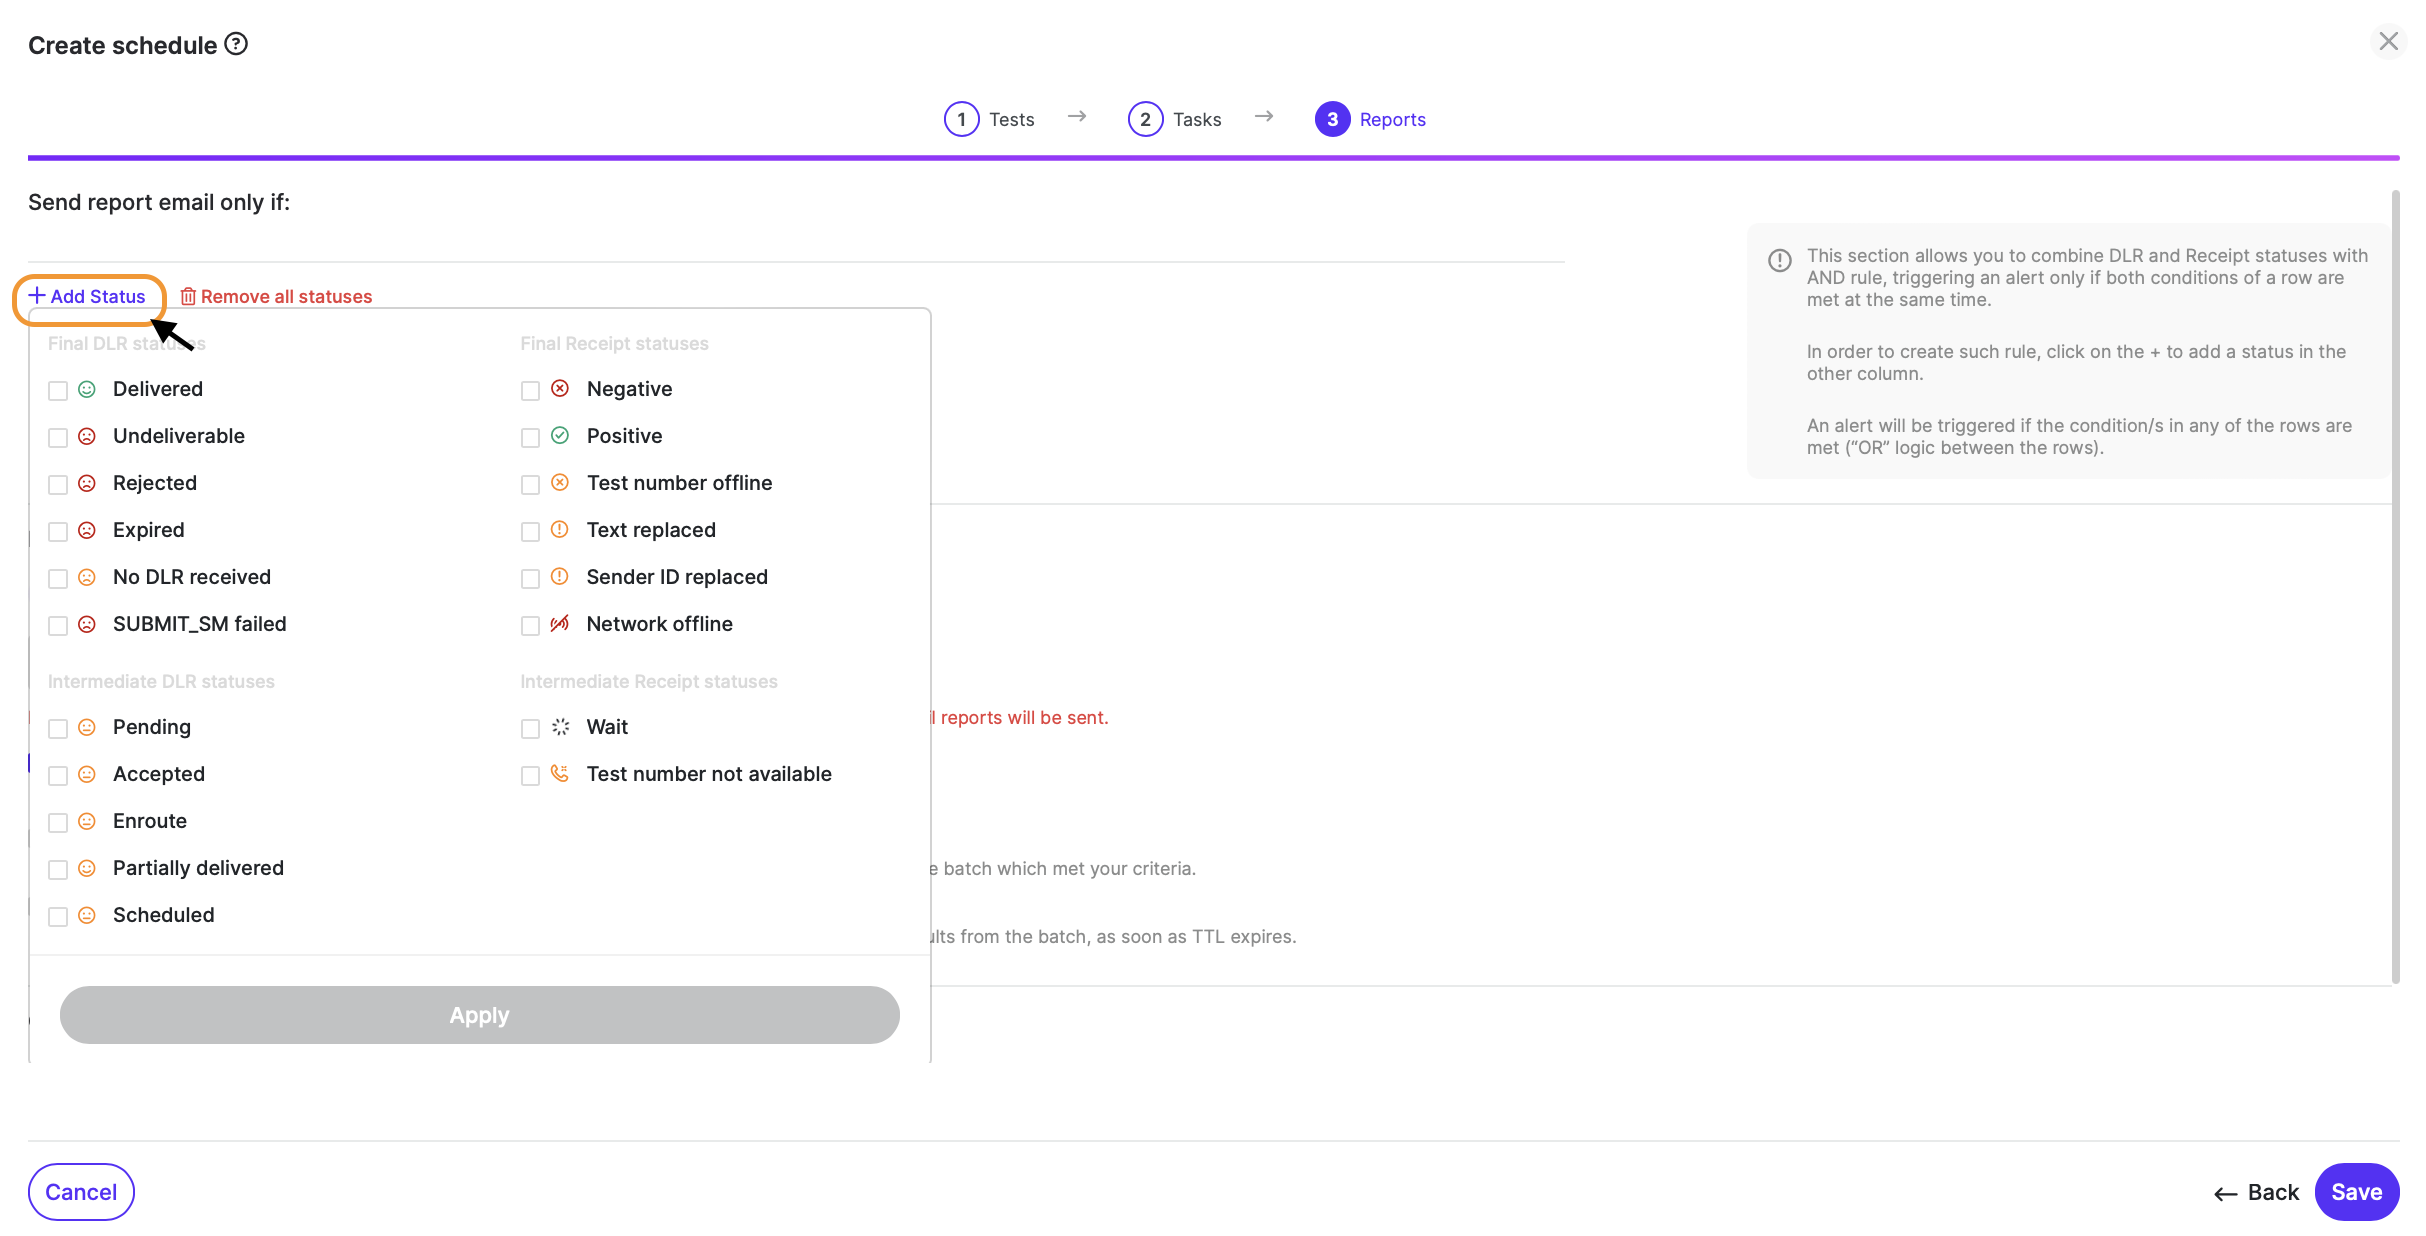
On this page you can select the conditions for which you’d like to receive an email alert by clicking on +Add Status button. There are 4 main categories of conditions:
Final DLR status
Final Receipt status
Intermediate DLR status (with mandatory time value when clicked on)
Intermediate Receipt status (with mandatory time value when clicked on)
In order to select a criterion, please click on the checkbox next to the status. By default, each criterion is added with logical value “OR”. In order to setup a combination (logical value “AND”), please use “Status combination rules” like shown in the example below.
Example of conditions with “OR”:
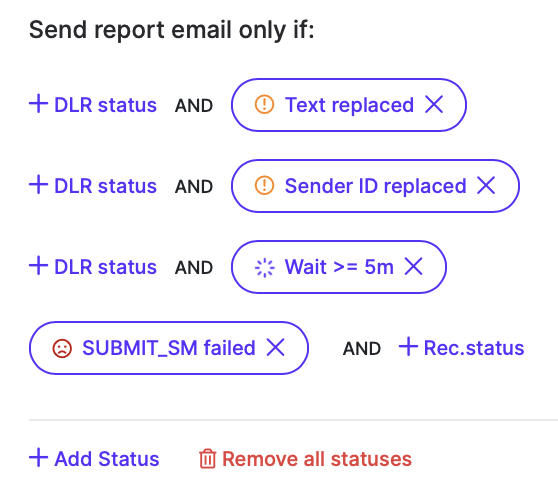
In the example above, the alert will be received if a test from the batch will have:
-
a Receipt status of “Text replaced"
-
OR a Receipt status of “Sender ID replaced”
-
OR a Receipt status of “Wait >= 5m”
-
OR a DLR status of “SUBMIT_SM failed“
Example of conditions with “AND” - select your first condition and then click +DLR status/+Rec. status to add the combination rule :
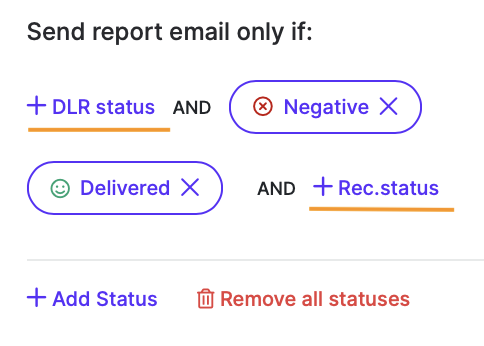
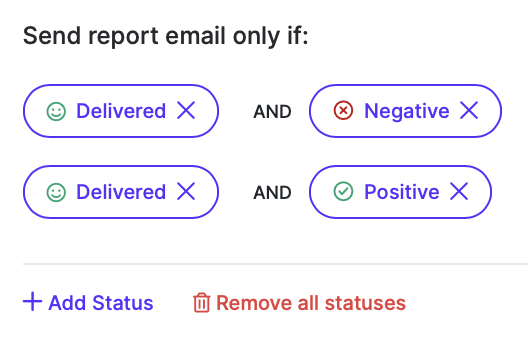
Your criteria would now look similar to this:
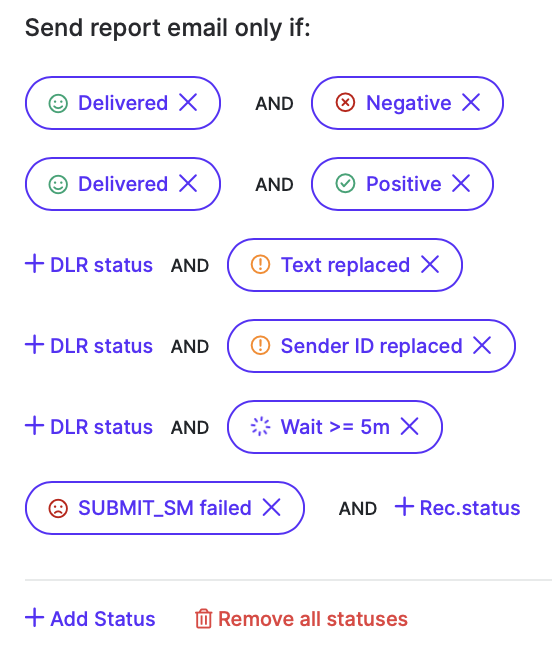
To remove any individual criteria, click on the x, and to remove all statuses at once, click on the red bin option.
There are currently 4 types of alerts you can choose to receive for your scheduled tasks:
-
Instant alert: immediate and individual alert each time one of your set conditions is met
-
Batch alerts report: one report sent to you over email at the end of each iteration, which contains all the test results that match the conditions you had previously set.
-
Full batch report: one report sent to you over email at the end of each iteration, which contains all the test results from that scheduler iteration/batch.
-
Callback URL: setting up a Callback URL in this field, you will enable your SMS platform to receive the immediate alerts of the scheduled tests directly in your gateway. Note: the callback URL needs to be specified for each scheduled batch.
Kindly note you can select any 1 option, or all of them at the same time.
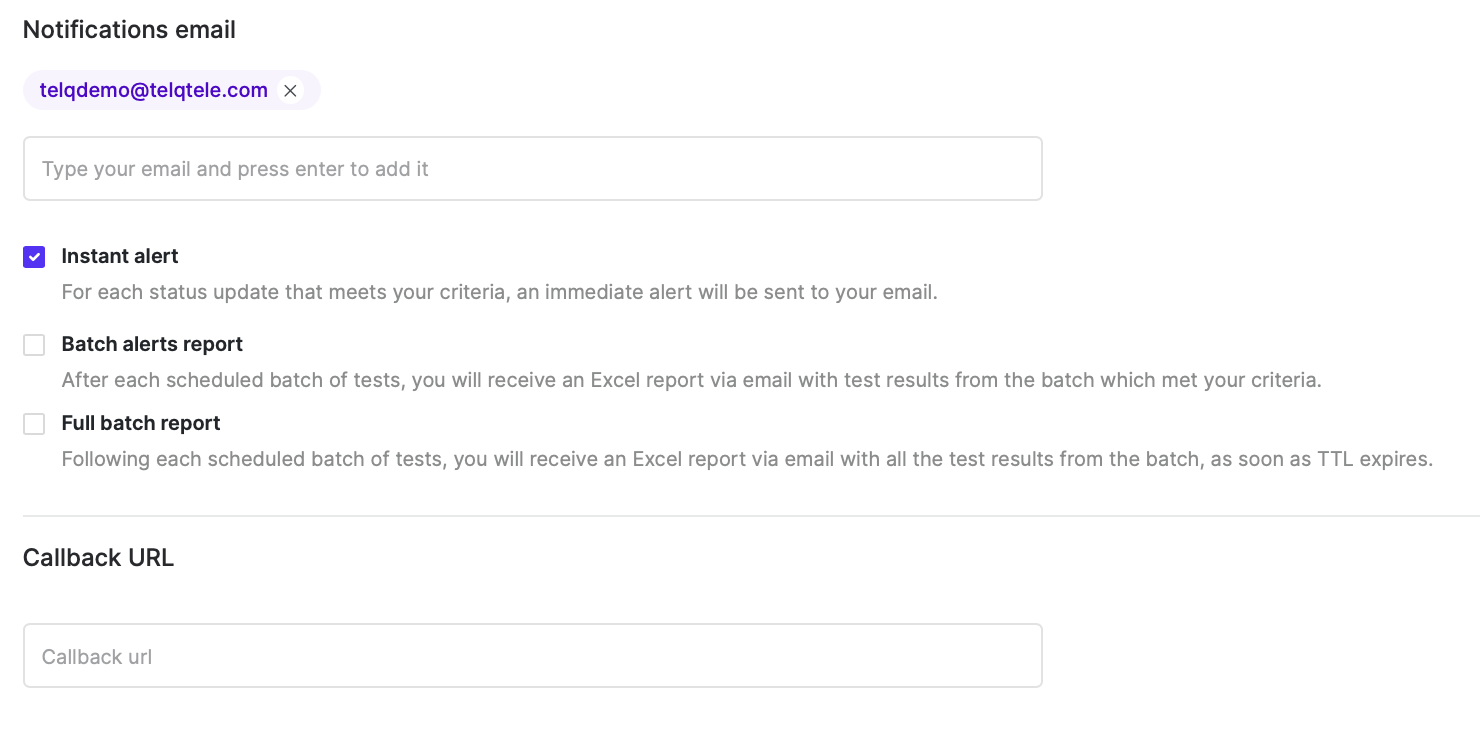
Notifications email: is prepopulated with the main email of the account creating the task. However, you can replace it or add other email addresses, as per your needs. This field cannot be empty as the alarms are sent by email, so the tool needs an email address to which to send them.

When everything is set up, click on Save.
You will be redirected to the Schedules page, where you will see your new task active. The status “Scheduled” is for an active task; the status “Finished” is a completed task and the status “Stopped” is for a stopped/paused task.

Important information:
-
please note that once a scheduled task is created, you cannot modify it. You can clone it and edit the clone, but please remember to stop the initial one (unless you intend to run both in parallel)
-
a stopped task can only be resumed in case the Start date is still in the future