Creating tests
Creating tests in Live Number Testing
Input Sender ID(s), Text(s), select the Destination(s) and Supplier(s) desired. Optionally you can also modify parameters from Settings.
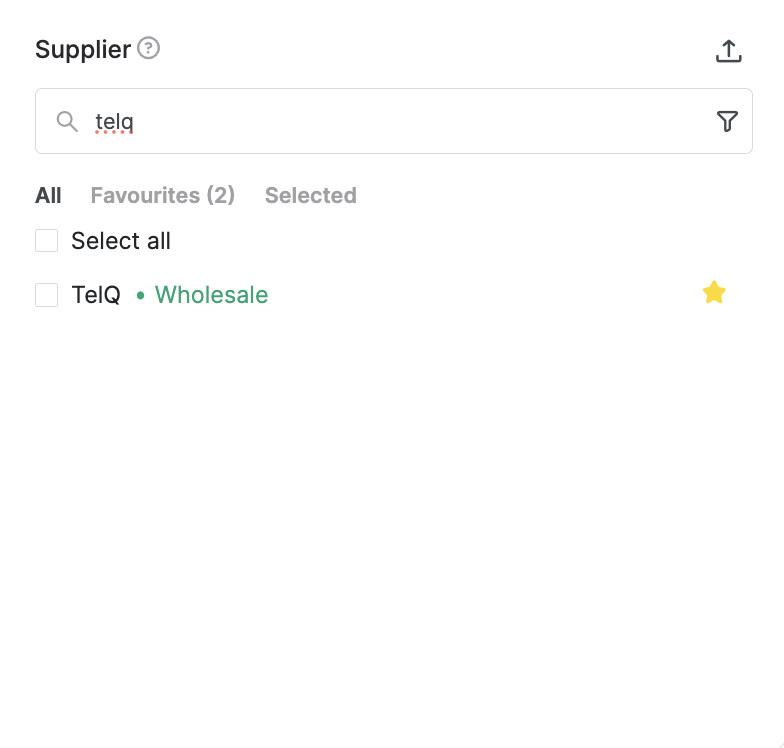
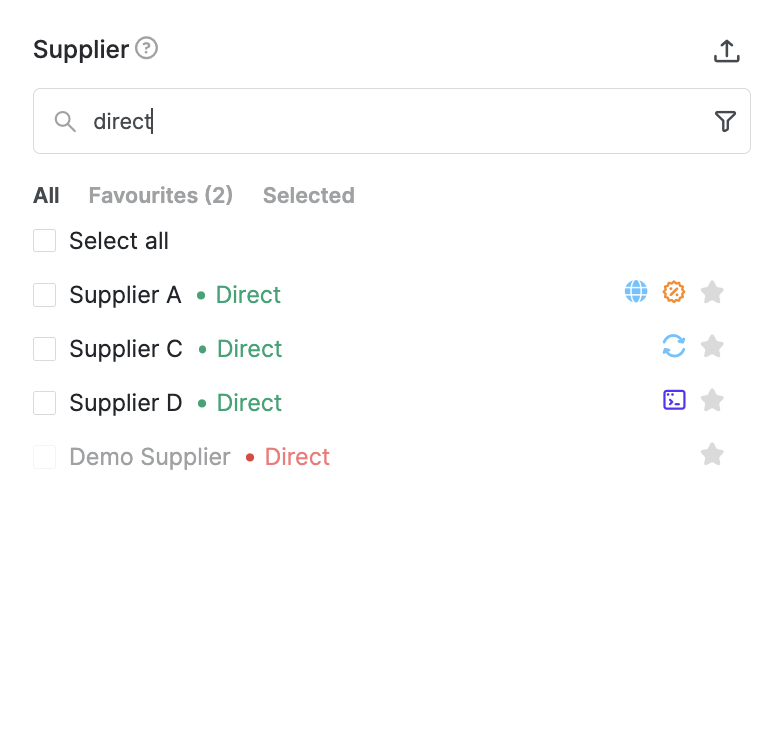
Please keep in mind to select your own Suppliers, not our demo TelQ Wholesale supplier.
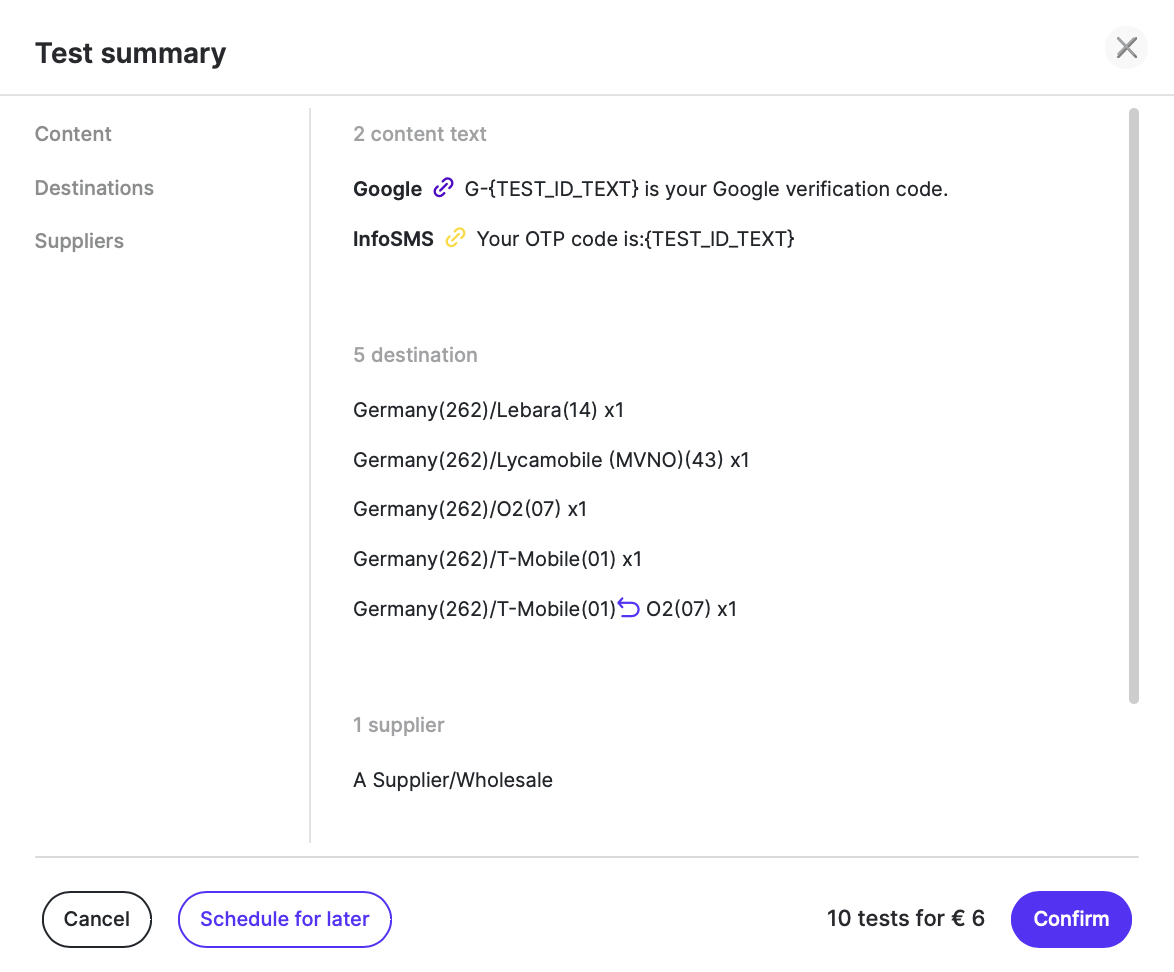
In this example, we selected 2 Sender ID and Text combinations, 5 Destinations (networks) and 1 Supplier. You will notice that the Run button is pre-calculating the number of tests selected for this test batch:

As shown in the above screenshot, you have several options in the top right corner:

Trash bin
You can clear your entire selection (content, destination and supplier) at once by clicking on the trash bin icon if you would like to make a completely new batch.
Settings
You can optionally define UDH and TLV values, modify Protocol ID, Source TON, NPI and Data Coding, as well as TTL value for your test batch. From the Settings pop-up you will also be able to add a comment before issuing your test. Please click here to learn more about Settings.
Repeat / Batch Testing
You can issue batch testing by using the 'Repeat' counter next to the RUN button. This feature will multiply the tests set up with the value you entered in the Repeat section.
Please keep in mind that due to security and prevention reasons, the limits for batch testing are: 8000 tests or 999 'Repeat' value at once. The Repeat value will not be saved in Test Case templates or for repeat action button, but it can be used in Scheduler.
Templates
By clicking on the save icon, you can save this input (a combination of Sender ID and Texts, Destinations and Suppliers) as a Test Template and reuse it in the future. All the Test Templates you make will be available in the “Templates“ dropdown. For more information about templates click here.

Run
If you press “Run”, a pop-up window will appear asking you to confirm the summary of the test batch, or schedule it for later. It will also display the total number of tests and the total amount that will be deducted from your balance for this batch:
Schedule
You can select to schedule this batch of tests for later or create a recurrent test. For more information about scheduler please click here.
Please click on the question mark in the bottom right corner to access our Help section as well as Customer Documentation and Video Tutorials.
Description of testing parameters:
Sender ID & Text
You can either type a new Sender ID & Text, pick one from a template or upload from an excel file.
Typing a new Sender ID and Text: Once you type in a new sender ID and text, you can press the plus (+) buttons to add them. One or more Sender IDs can be linked to your content using the plus (+) button.
Below the text box you will also find the character counter (which includes the ID length), as well as the message encoding.

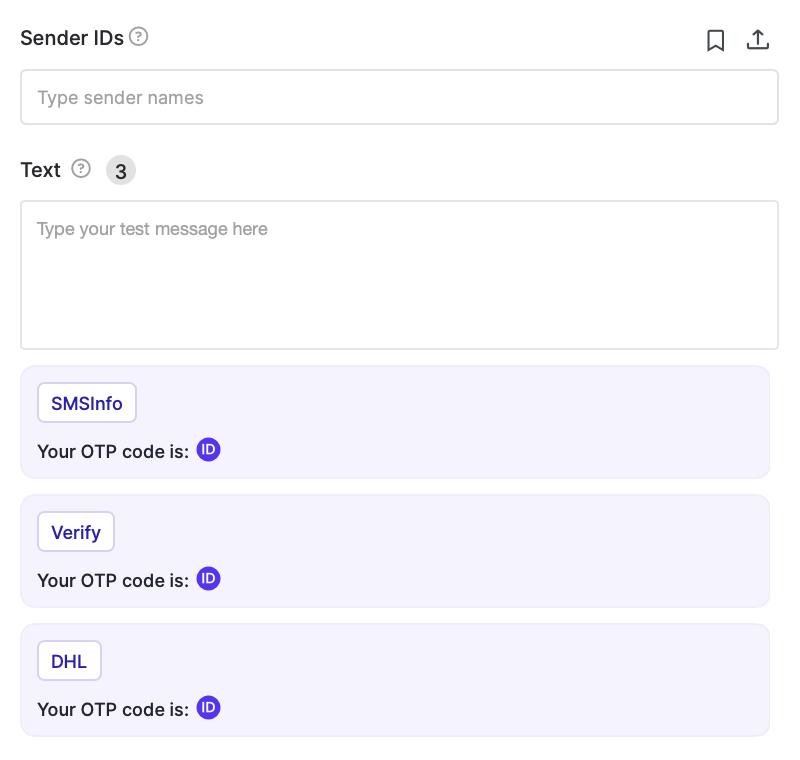
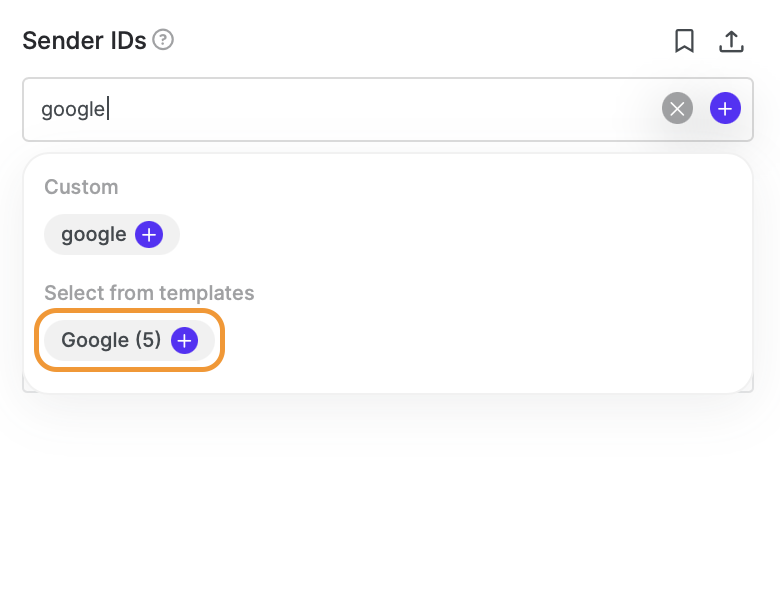
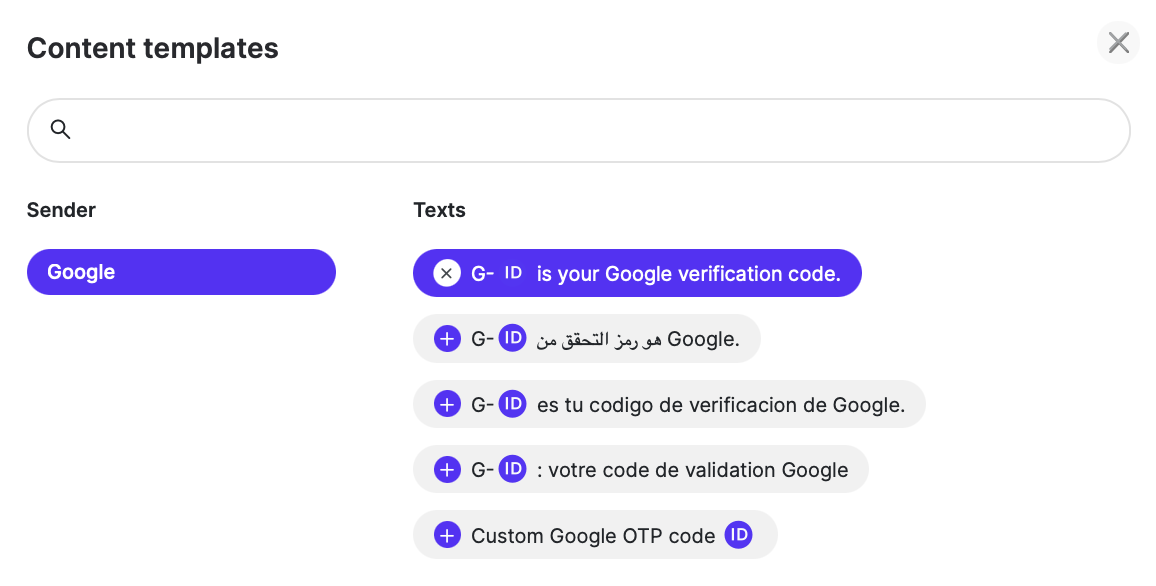
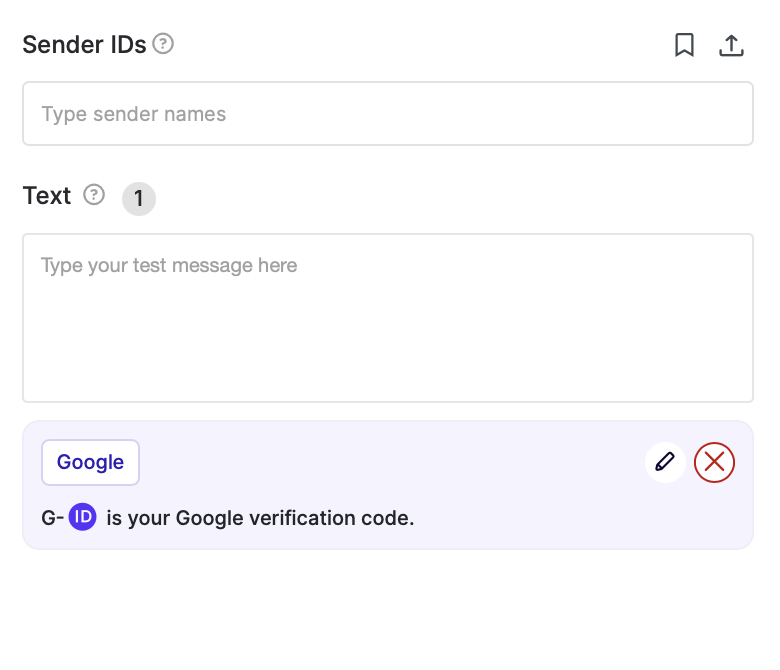
Similarly, if your Sender ID and text are saved as templates, you will be able to search them and add them by clicking on the Sender ID. If there are multiple texts connected to the same Sender ID, you will be able to choose the one you want to test by clicking on the three dots. A pop-up will appear from where you can choose 1 or more texts:

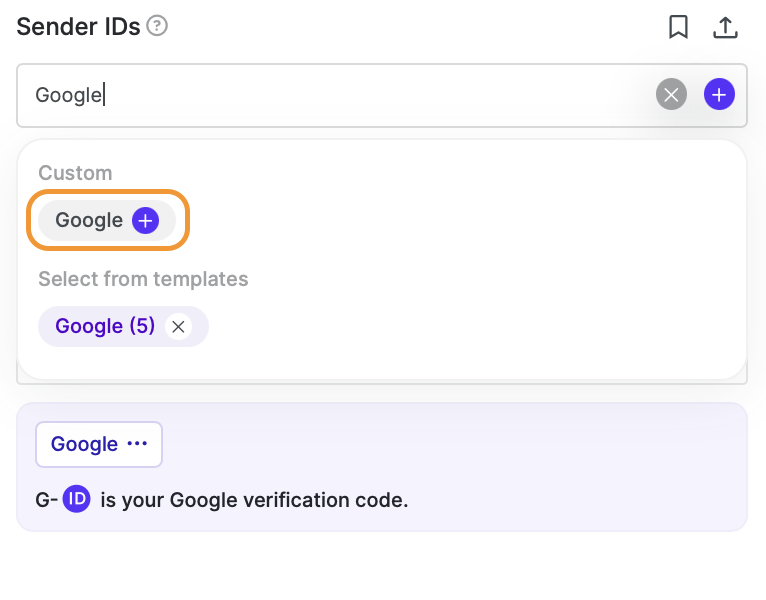
If you would like to add your own custom content that is not provided in the pop-up, you can add your Sender ID and type it in:
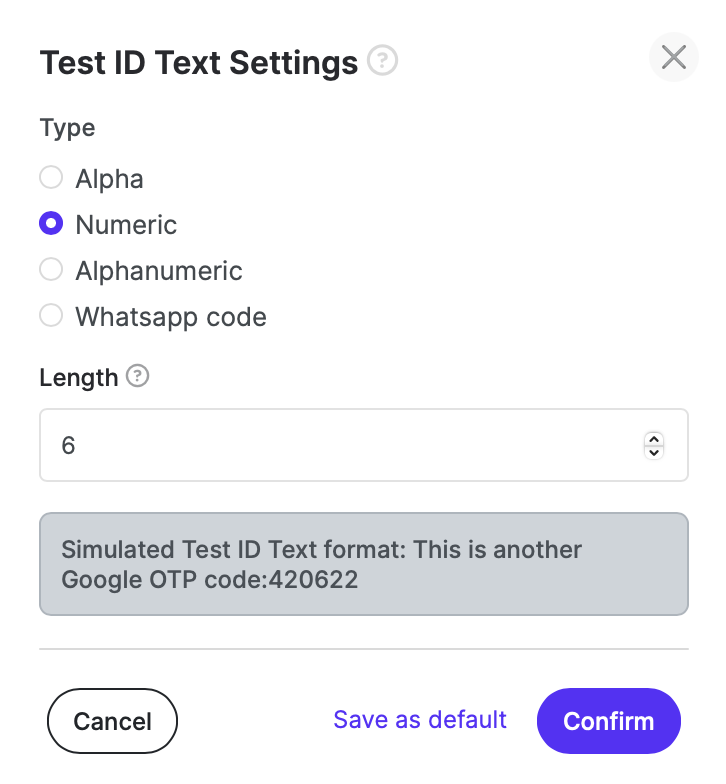
When adding content in the text box, you will be able to customize the Test ID Text by clicking on the “ID” icon. A pop-up will appear asking you to select and confirm your TelQ ID Settings. You can select your ID’s type (alpha, numeric, alphanumeric or Whatsapp code), as well as the case for your Alpha and Alphanumeric ID, and length (from 4 to 20 characters).
By default, the test ID text is a mixed case 10 letter code, however, if you wish to have a different default for your TelQ account, you can set your own ID values by clicking the “Save as default' button. You will be able to see its simulated format highlighted below. Happy with your settings? Click on “Confirm“.
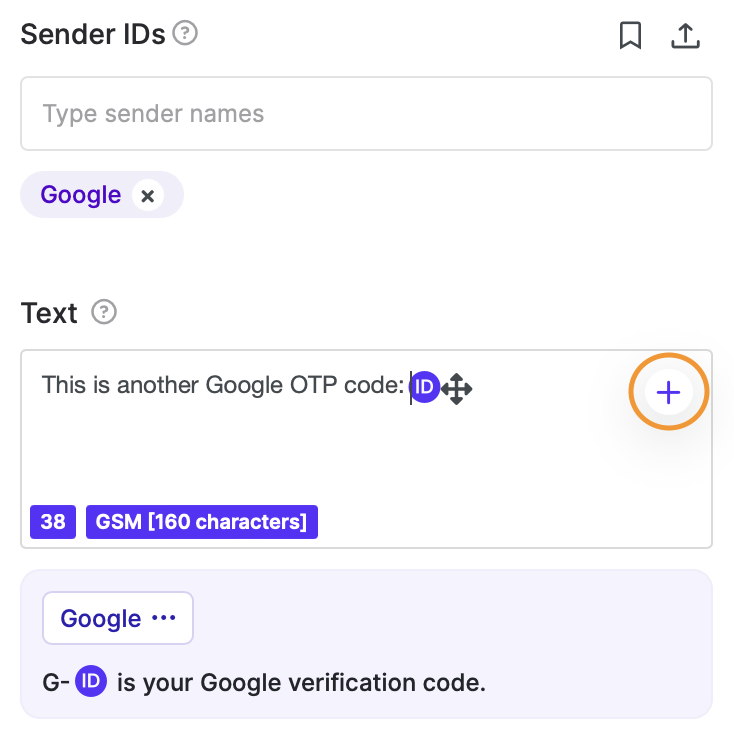
Once you customize your ID, you can click on it and place it anywhere in the test message body.
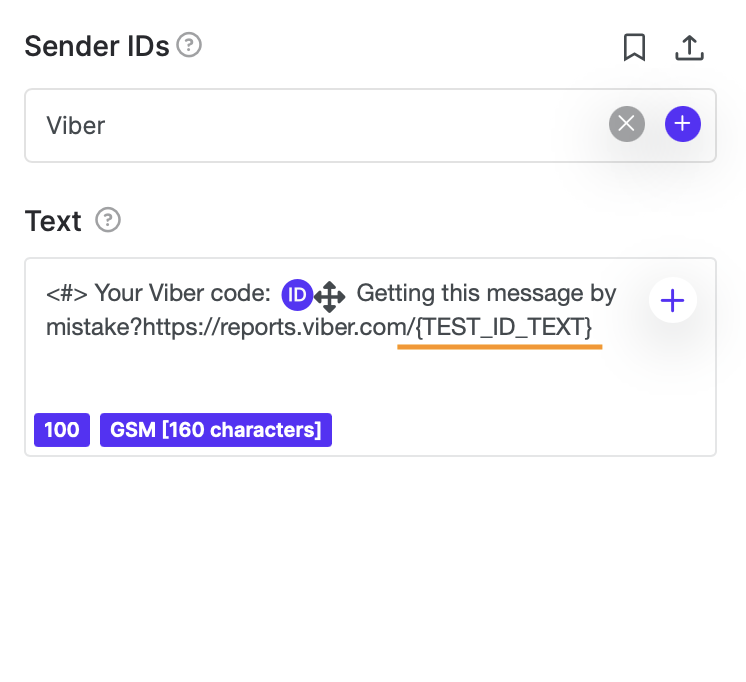
In case you need to duplicate the ID in the text, for instance, to repeat the same OTP code, you can indicate it by typing {TEST_ID_TEXT} in your content:

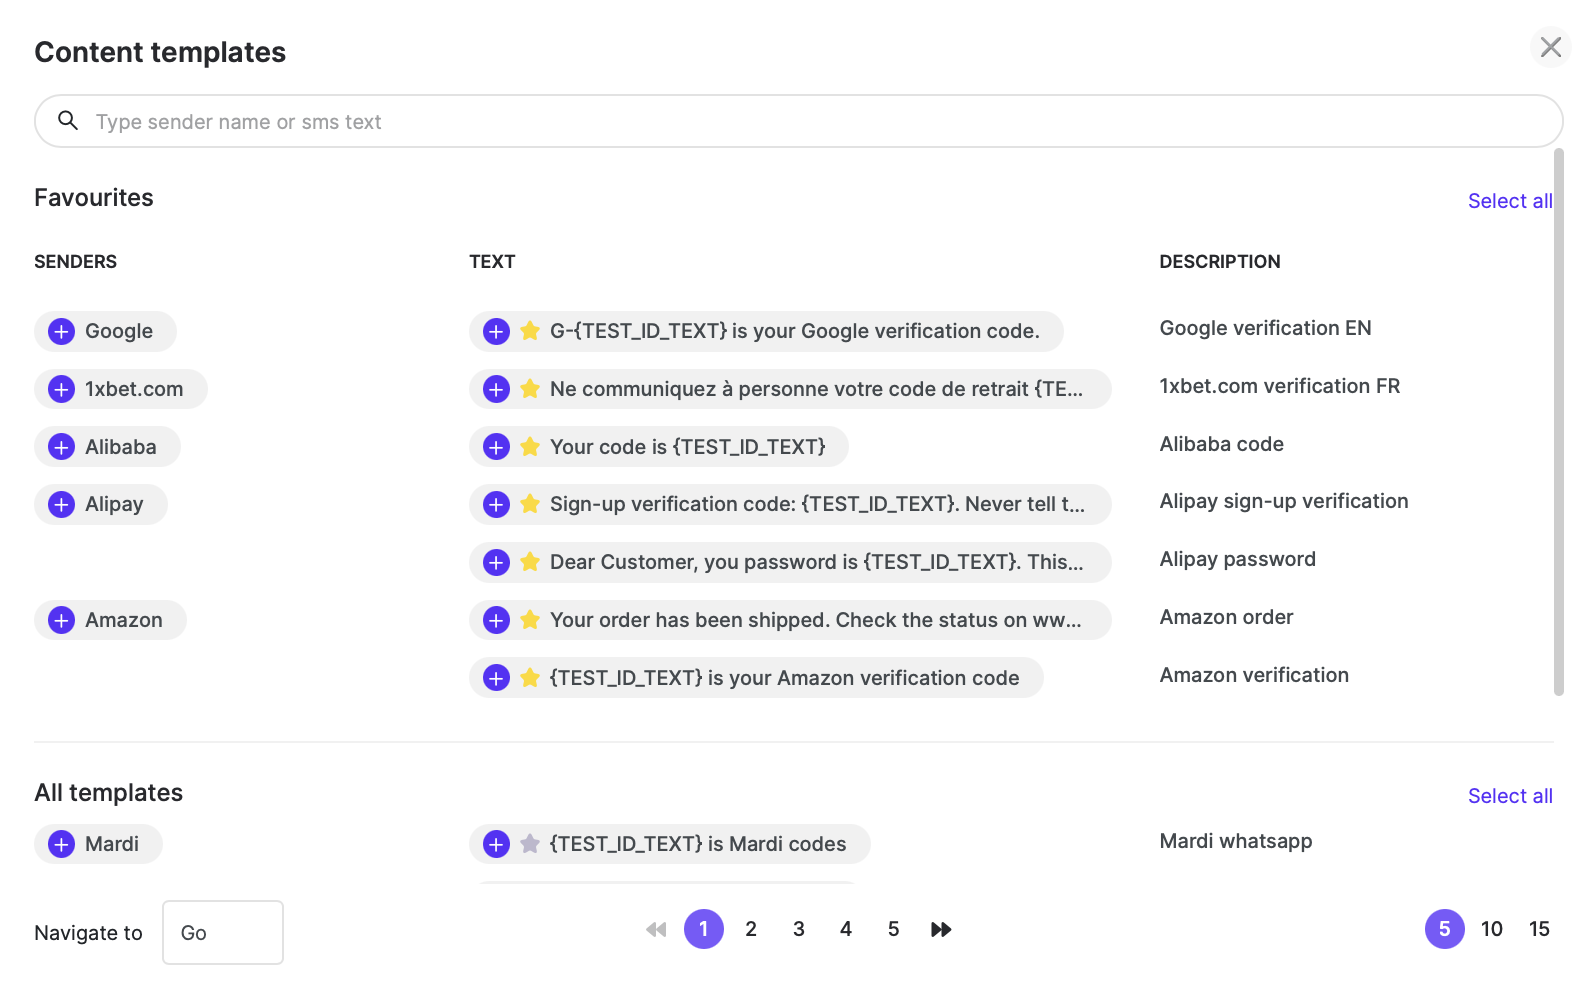
Selecting a Sender ID and Text combination from Templates.

Click on the “Bookmark” icon in order to view the existing templates. You can mark your favorites that will be displayed at the top of the list by clicking on the star button. Select the one(s) which you wish for your test and click “Done”. In order to remove the Sender ID and Text combination, please press on the “x” sign.
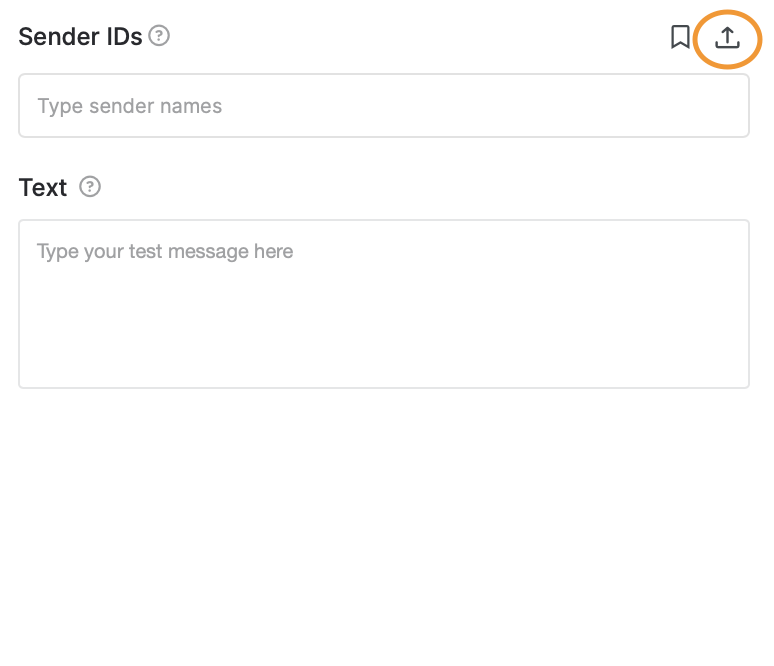
Importing from Excel: You can also import the desired Sender ID and Text as an Excel sheet by clicking on the “Upload“ button as shown in the below screenshot.
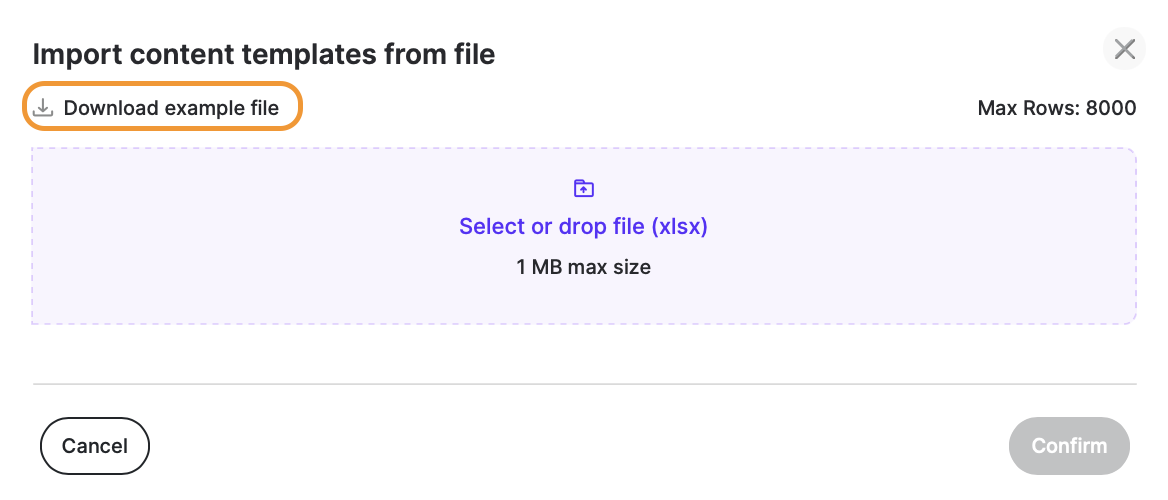
Please click to download the Example file which contains the values in rows our system needs to successfully upload your content.
If you wish to test multiple Sender IDs with the same text and include each respective SID in your content, you can use our Sender Tag option. Simply type in your Sender IDs and indicate in the textbox where you want the Sender IDs to appear by writing @sender:
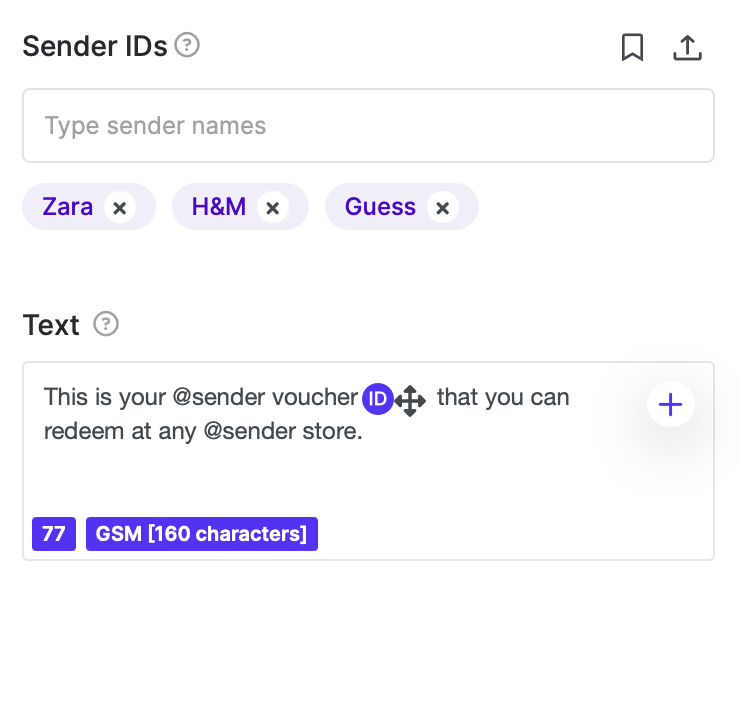
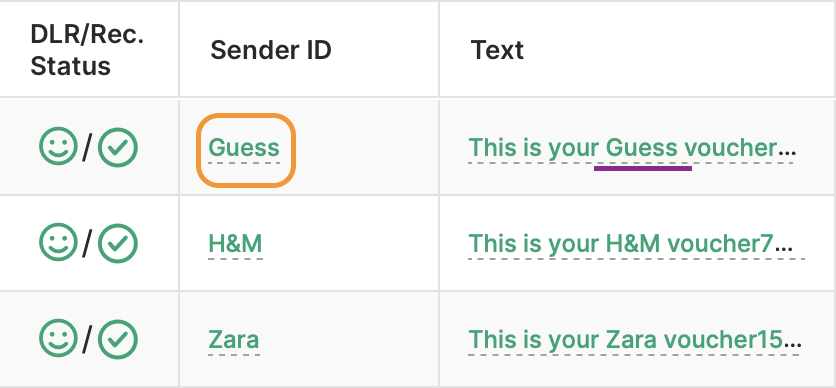
As it is shown in the example, the text entry @sender will be replaced with the respective SenderID of the message.
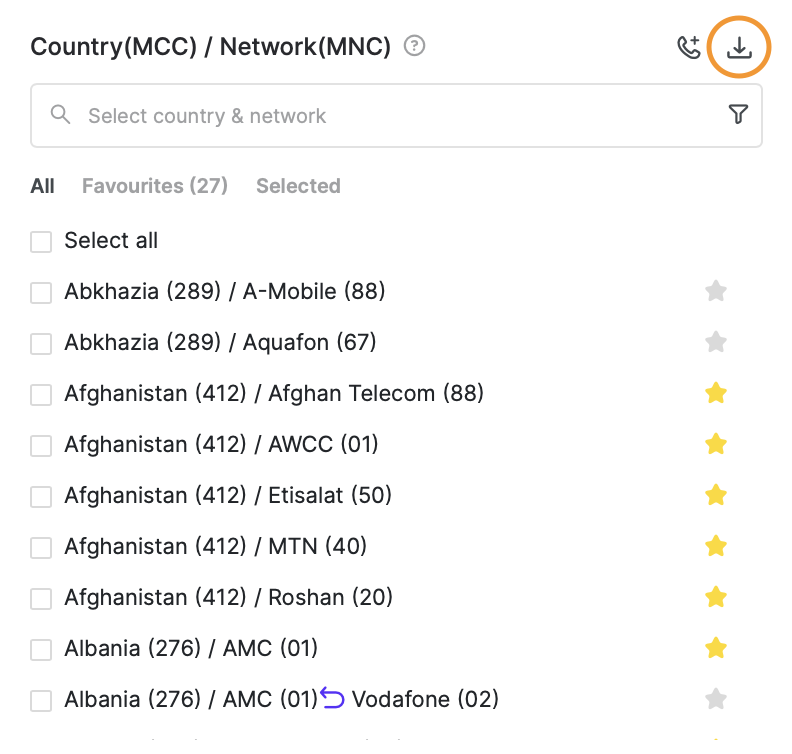
Destinations
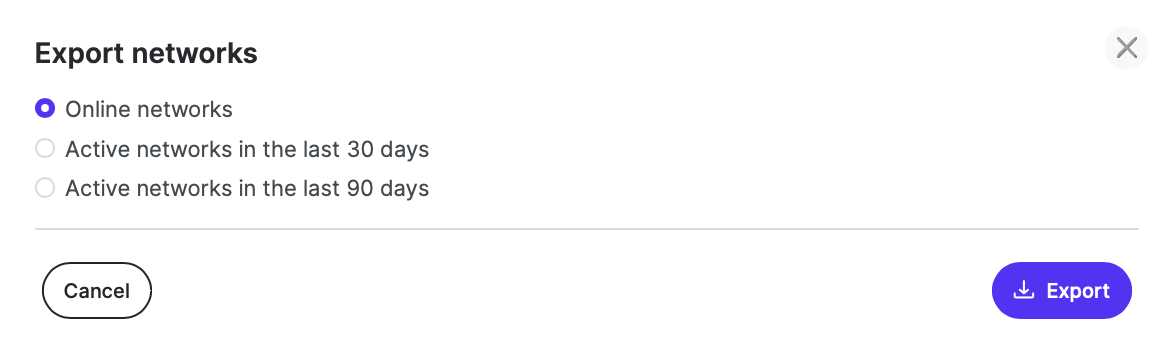
In this list, you may find all the destinations with the currently available test numbers, representing our coverage. To download our coverage in the last 30 or the last 90 days, please click on the downward arrow icon.
Please note that we check our test numbers' availability constantly and make sure to disable a test number if it does not communicate with our system for 4 minutes.
You may search for the destinations which you would like to test, select them with a check box or select all matching entries by clicking on the top check box.
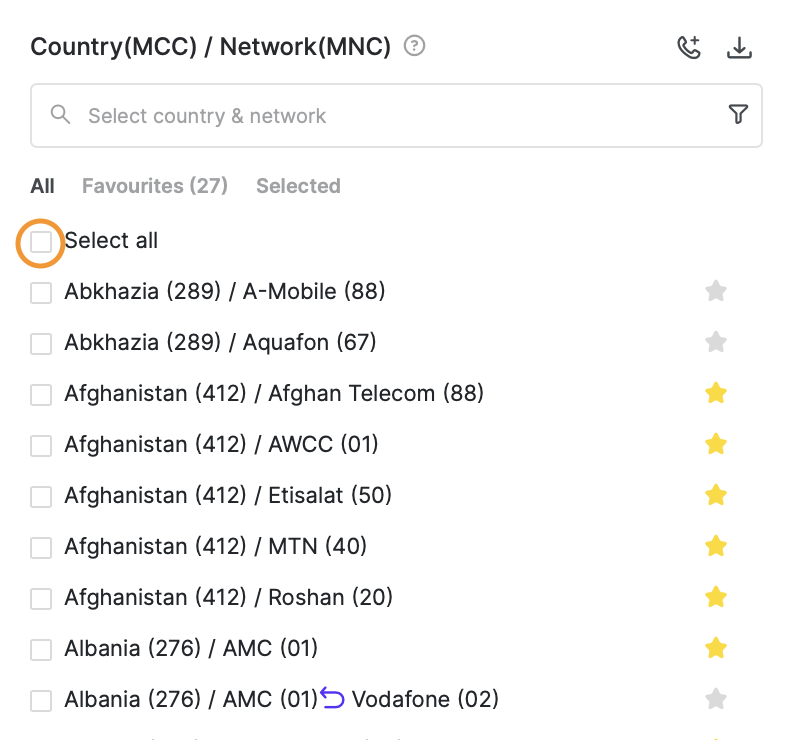
Easy way to select multiple countries at once
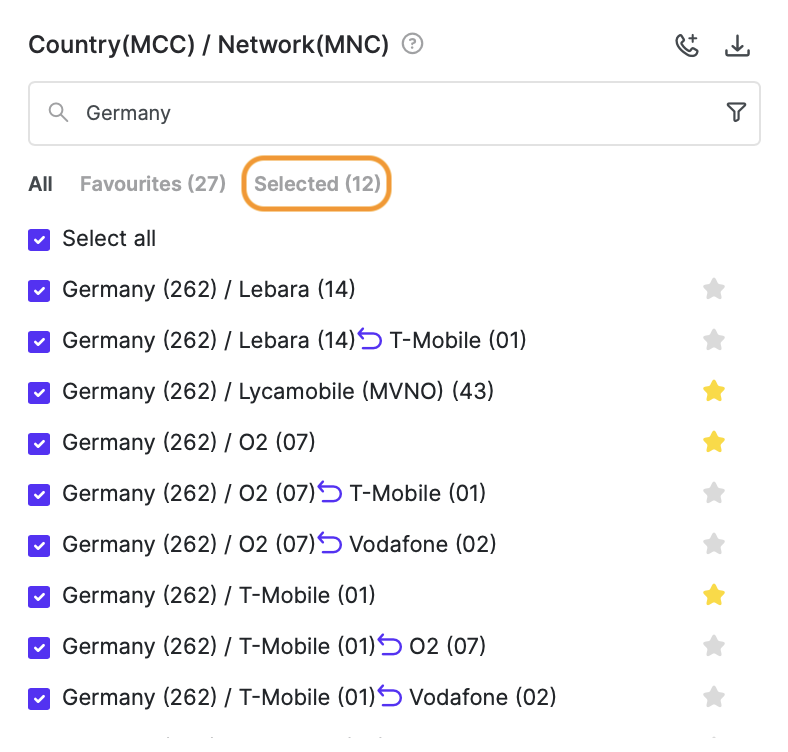
Search for the first country (in this example Germany) and then click on the top check box.
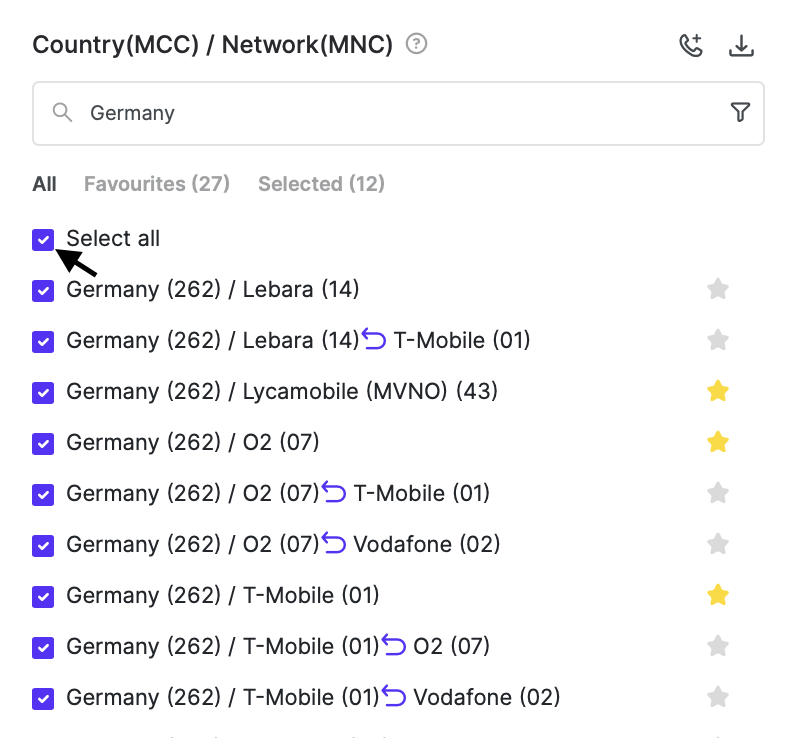
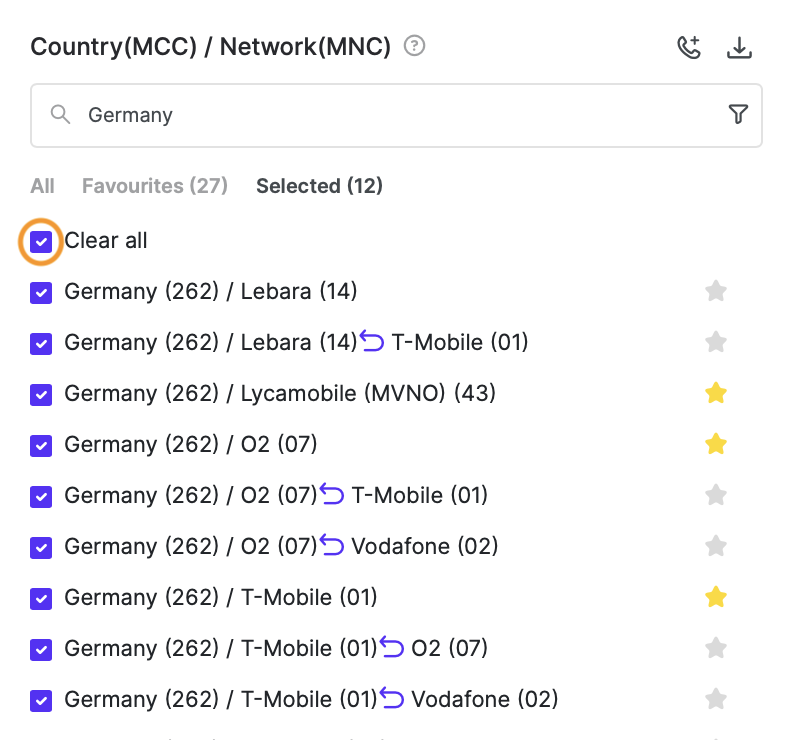
Delete the text from the search box (“Germany”). You will be returned to default coverage list but your previously selected destinations will still remain selected. You can view them in the “Selected” section and uncheck the ones you don’t want to test or clear all from this list.
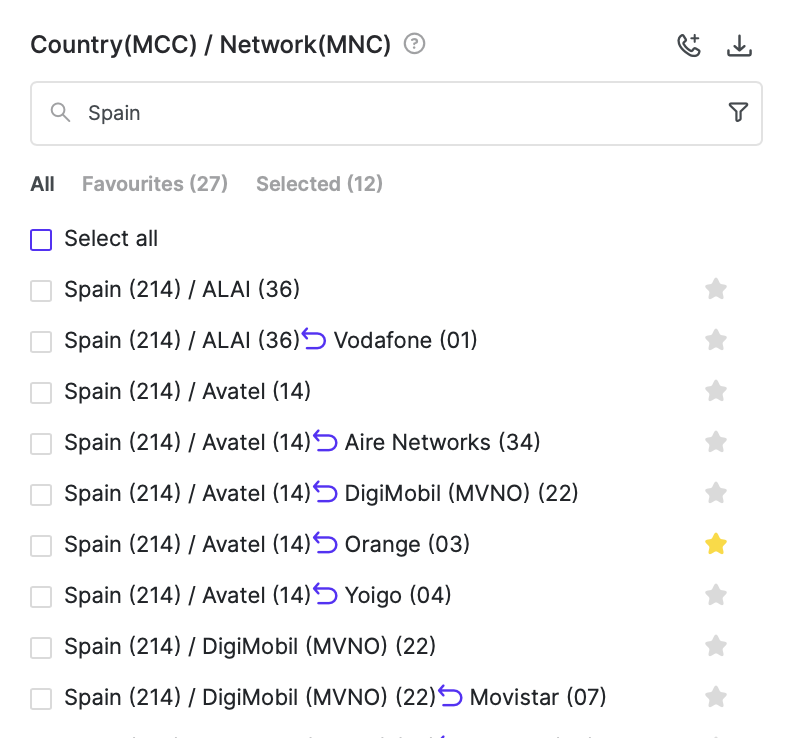
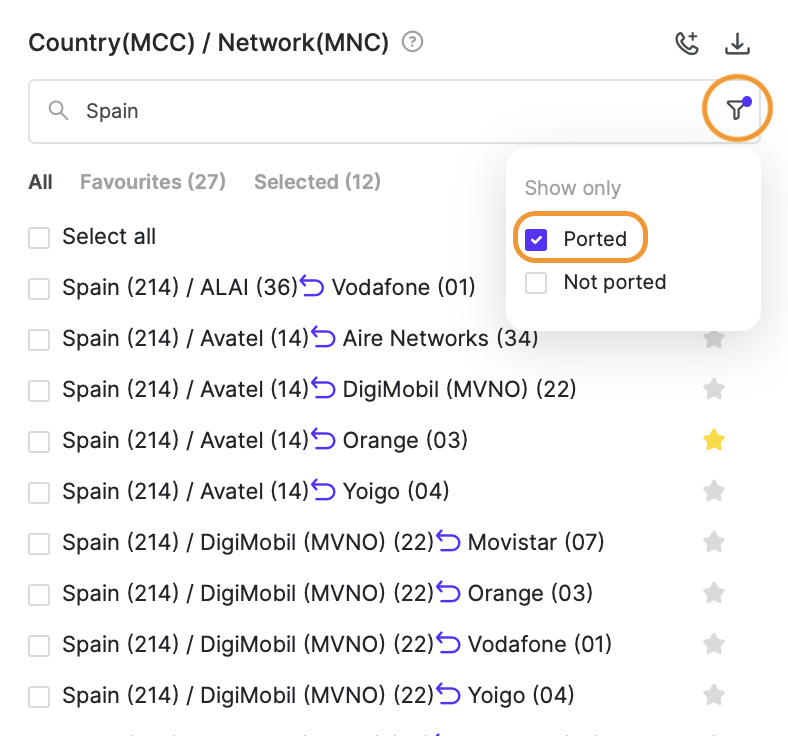
Type in another country or MCCMNC and unselect the top check box. In order to select all networks for Spain, please click again on the top check box.
Repeat these steps for all the destinations that you need.
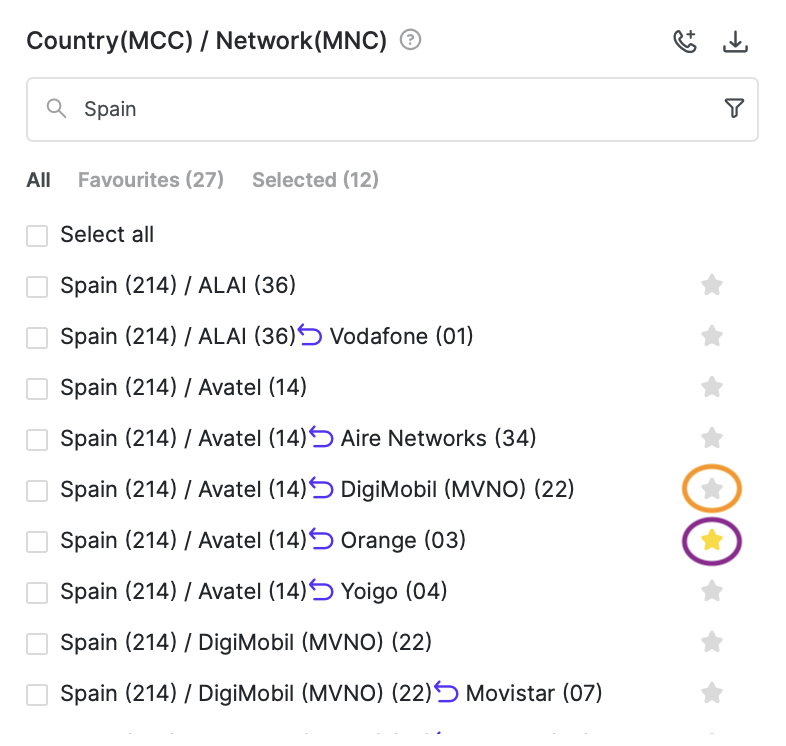
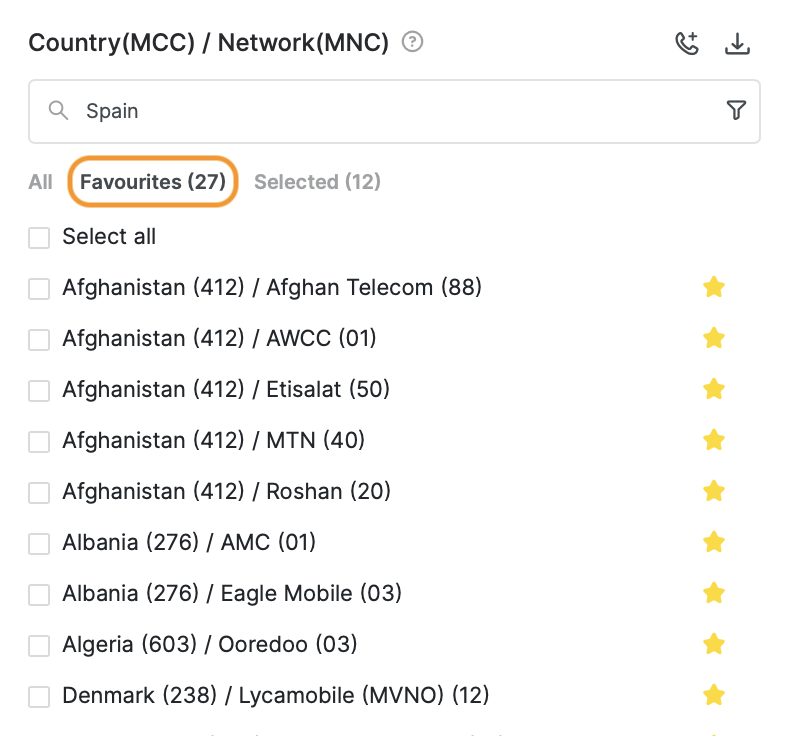
For frequently tested destinations, you can use the star icon on the right hand side to mark a destination as favorite. Your Favorites will be listed in Favorites for easier access.
If you need to filter out the ported from non-ported numbers or vice versa, you can click on the funnel icon and sort by selecting the right checkbox:
Issue tests towards specific TelQ test numbers
We do not recommend testing specific test numbers instead of selecting the destination from the list due to the fact that we check the availability of our test numbers constantly and we update our coverage accordingly. Furthermore, our algorithms ensure the selection of the optimal test number for your test, depending on its usage, probability of it being whitelisted and its uptime.
When you choose to test a specific test number, our algorithms and availability checks are being bypassed, so we cannot guarantee that the test number you chose to test specifically is still available at the moment of the test and that it is functioning as expected.
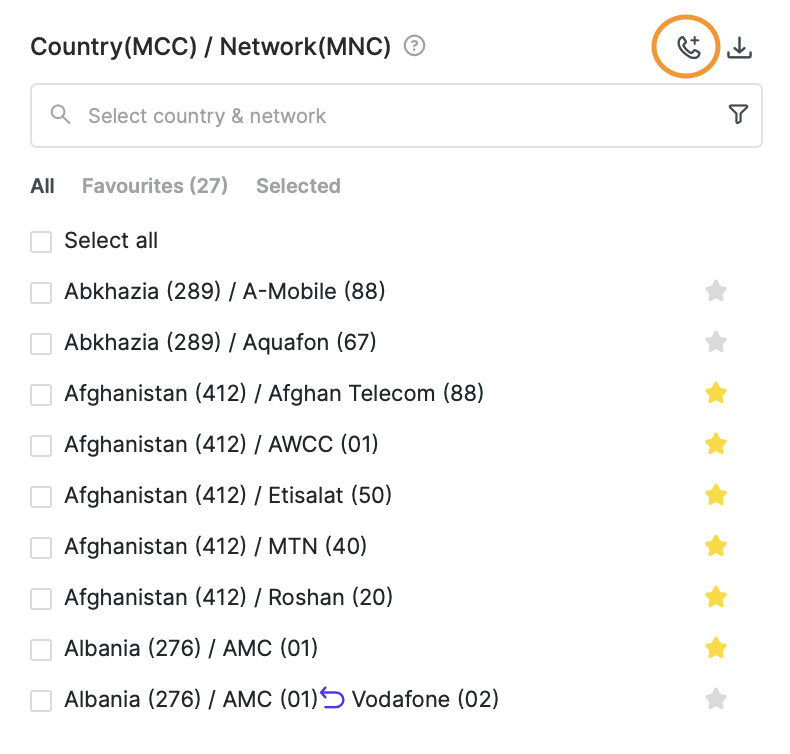
Keeping in mind the above, you may issue a test towards a specific test number that was already allocated to you in past tests by pressing the phone button in Destinations and pasting the test number in international format. For multiple test numbers, please write them one below the other as shown in the below screenshots:

Issue tests to external phone numbers
We do not recommend testing external phone numbers because they do not have our software installed, so we cannot retrieve the Receipt confirmation from them. We consider an external number a number which is not part of our test number pool.
We can take as example your own mobile phone number. You can follow the same steps mentioned in the previous section.
If you run the test and your SMS supplier delivers to the MCCMNC to which your phone number belongs, you will receive the SMS, but our tool will not be able to confirm the receipt of the SMS on your handset because our software is not installed on your phone.
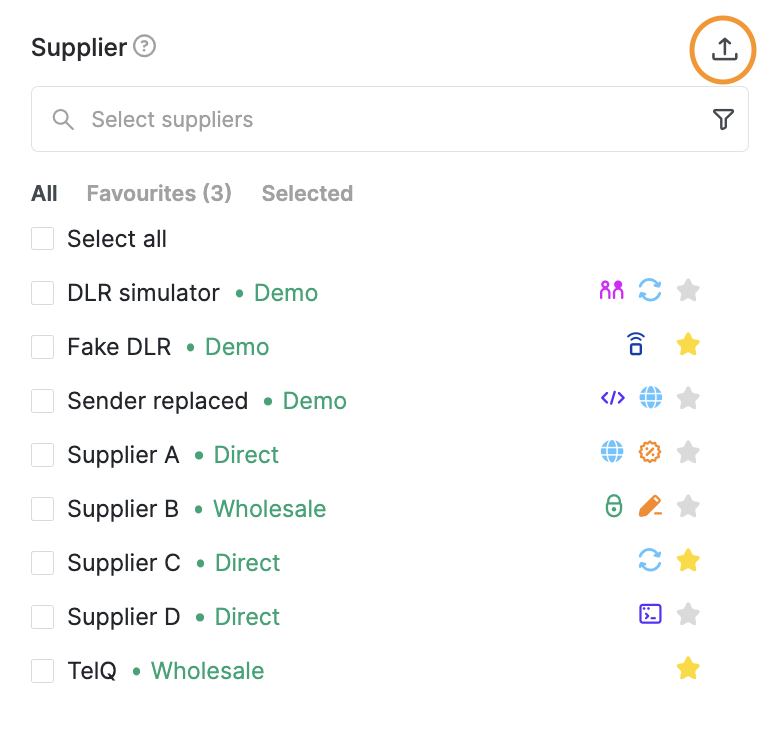
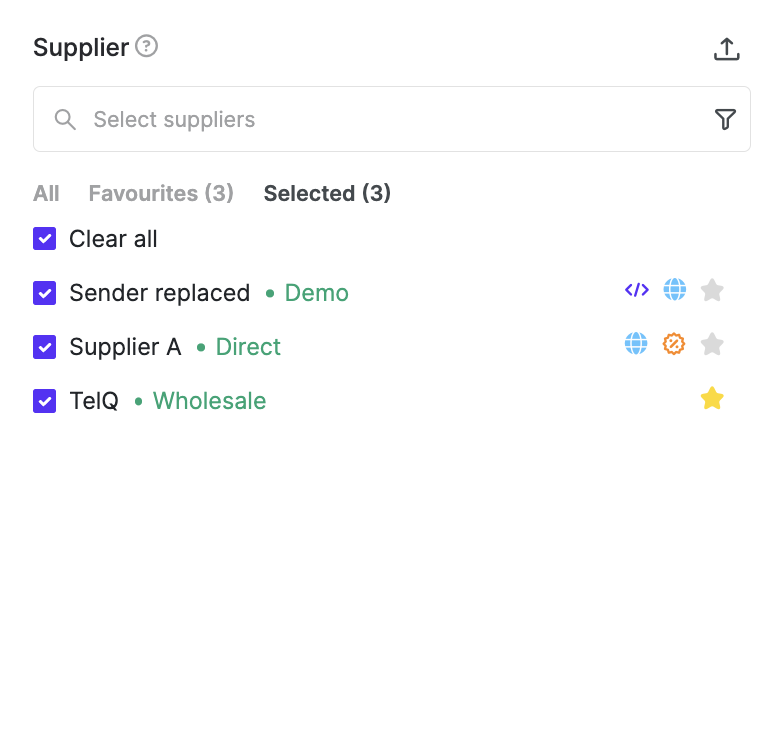
Suppliers
In this list, you may find all the suppliers which you set up for your account, as well as our own demo TelQ Wholesale route. If you are just starting, please go through Suppliers and Connections sections and set up your suppliers first.
You may use TelQ Wholesale route in case you suspect one of our test numbers is not working properly and you can issue a test towards the same test number (as mentioned in “Issue tests towards specific TelQ test numbers”) via your supplier and TelQ route and compare the results.
To search for the supplier(s) you would like to test, you can search by the supplier’s name, part of the name, and/or route type:
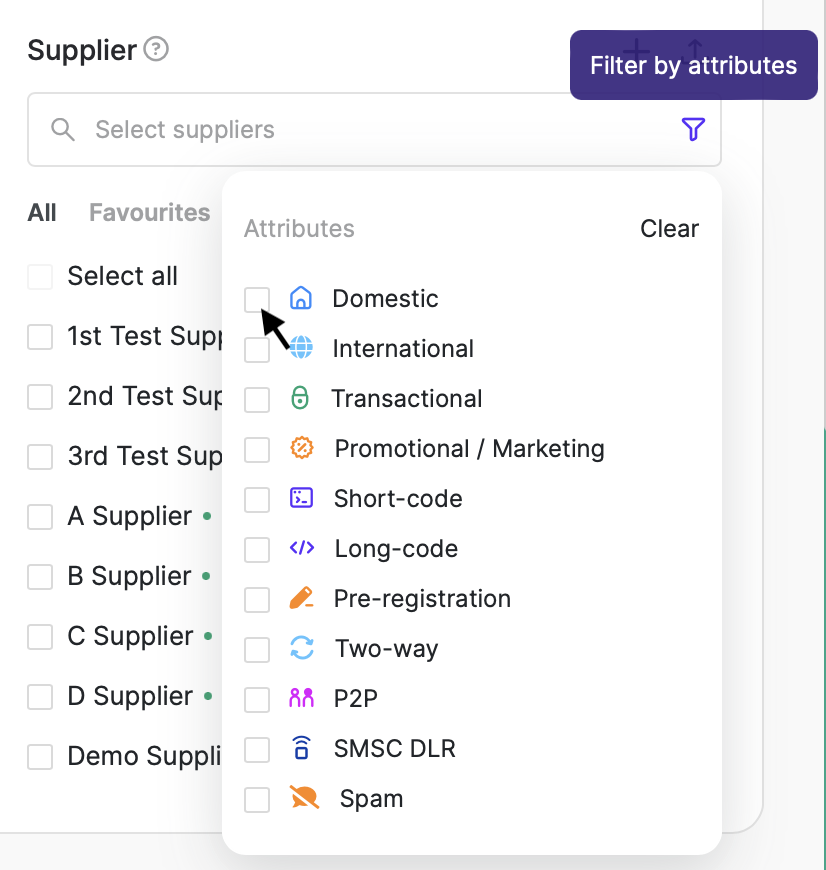
To search suppliers based on their attributes, you can click on the funnel icon and select your choice(s).
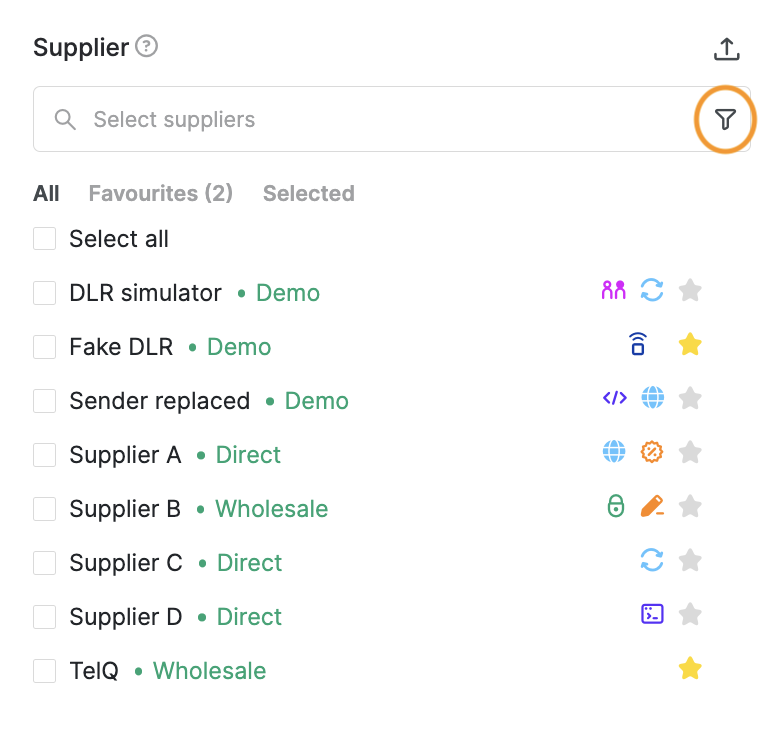
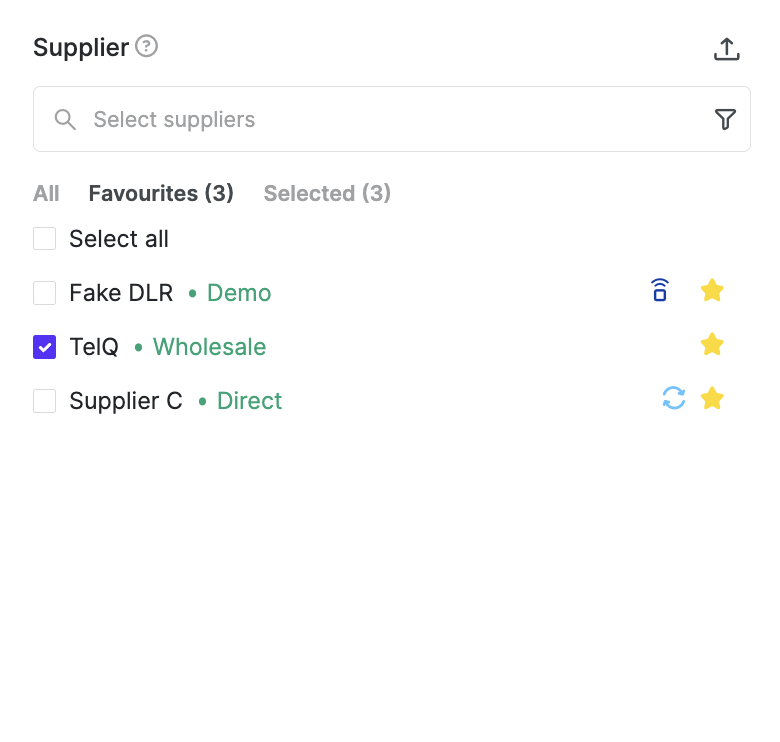
You can select mark your suppliers as Favorites by marking them with a star on the right hand side and they will appear in the Favorites menu. You can also modify your selection by clicking on Selected to view the suppliers you chose for this batch:
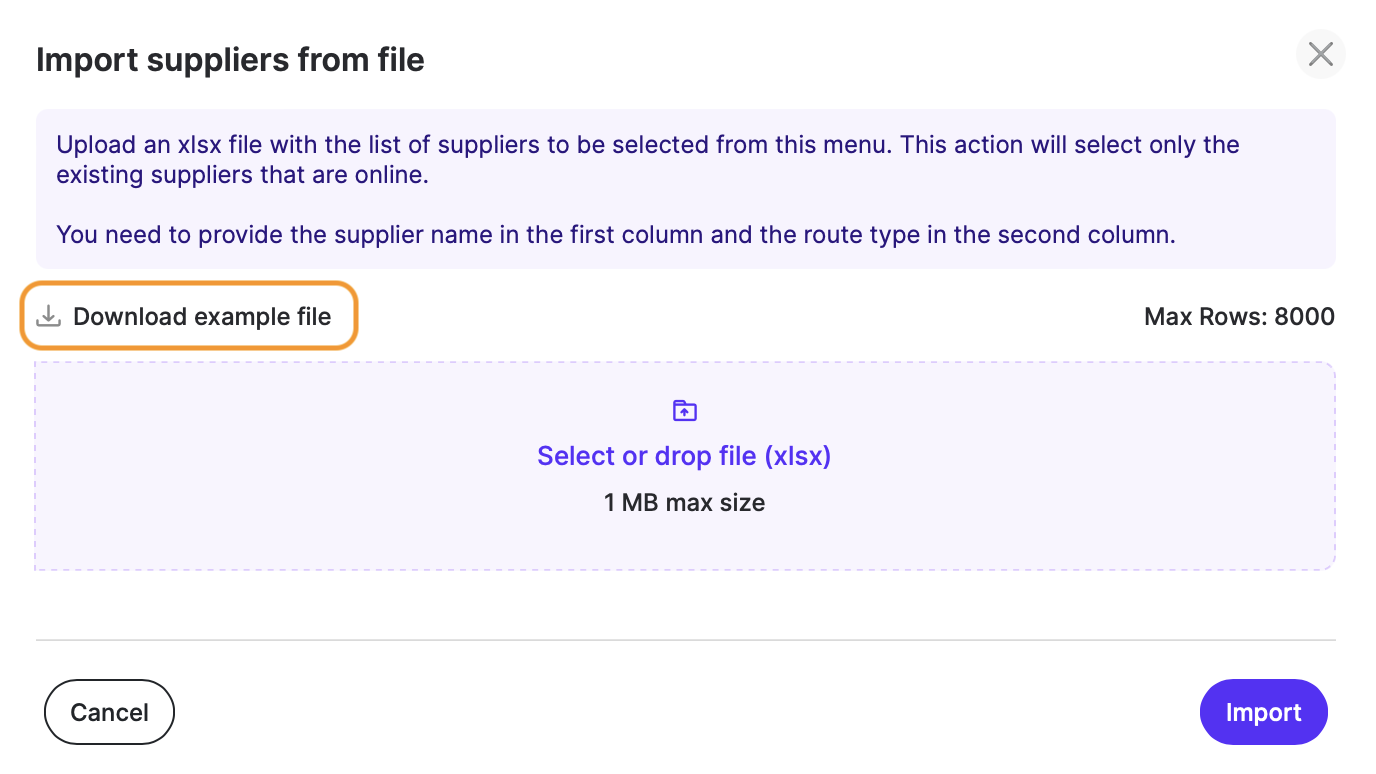
In case you wish to select multiple suppliers at once for your test batch, to navigate your supplier list more quickly, you can use the import from excel option. You can download our example file and import the list as shown in the screenshot below: