SMPP Sessions
You can also find the detailed information about setting up SMPP sessions on our platform under the Help section of the SMPP & Suppliers page.
In order to create an SMPP bind between our platform and your platform the following steps need to be followed.
Step 1: Whitelist our IP (52.29.63.229).
Step 2: Create a new SMPP client account on your platform and set up routing for it (as if we would be buying SMS routes from you). As mentioned, it’s important not to connect directly to your suppliers - that option would increase the chances of your suppliers spotting the quality checks you are doing and whitelisting the test numbers. We advise you to connect from our platform to your own platform and then route the tests from there to your suppliers (TelQ platform -> your SMS platform -> Supplier).
Go to Integration Settings – SMPP & Suppliers and click on Create Session as highlighted in the screenshot below:

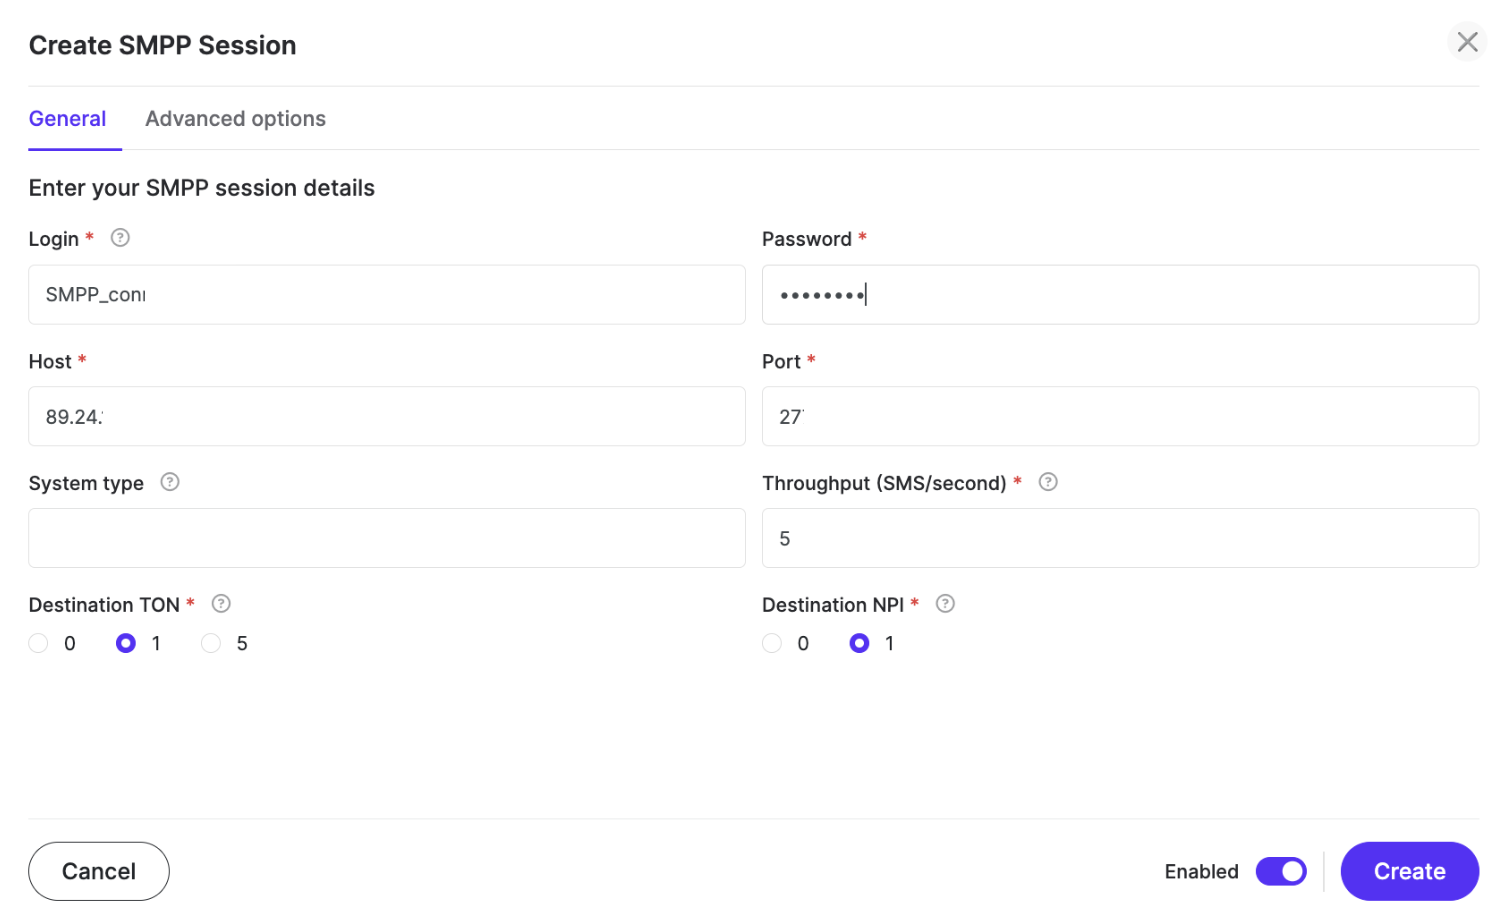
Step 3: In Login and Password enter the credentials of the SMPP account you created in your system (as per Step 2). In Host and Port please enter the IP/host and port of your server.
(Optional) Add additional parameters if needed, such as TON, NPI, Throughput, etc.
Step 4: Advanced options here should be skipped unless your system supports asynchronous processing. If these details need to be modified, feel free to reach out to us for assistance.
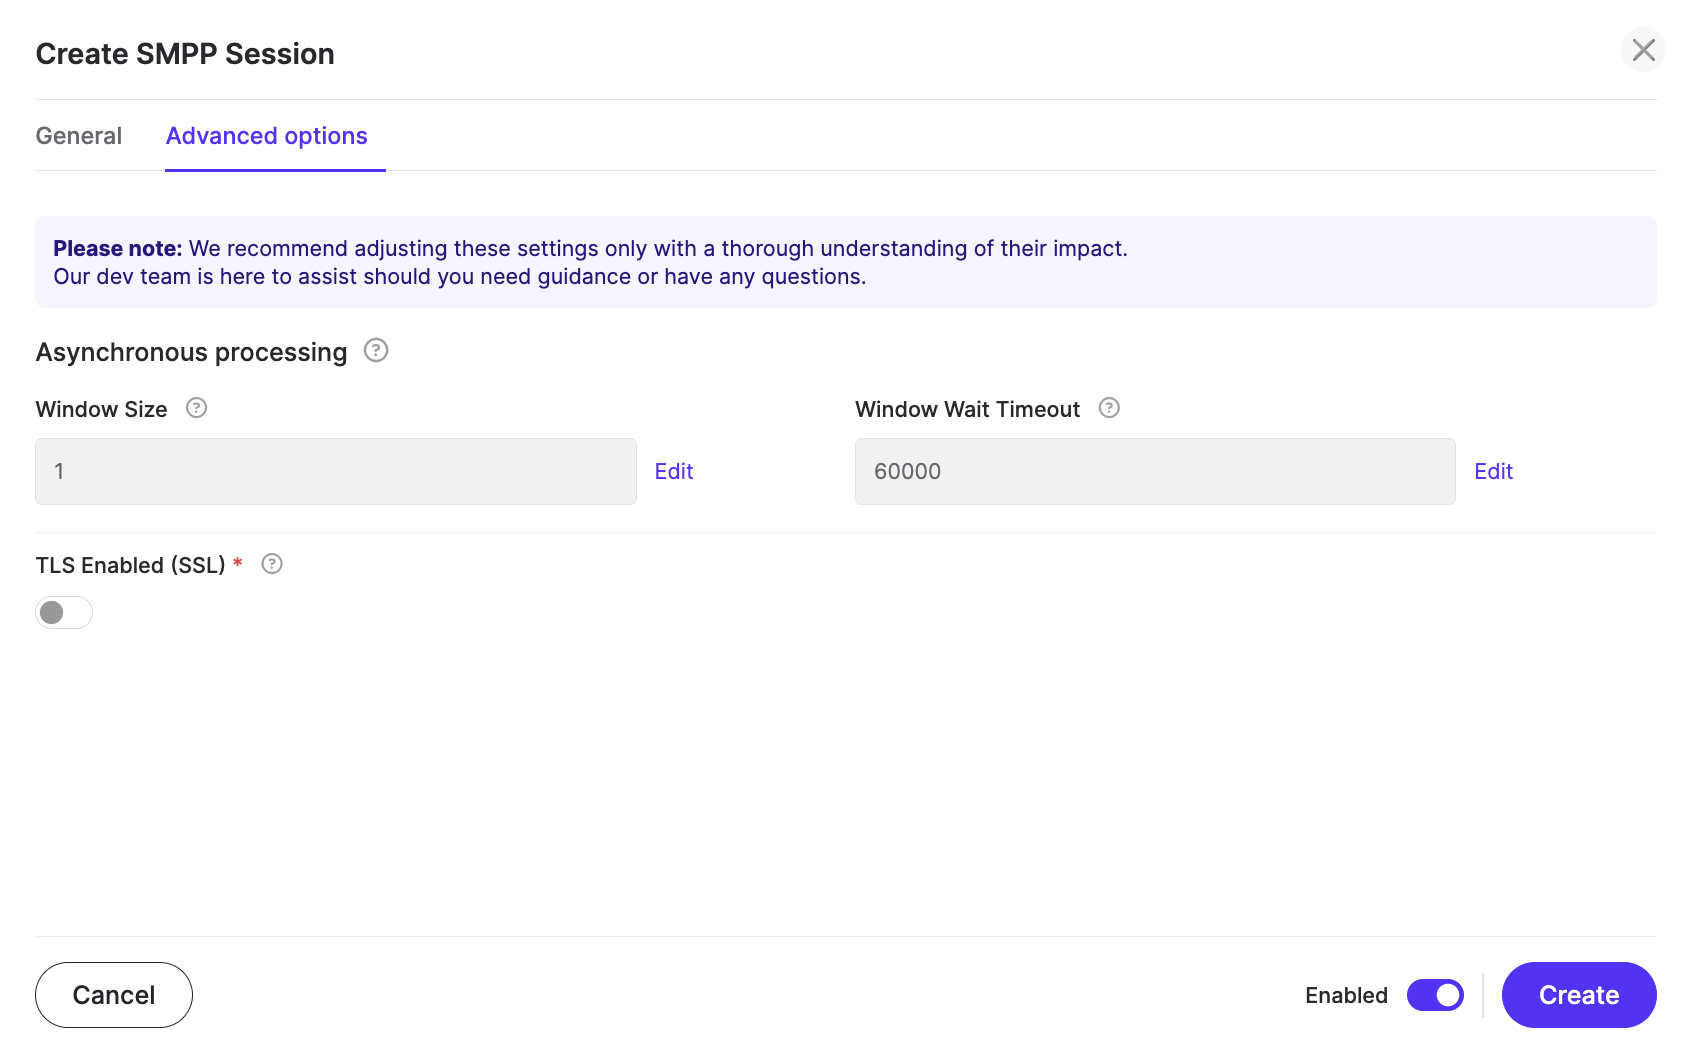
Step 5: Click “Create“
Step 6: (optional) Restart the sessions following the steps below :
-
To restart a single session, toggle the Enable button to disable the session:
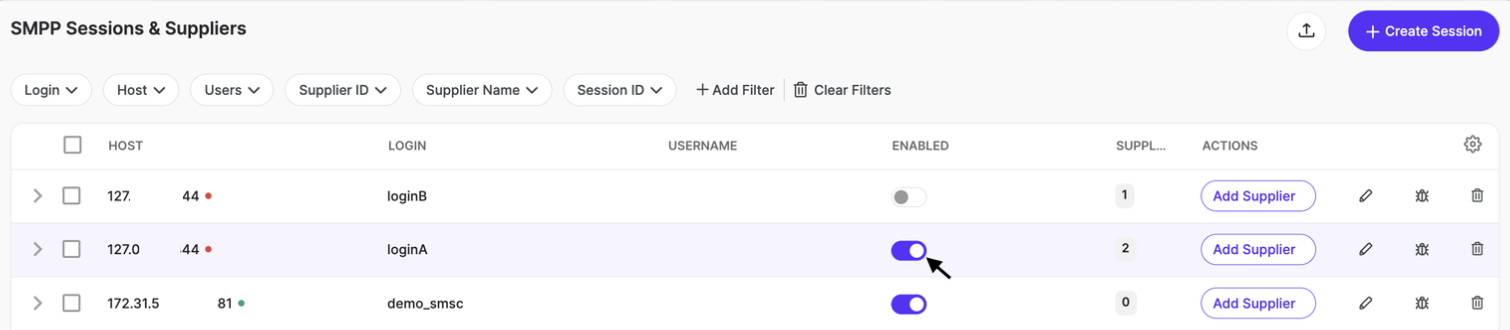
-
If you have multiple sessions you’d like to restart, click on the checkbox to select the ones you want and click the enable/disable button below:
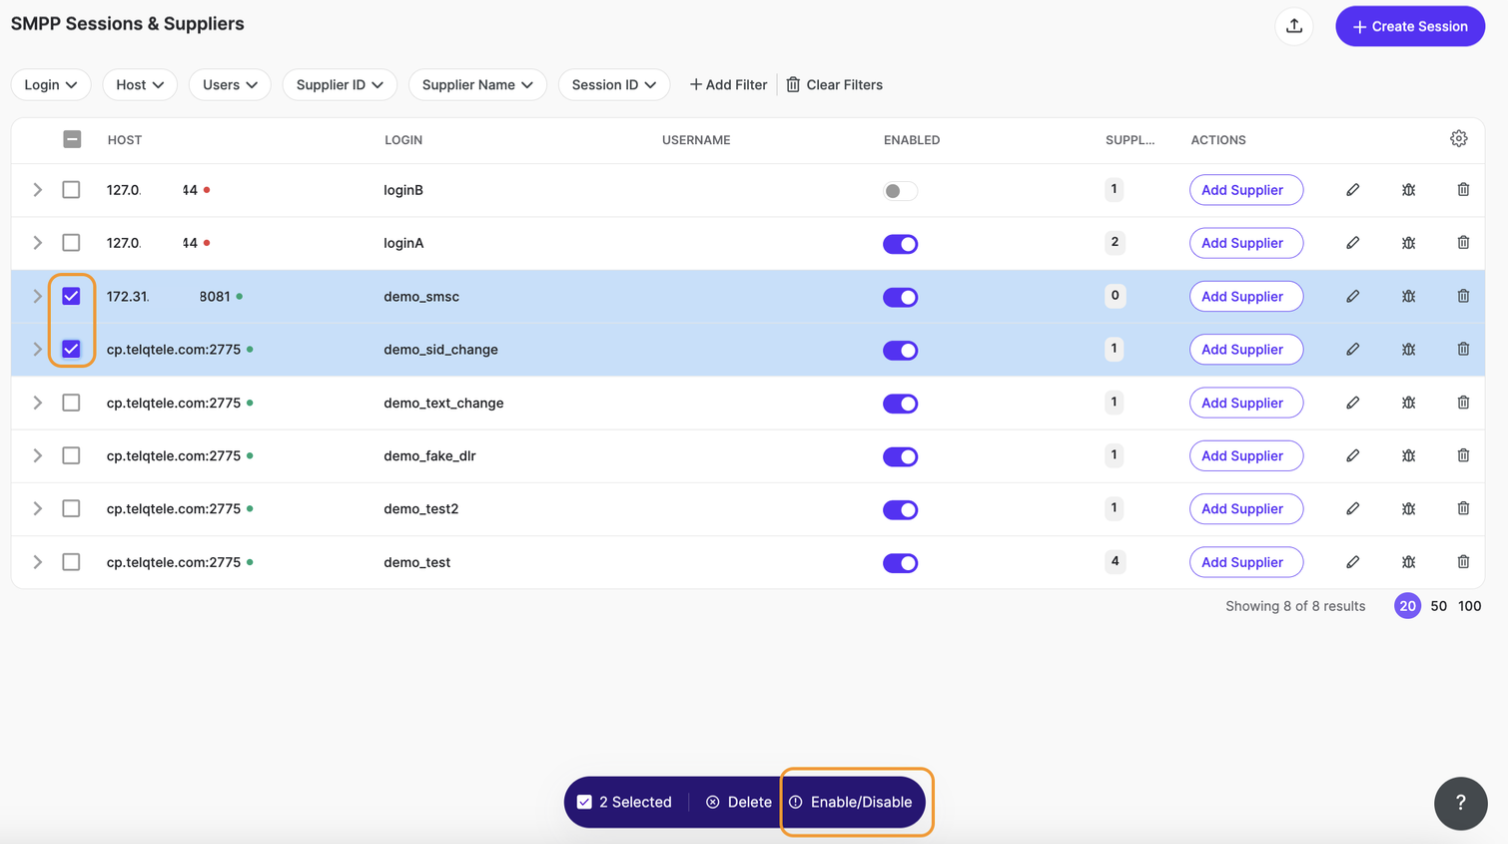
-
Once disabled, wait a few moments, until the dot(s) in the Host column are red:

-
Wait for a minute, click again on the checkbox as mentioned in Step 1 and enable
Your session(s) should become green after this step.

Suppliers
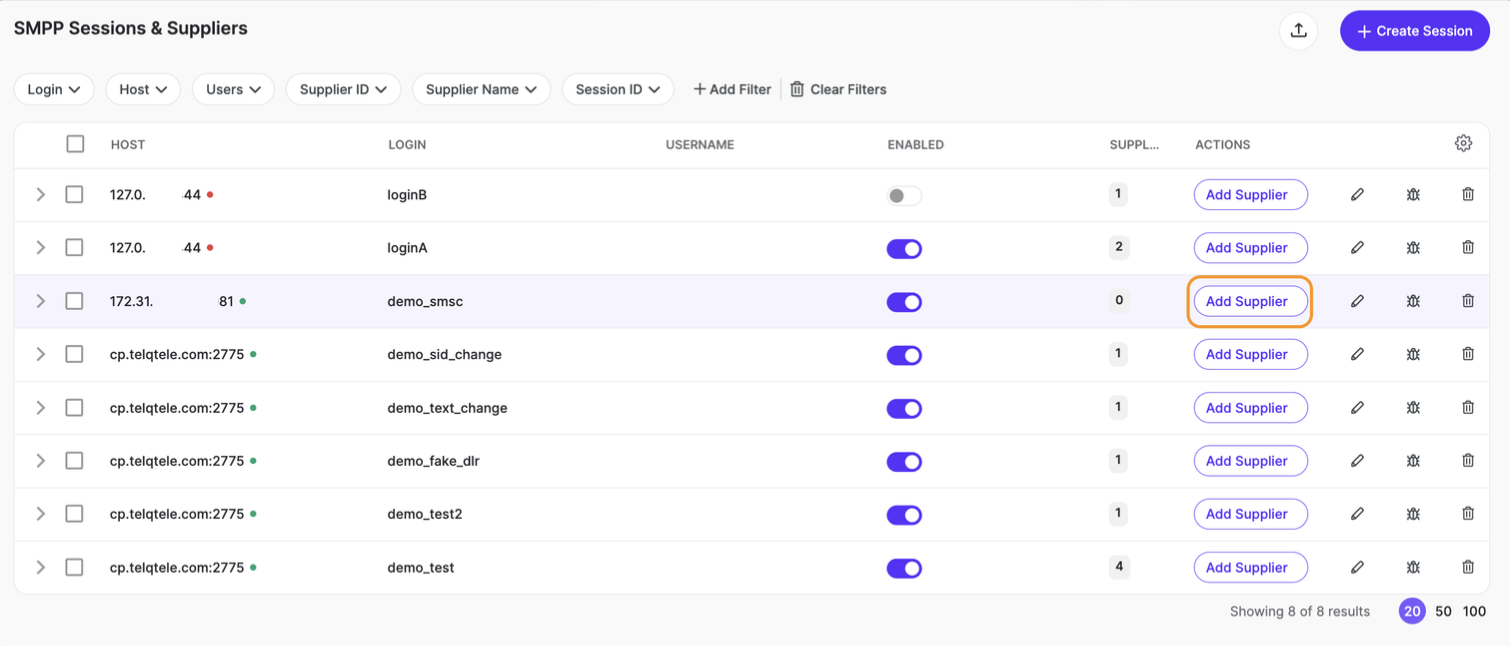
Once you have an existing SMPP session set up between your platform and TelQ’s, you’ll be able to start adding suppliers to it by clicking on “Add supplier“ in the SMPP bind’s line.
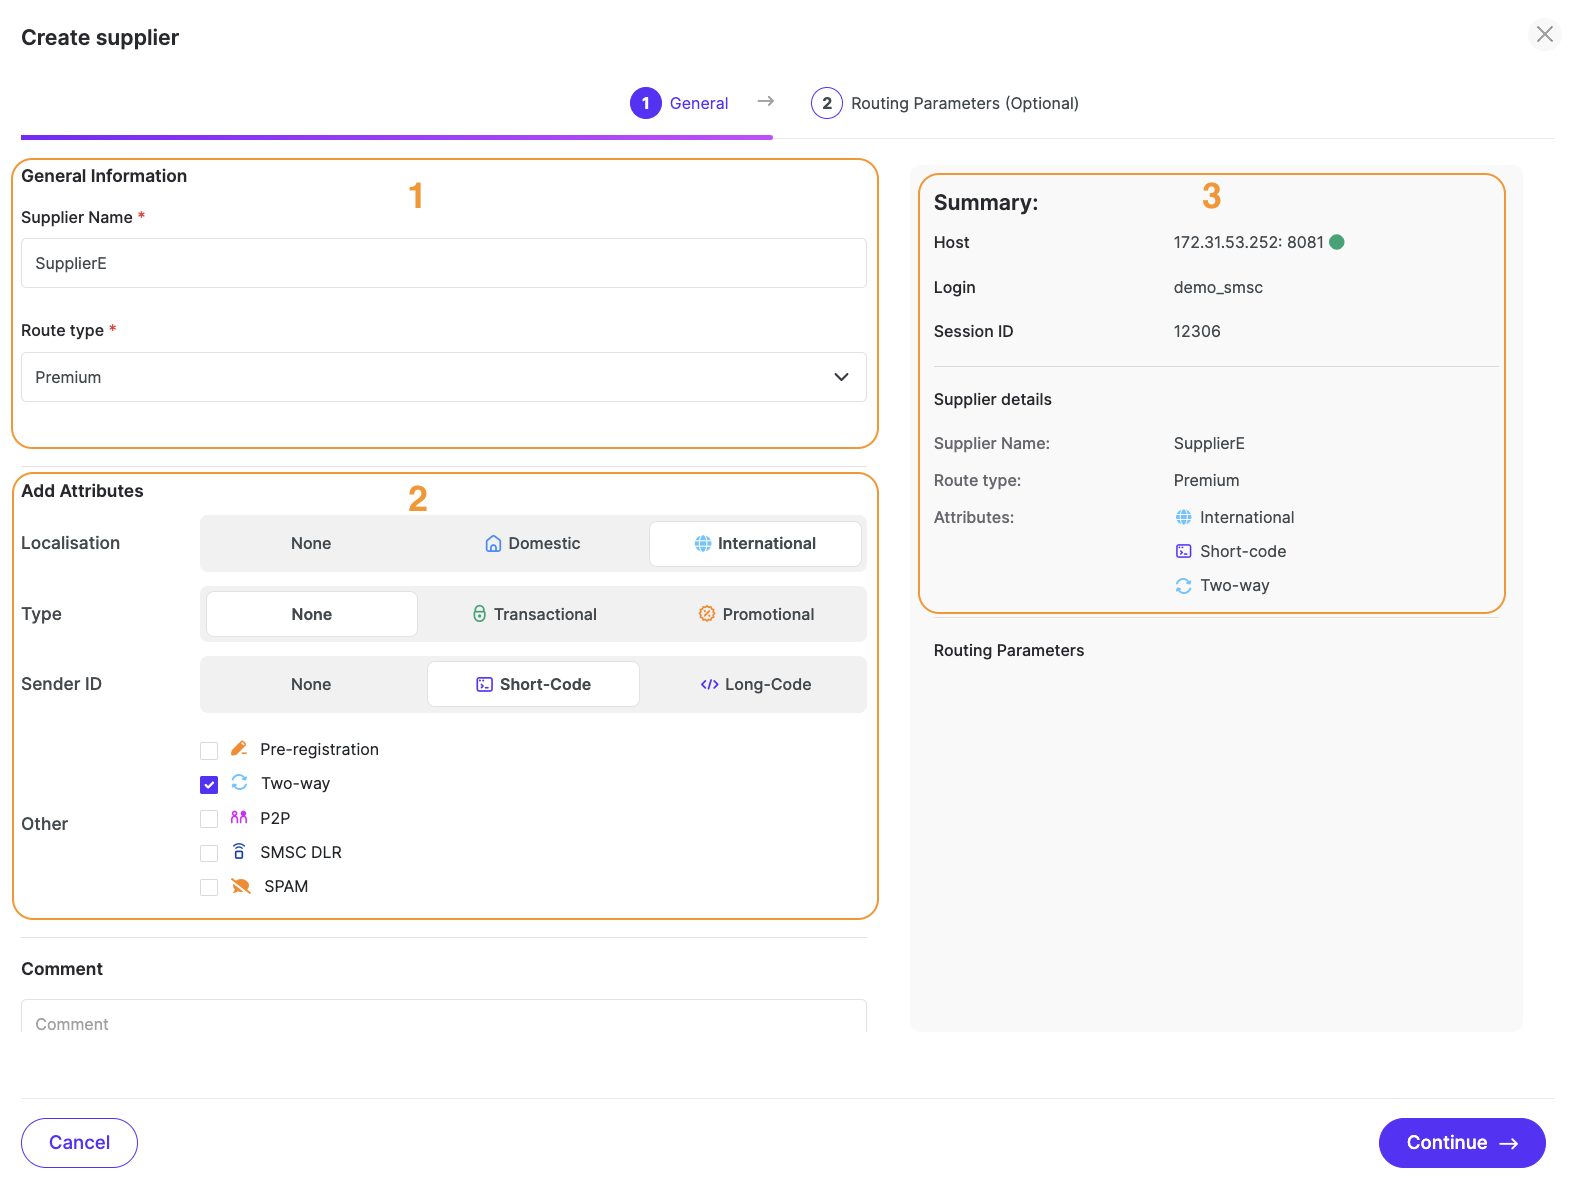
To create a supplier, you need to fill out the mandatory fields, which are Supplier Name and Route Type. All other parameters are optional. See the explanations below:
-
General Information:
Supplier Name: enter the name/ID/nickname of the supplier. This information will be displayed in Live number testing for Suppliers.
Route type: select one of the following route types: SS7, Direct, HQ, Wholesale, etc. This information will be displayed in Live number testing for Suppliers.
-
Optional Parameters:
Attributes: optional values that can help you differentiate your routes based on their features.
Comment: optional value you can add for your own, or your team’s reference.
-
Summary:
You’ll find the SMPP and Supplier data you filled in so far to the right.
The final step is for adding routing parameters such as Service type, UDH and TLV (on supplier level). Please note that UDH and TLV parameters can be added in Live Number Testing on the batch level as well.
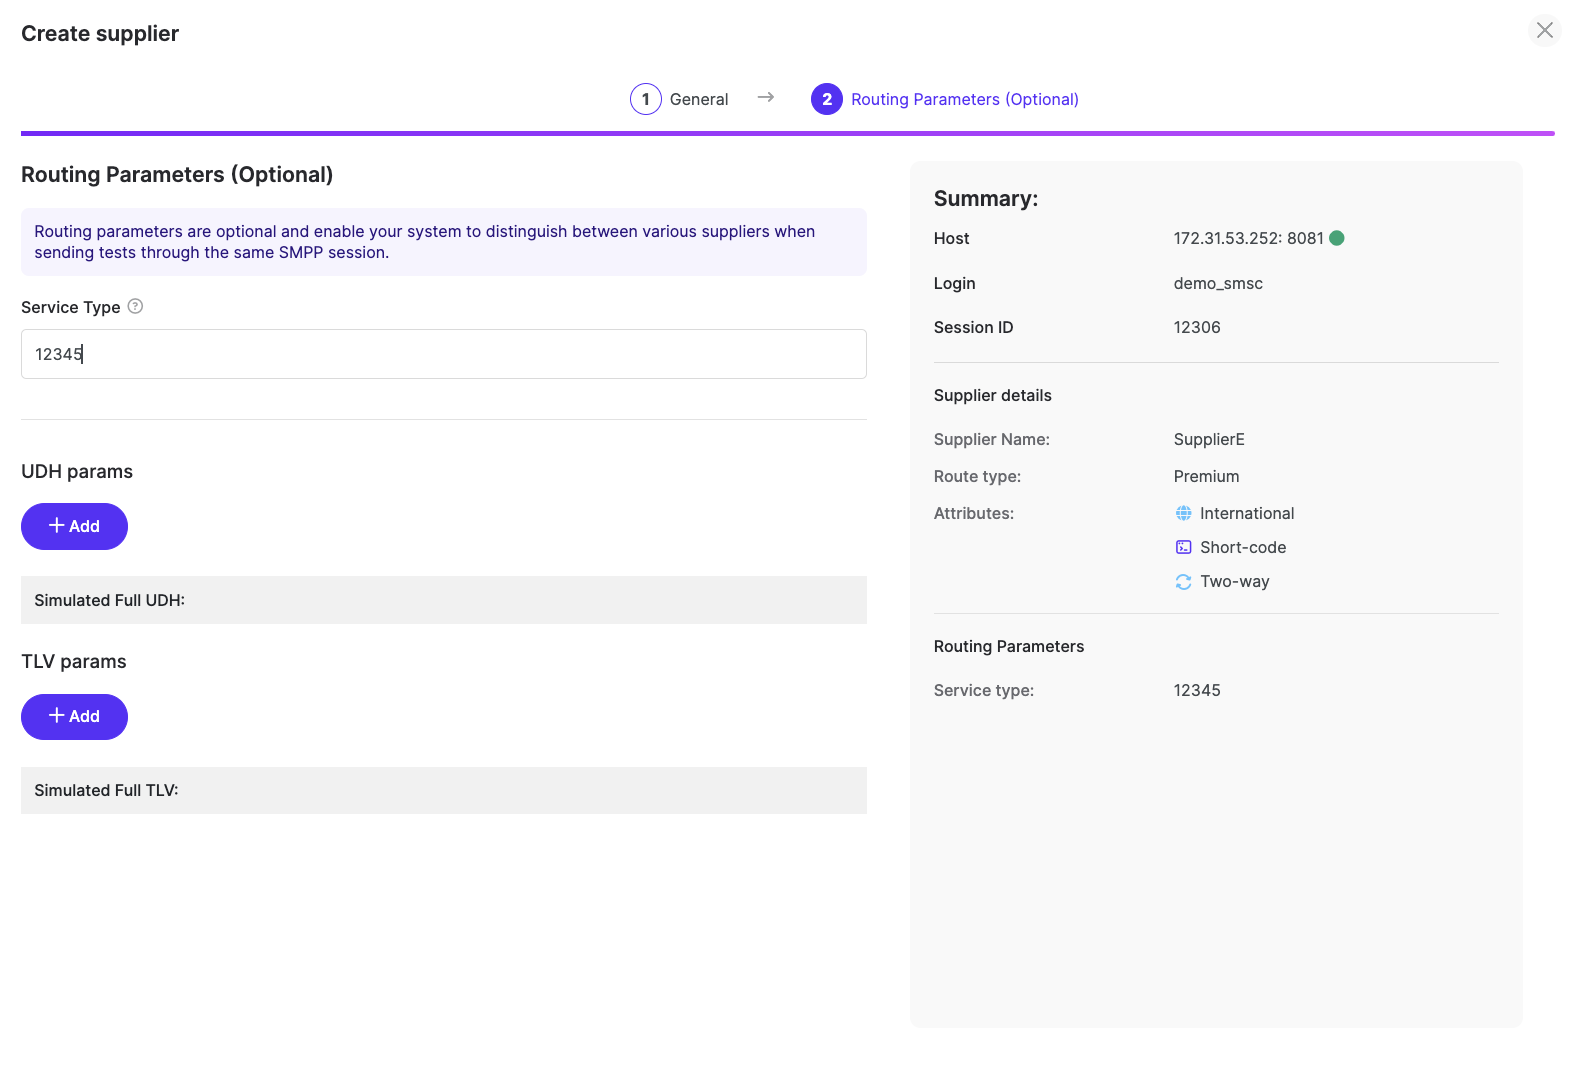
Routing and UDH Parameters
Service Type: is an optional parameter used for routing which allows you to link multiple suppliers to a single SMPP bind. Enter the unique value of the Service Type that matches the service type you have set up on your own server for this supplier.
UDH params: is an optional parameter. Set it up here if you want it set up at the supplier level. If you want to use it on a case by case basis, you can always set it up in Settings in Live number testing.
User Data Header (UDH) is a binary structure which may be present at the start of a short message in the Short Message Service in GSM. It does not contain any text, but it specifies how the message should be formatted and processed. UDH can be used to form Concatenated SMS, to enrich the content of the message with colors, text formatting, small pictures and animations and simple music which are used in Enhanced Messaging Service (EMS), to convey port numbers which may cause start of an application in the mobile phone, which is used for Multimedia Messaging Service (MMS) or to indicate using of national language shift tables.
UDH uses space intended for the message payload. The longer the UDH, the less space remains for the message text or other contents.
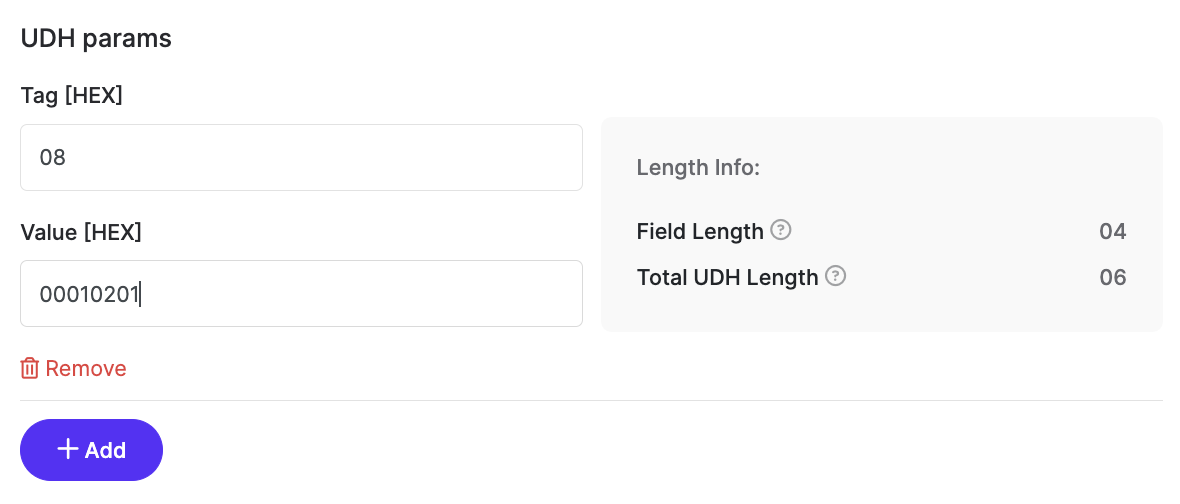
UDH is split into several Octets as you can see in the example below. While the length is being calculated automatically by TelQ, the other fields have to be filled in by the customer.
Below is an example of how the full UDH 06080400010201 has to be split in order to send it through our system.
06: UDH Length. Calculated automatically and does not need to be entered.
08: IEI Predefined sound. Refers to 16 bit. Needs to be added to the tag section.
04: IE Length. Calculated automatically and does not need to be entered.
0001: Position and Chord high. Message reference. Needs to be added to the value section.
02: 6 lower bits of the 1st char + 2 fill bits. Refers to the total number of parts. Needs to be added to the value section.
01: 7 lower bits of the 2nd char + 1 upper bit of the first char. Refers to the part number. Needs to be added to the value section.
Here is how this specific UDH will be entered in our user interface:
TLV params: is an optional routing parameter. Set it up here if you want it set up at a supplier level. If you want to use it on a case by case basis, you can always set it up in Settings in Live number testing.
TLV can also be used for routing as a unique identifier for each supplier.
The Tag and Value that you set up in our interface can be found in the optional parameters section of the Submit_sm command of the corresponding test:
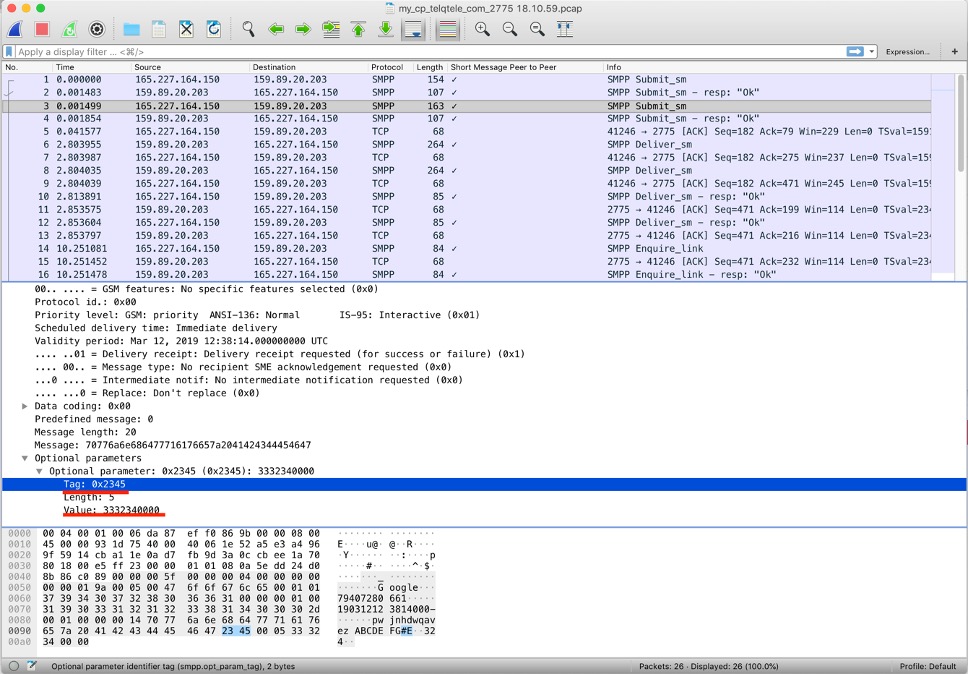
Please be advised that these parameters, when set up on supplier level, will be applied to every test issued to that specific supplier.
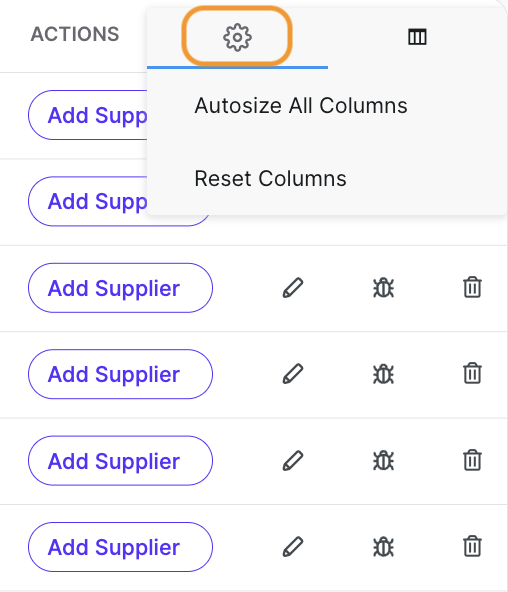
Filtering & Modifying
In the actions column, you can do the following:
-
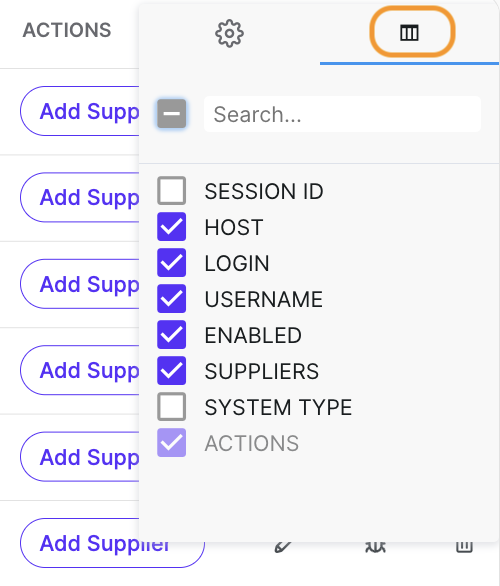
Modify the sessions table information and size by clicking on the gear icon
-
Edit your session by clicking on the pen button

-
See the last error by clicking on the bug button

-
Delete your session by clicking on the bin button

To search for a particular SMPP session, or supplier, you can use the various filtering criteria as in the screenshot below:
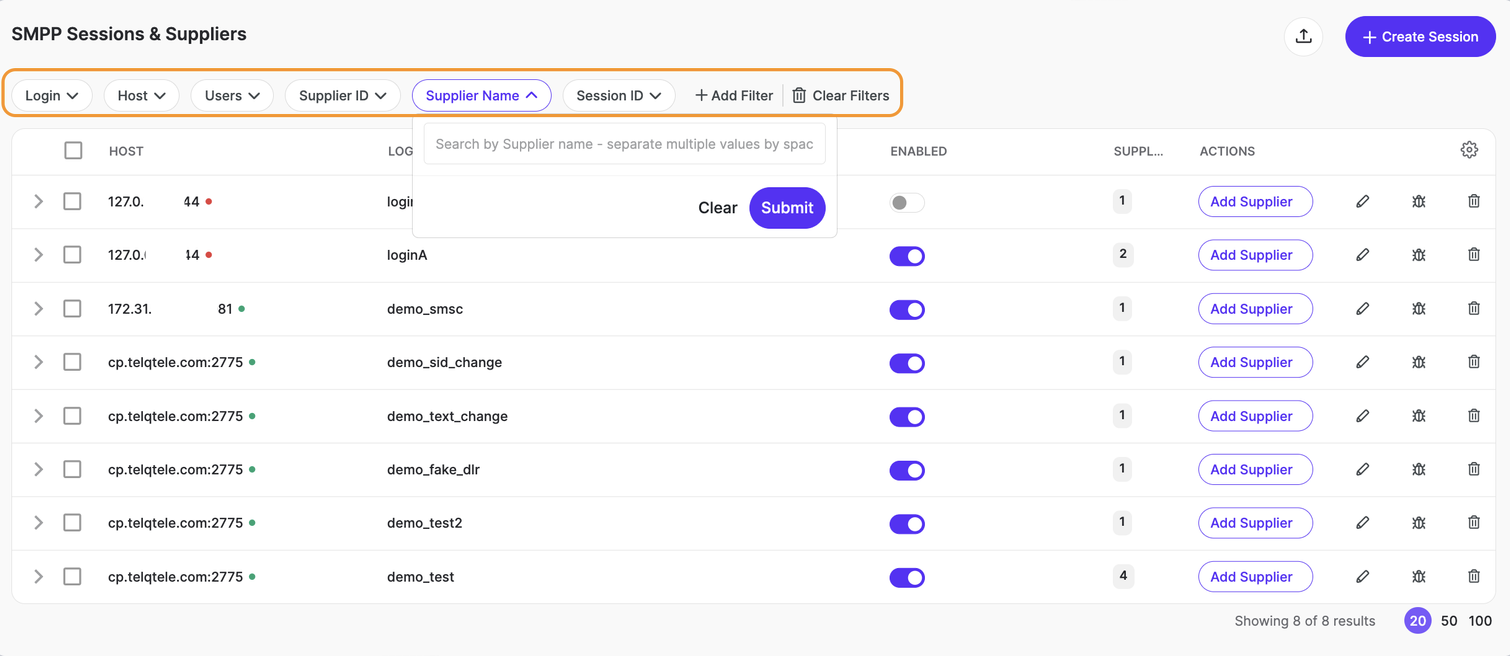
Make sure to click submit once you type your entry and to clear it once you’re done with your search.
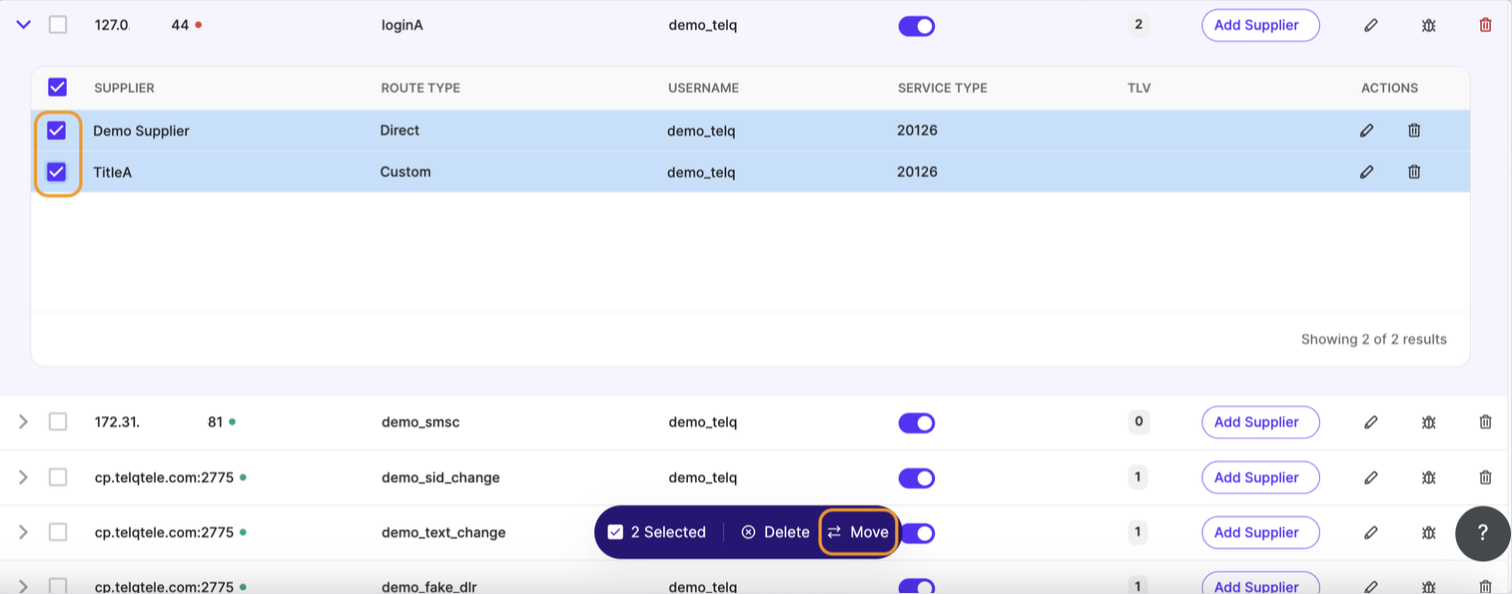
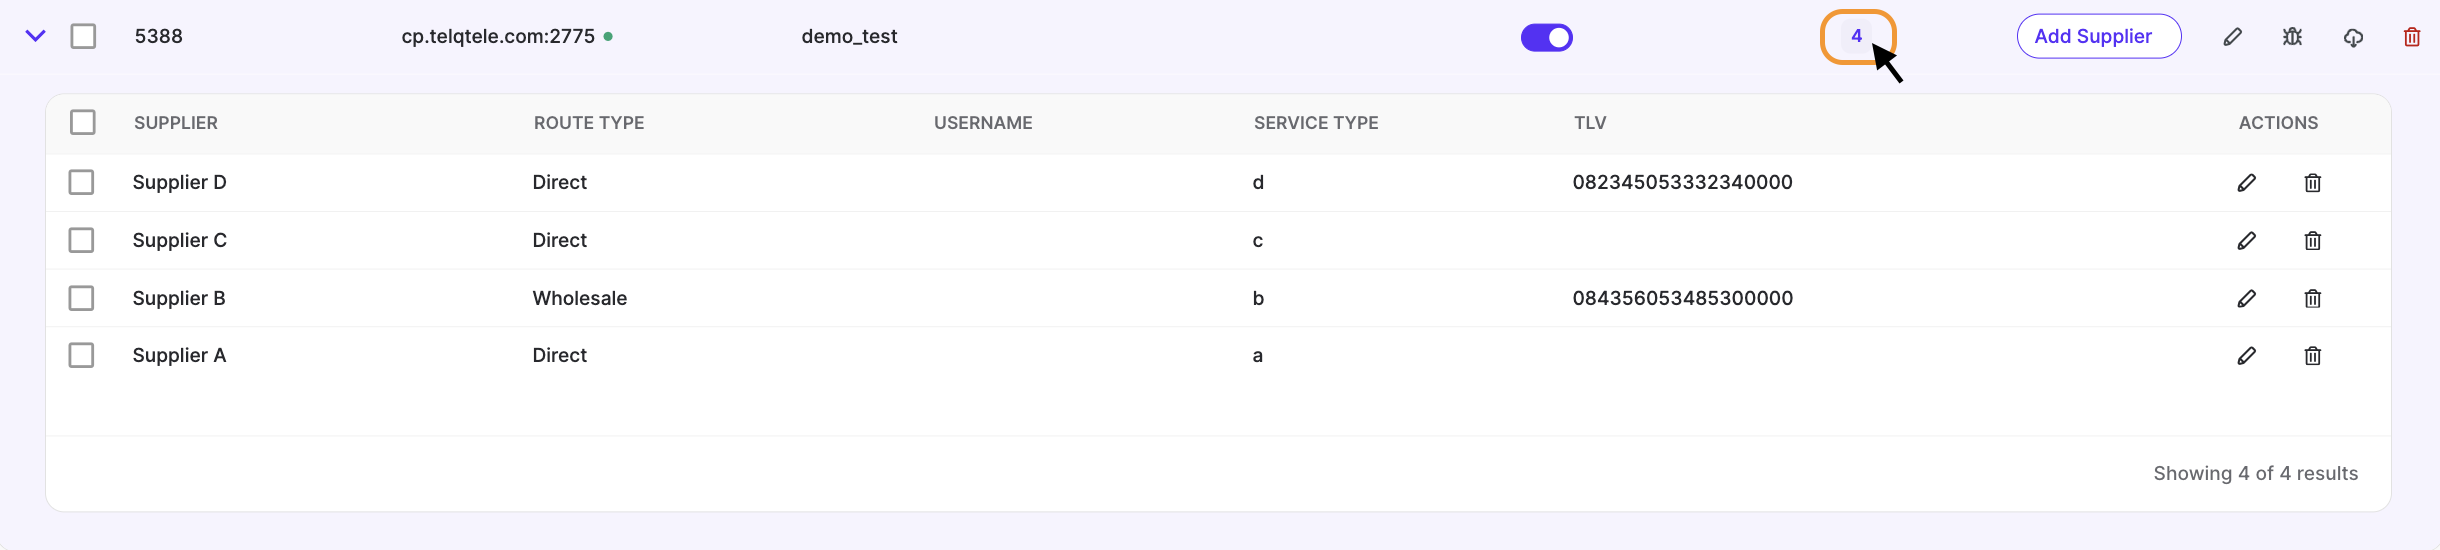
You can also expand the suppliers linked to a particular SMPP bind, which makes it easier to browse if you have more than 1 supplier linked to 1 bind. In actions, you can edit or delete them:
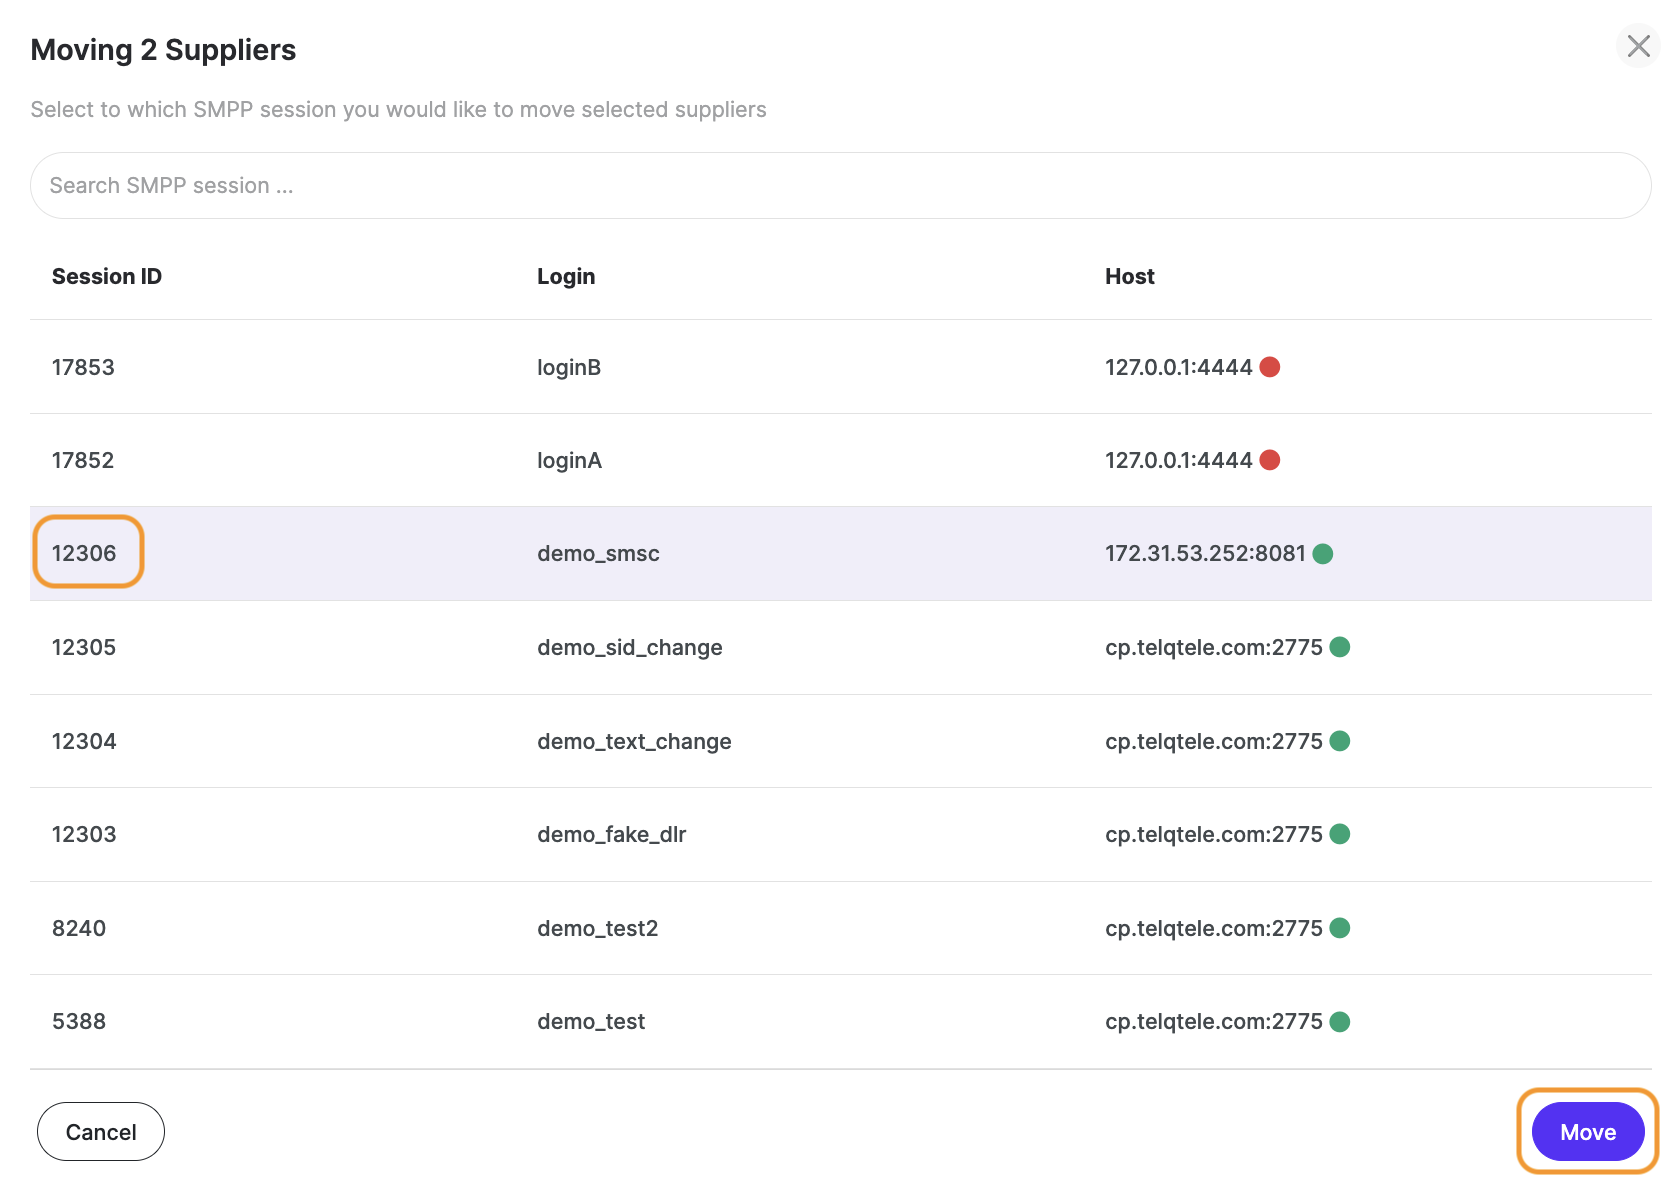
Suppliers can also be moved from 1 SMPP session to another by clicking on their checkmarks, then on the “move“ button at the bottom and specifying the session to which you would like to transfer them: